- Teacher: First Admin
Myrix Learn
Skip available courses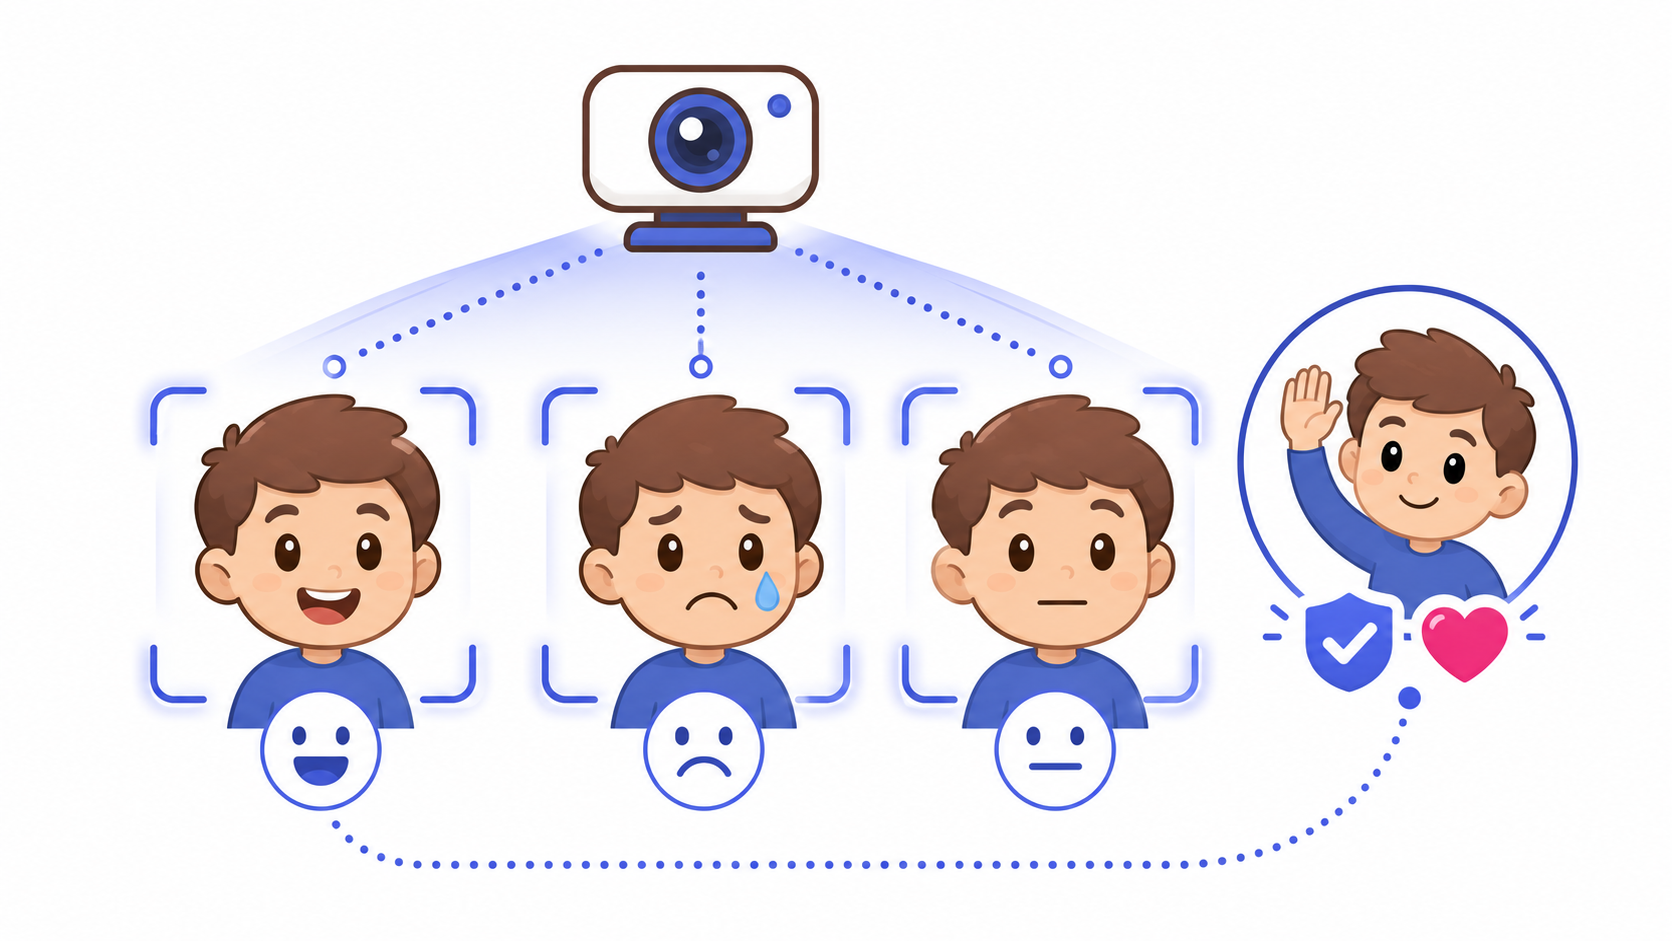
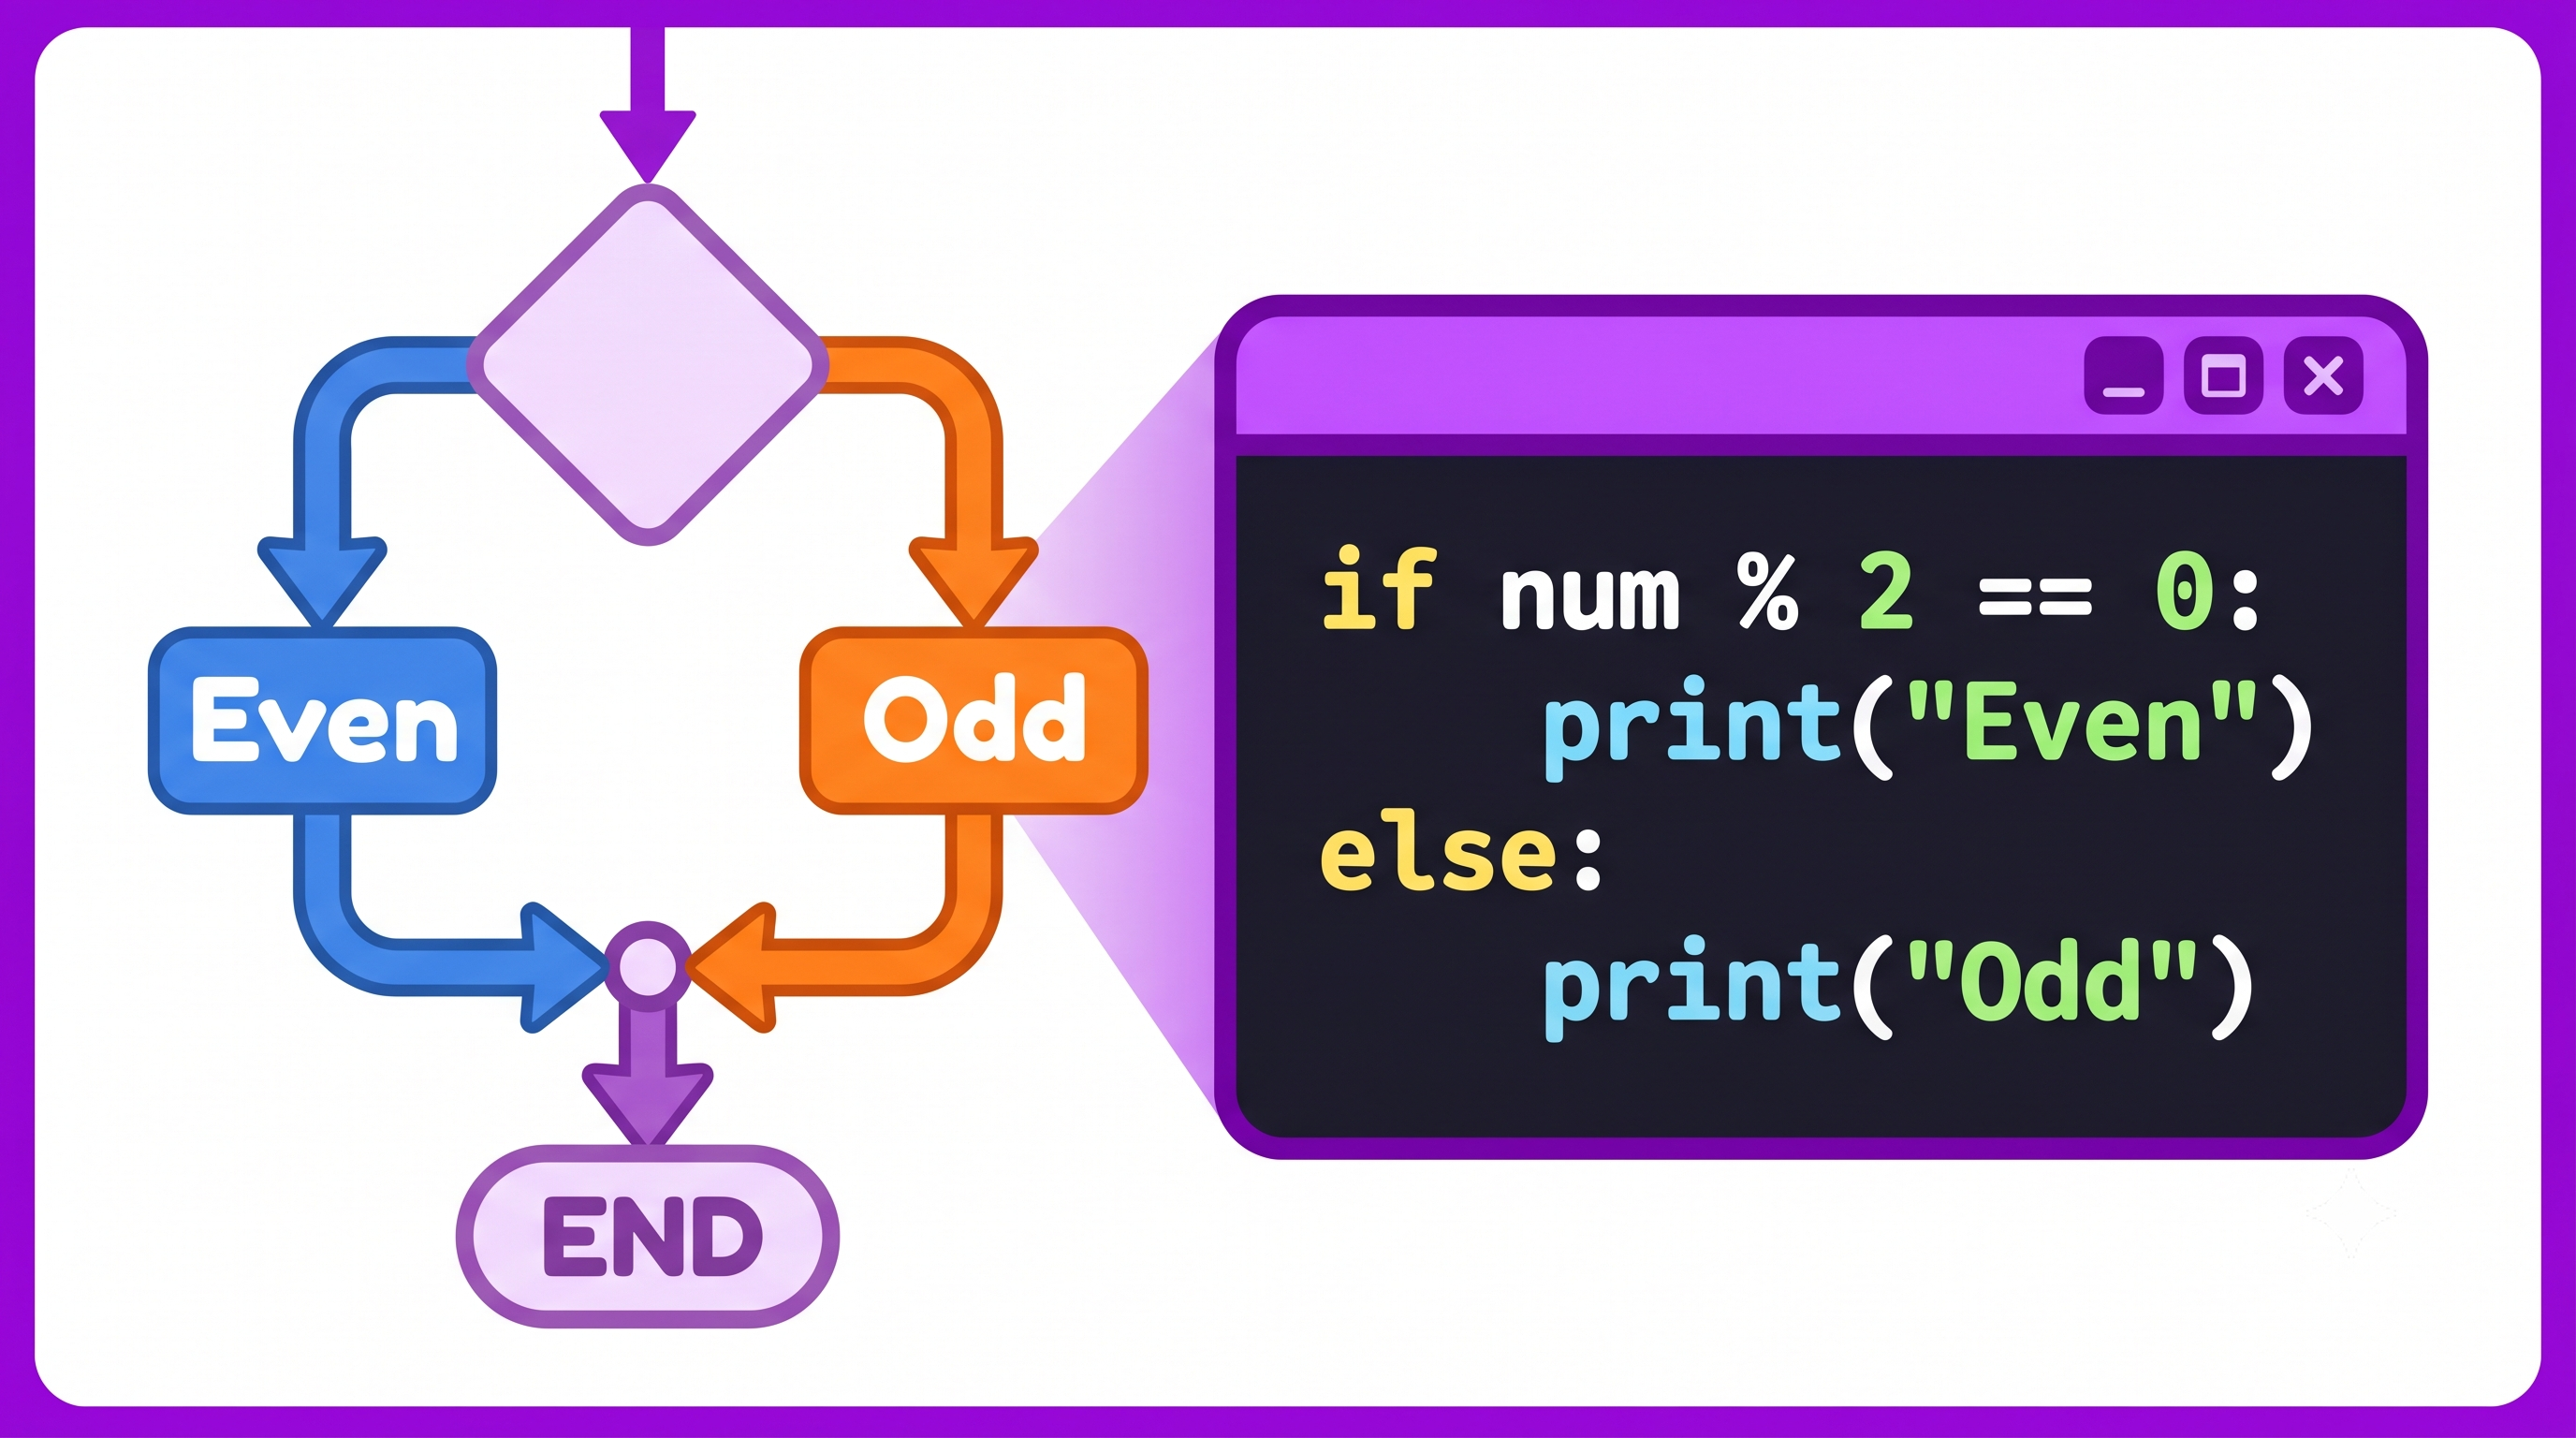
Give your program two paths. Building on the if statement, this lesson adds else — the "otherwise" path that runs whenever the condition is False, so exactly ONE of the two blocks always runs (never both, never neither). Students learn the shape of an if-else (colons, indentation, and an else with no condition), trace what happens for True and False inputs, and use the % remainder trick to build an Even-or-Odd checker (num % 2 == 0). They meet real-life if-else decisions (pass/fail, umbrella/sunglasses, buy/save) and practise spotting which block runs. With common-error fixes and a quiz. Class 6–8 · Python Programming.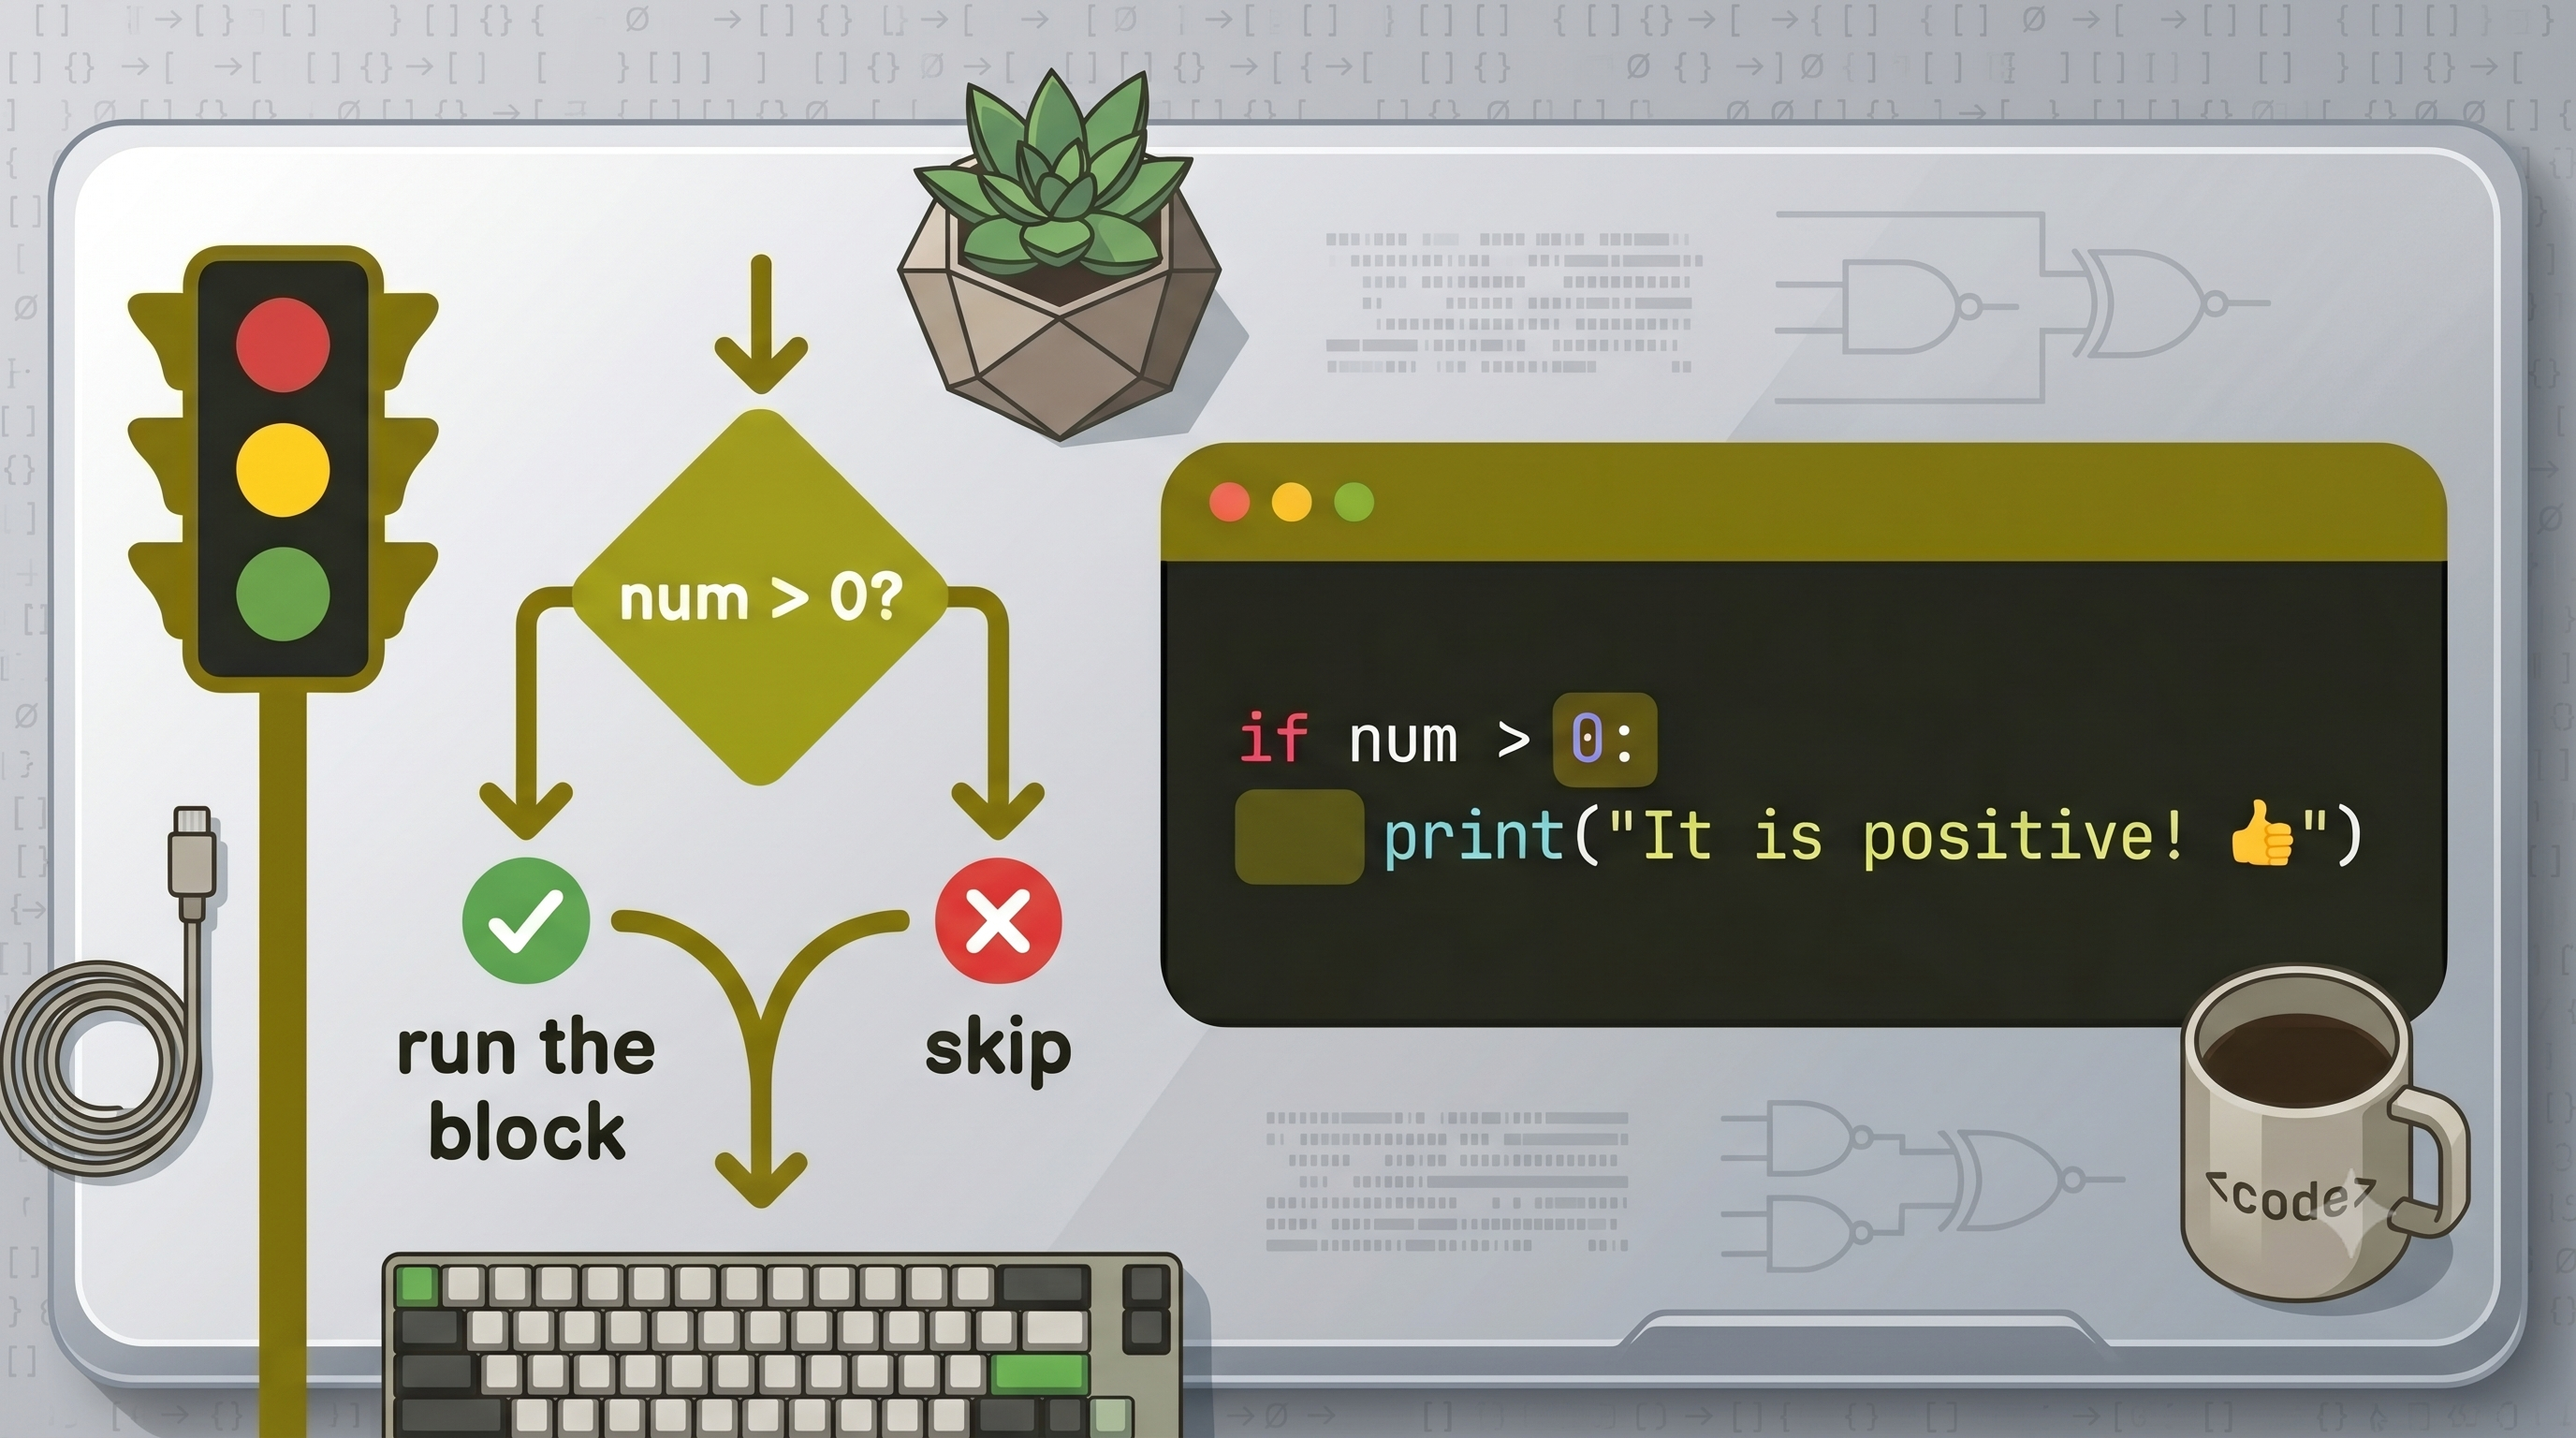
Available courses
This capstone project combines everything students have learned so far into building an Emotion Detector — an image classification model that reads facial expressions as Happy, Sad, or Neutral. Unlike prior projects, this one places consent front and center: before pointing a camera at anyone, students must ask permission ("Can I take some quick photos for my AI project?"), respect a "no" immediately, and never save or share a photo without clear agreement. With willing volunteers only, students gather 20+ samples per expression, train the same underlying image-classification process used for Cat vs Dog (just with new classes), and test live — checking in with volunteers throughout ("Are you okay continuing?") and stopping immediately if anyone seems uncomfortable. In the featured activity, 9/10 live tests are correct (90%, above the 80% goal), with one "Sad" misread as "Neutral" — highlighting that these two low-energy expressions are the trickiest to distinguish. Crucially, the lesson teaches that the AI only reads outward facial expression, not a person's true inner feeling — someone can smile while sad, or look neutral while happy — and that lighting, camera angle, culture, and individual resting expressions can all cause errors. This sets up a broader ethical lesson: emotion AI should be used carefully and never to unfairly judge or label a person. Includes an accuracy quiz, common errors (skipping consent, continuing after discomfort, training on only one face), and a full activity checklist.
- Teacher: First Admin
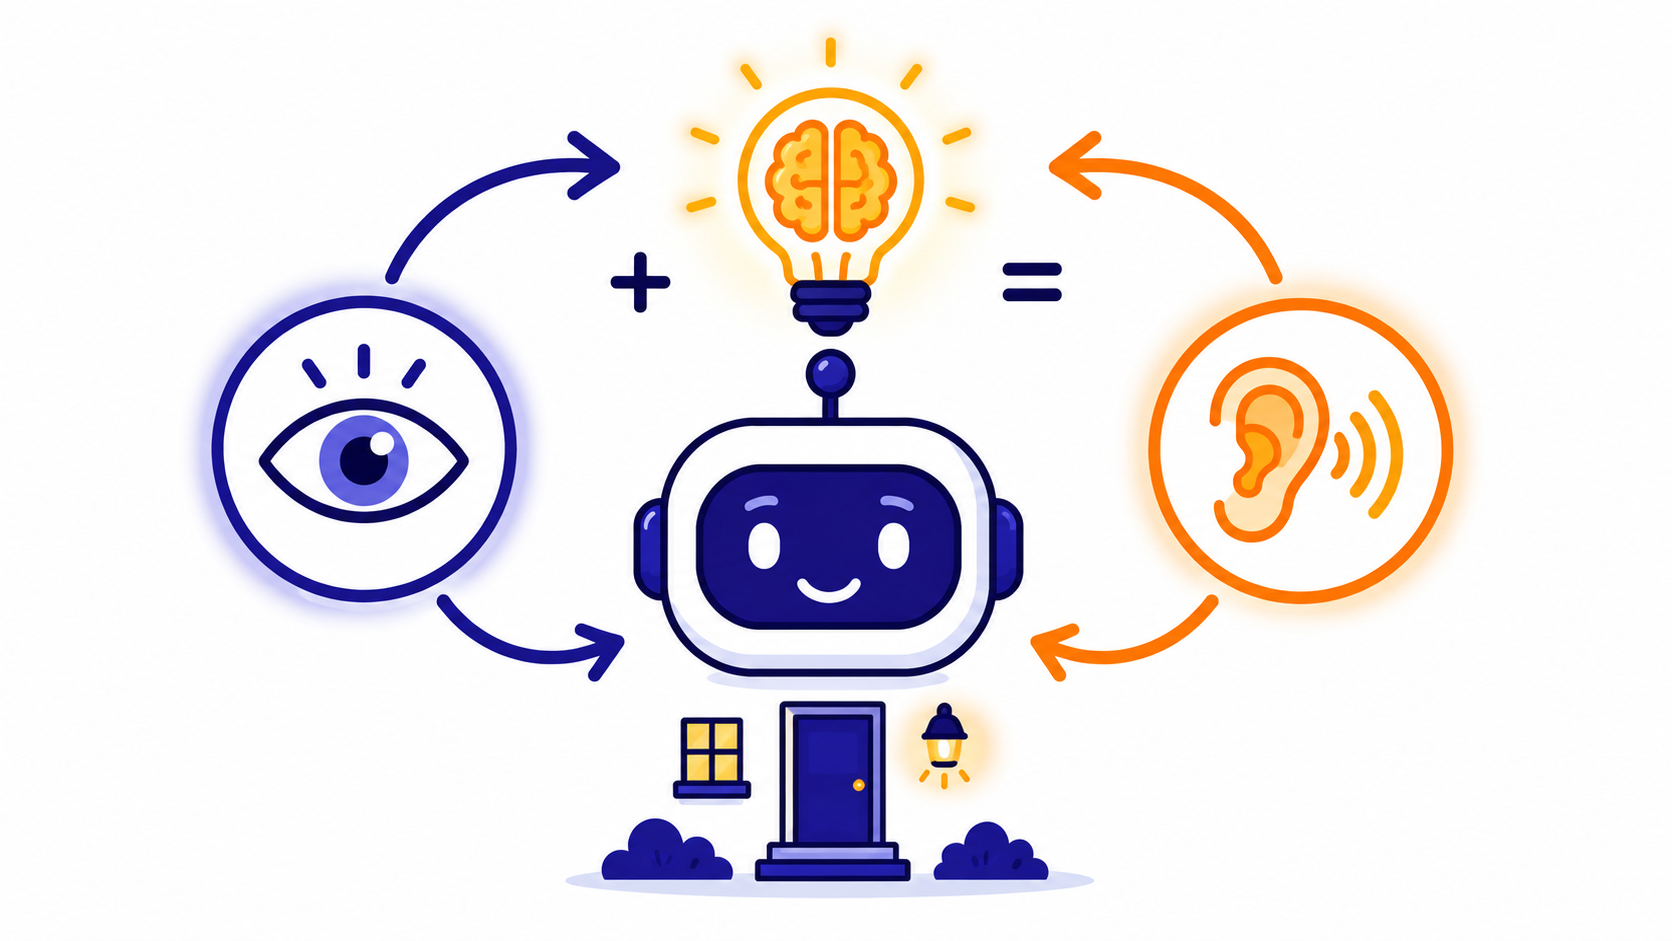
This lesson introduces Multi-Modal AI — systems that combine more than one type of input, unlike the single-sense Image, Pose, and Sound models students built in prior lessons. Students learn the "Sees + Hears = Understands" framework and explore three real-world examples: Smart Home devices that recognize a known voice AND a known face together for stronger security; self-driving cars that combine camera vision (traffic lights, pedestrians) with microphone hearing (an ambulance siren before it's even visible) to react earlier and more safely; and video call apps that run separate image (background blur) and sound (noise cancellation) models side by side. The core activity is a group brainstorm: students pick a real-life scenario and fill out a worksheet specifying what a camera would SEE, what a microphone would HEAR, and what Combined Action the AI should take when both inputs are detected — using the modeled Smart Home example (sees a family member's face, hears "It's me, let me in!", unlocks the door and turns on the porch light) as a template, then inventing their own scenario. The lesson closes by explaining why combining senses makes AI harder to fool — a single sense can be tricked by a photo or a voice recording, but disagreement between senses lets an AI ask for a double-check. Includes a quiz matching real examples to the sense(s) they use, common brainstorming mistakes (using only one sense, vague combined actions, copying the example), and a full activity checklist. Class 6–8 · Introduction to AI.
- Teacher: First Admin
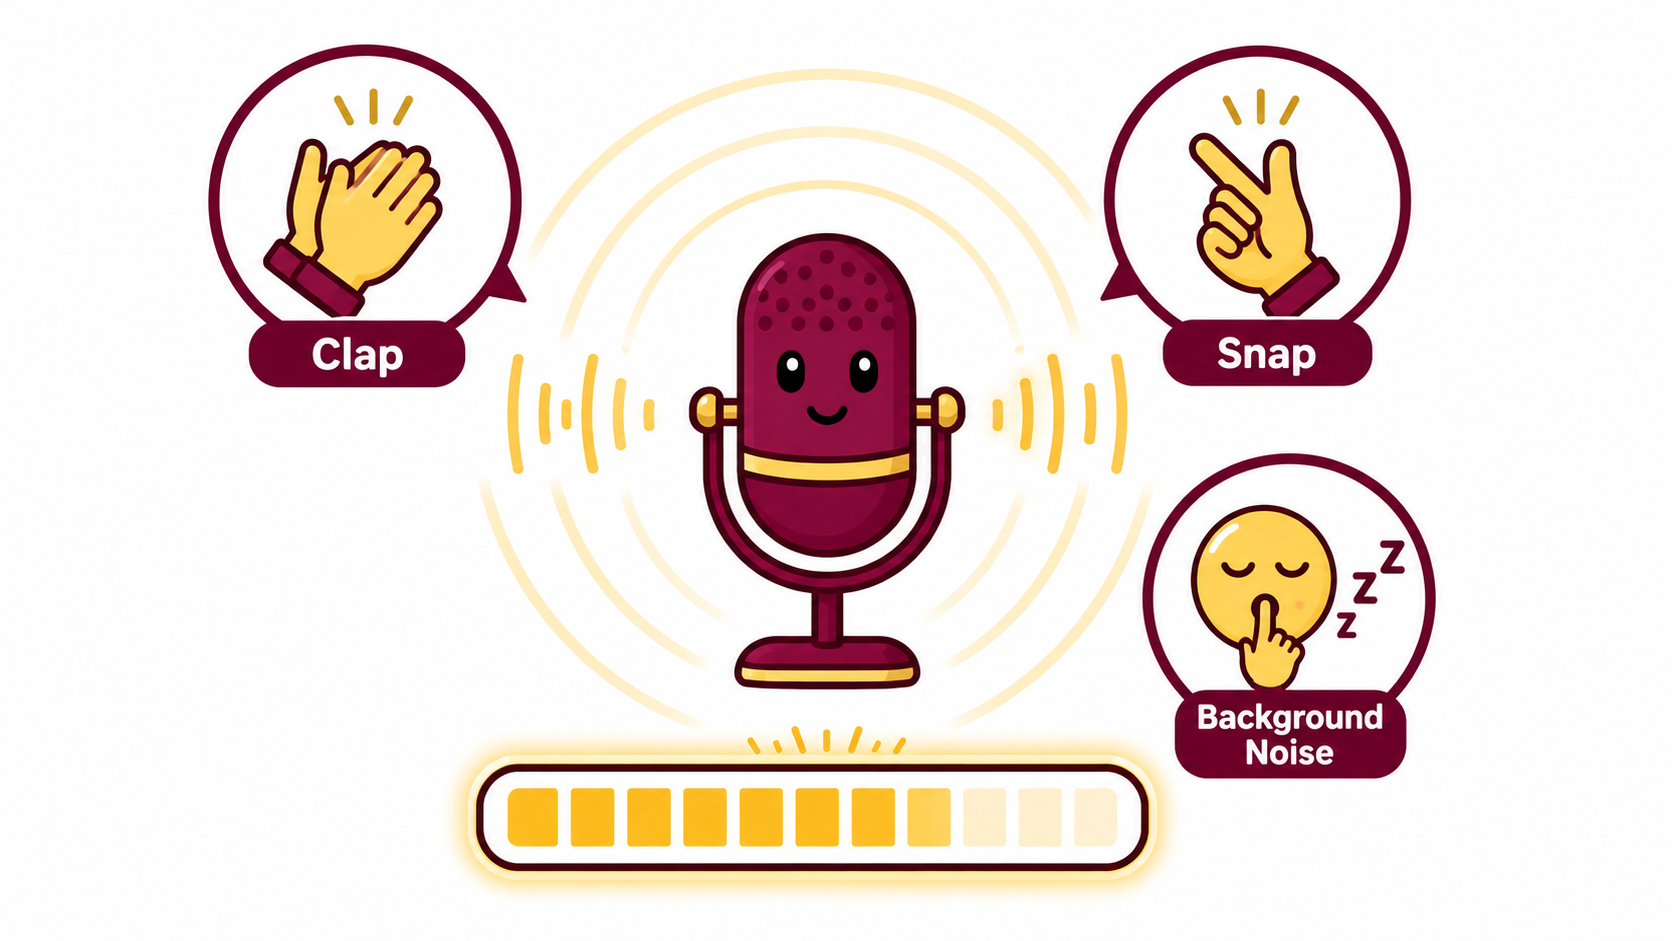
This lesson introduces Sound Classification, where a model learns to LISTEN rather than look — recording short audio clips and sorting them into trained classes. Students first learn the "secret rule" unique to sound projects: unlike Image or Pose projects, every sound model needs an extra "Background Noise" class representing normal quiet, so the model can distinguish "something" from "nothing." After recording 20+ short (1-2 second) microphone samples for Clap, Snap, and Background Noise, students train the model and test it live, watching confidence bars respond instantly to claps, snaps, and silence. The main activity has students train and test a "Yes" vs "No" vs Background Noise voice model, running 10 live tests and calculating accuracy — in the featured example, 9/10 (90%) exceeds the 80% goal, but one quiet "No" misclassified as "Yes" highlights that mumbled or whispered words are the hardest to classify correctly, easily confused with silence. The lesson reinforces the familiar Test → Diagnose → Add Data → Retrain loop applied to audio, and covers common sound mix-ups like room noise or chatter affecting any class. Includes an accuracy-calculation quiz, common errors (forgetting Background Noise, inconsistent sample length, mismatched training/testing noise levels), and a full live-activity checklist
- Teacher: First Admin
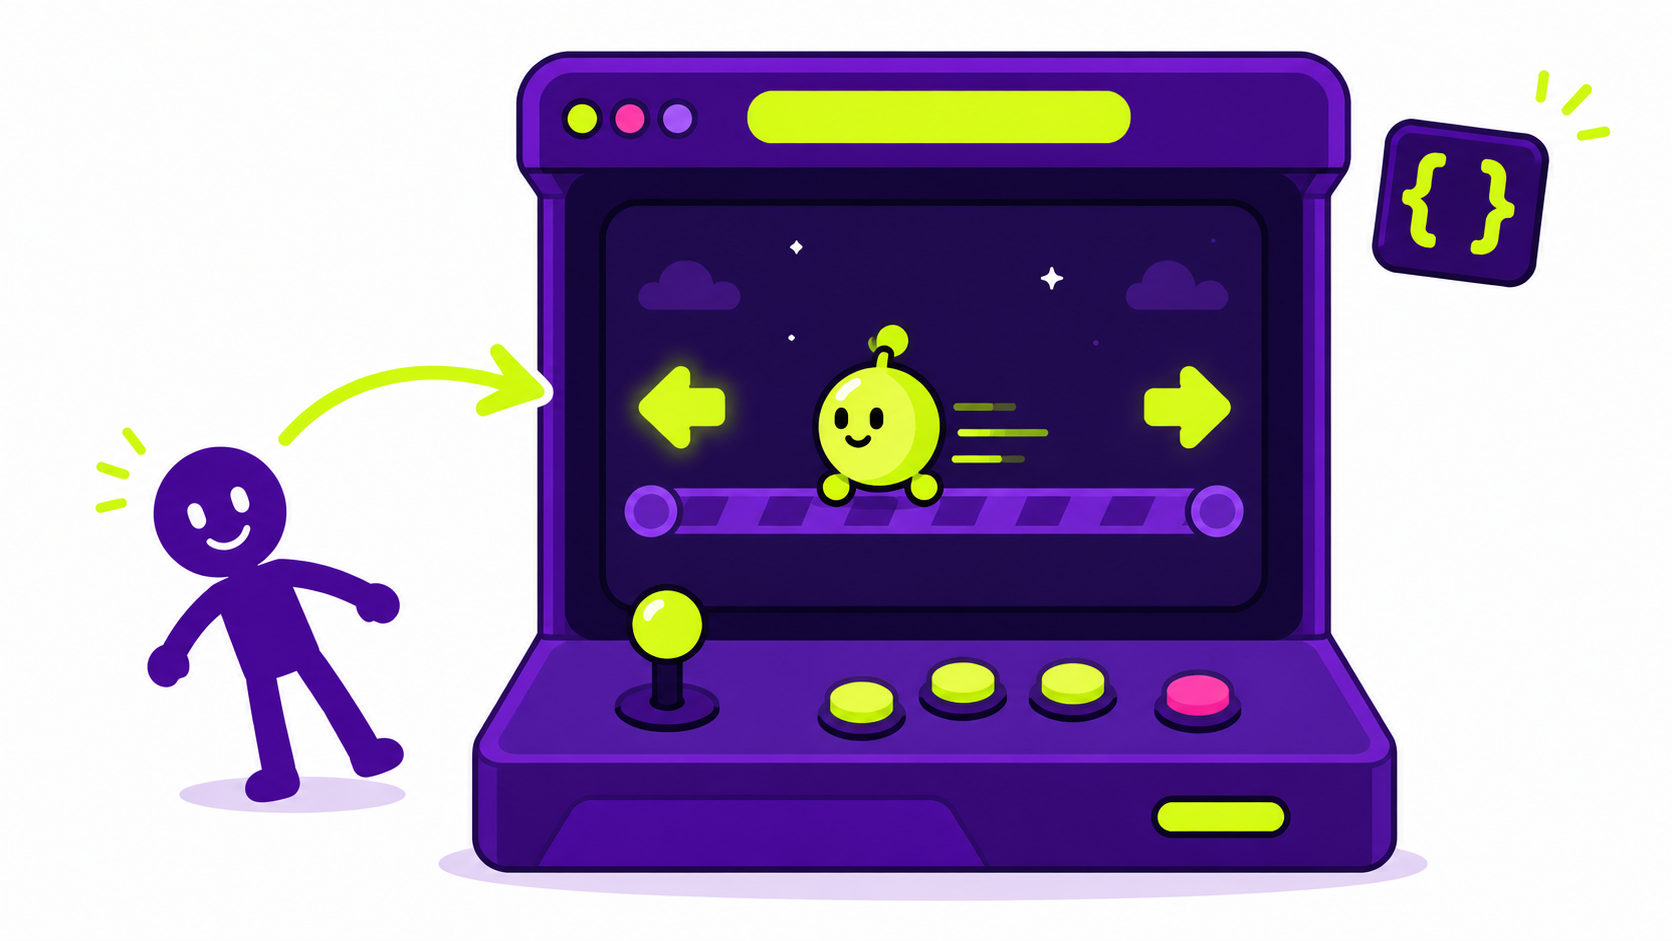
This lesson takes a previously-trained pose model and gives it a completely new job: controlling a live, moving browser game. Unlike the earlier Python export (Cat vs Dog), this export uses TensorFlow.js — a browser-native version of TensorFlow — via Teachable Machine's "Upload my model" option, which hosts the model online and provides both a shareable link and a ready-made code snippet. Students paste that code into a free online editor (like the p5.js Web Editor), run it to activate their webcam and load the model, then write a simple movePlayer() function using if/else logic: leaning "Left" decreases the character's x-position, leaning "Right" increases it, and standing does nothing at all — no matching condition means no change. After testing all three poses live and troubleshooting issues like wrong-direction movement (swap the -20/+20) or lag, students share their working game with others. The lesson emphasizes that class names in code must match Teachable Machine's labels exactly (capitalization included) and that a character that never stops usually means a missing Stand case. Includes a code-matching quiz, common errors and fixes, and a full export-code-play activity checklist
- Teacher: First Admin
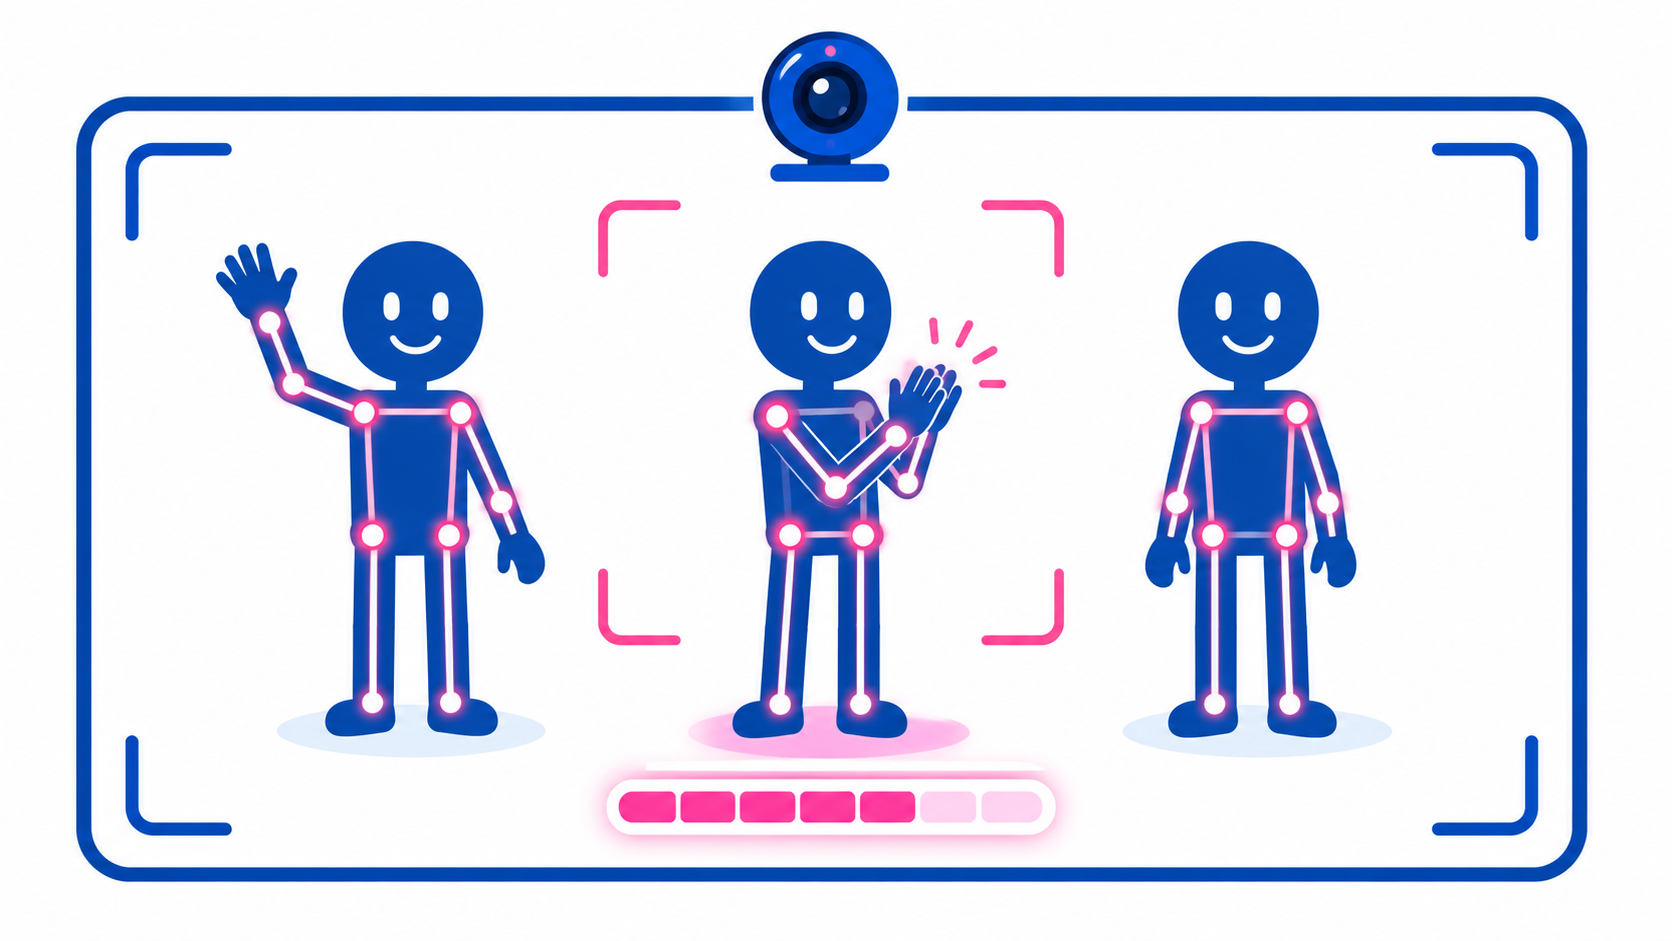
This lesson introduces Pose Classification, a fundamentally different kind of Teachable Machine project: instead of analyzing whole photos, it tracks body keypoints — shoulders, elbows, wrists, hips, knees — using a tool called PoseNet, then classifies body position based on where those points sit. Students train a three-class model (Wave, Clap, Stand), recording 30+ live webcam samples per pose from several different people at different distances, then test it live in real time, watching confidence bars shift as they move. The activity has students perform 10 live pose tests, calculate accuracy, and — like prior projects — retrain with targeted data if below 80%. The lesson highlights a unique challenge of live, moving data: mid-motion moments (like the instant between a wave and a clap) are inherently the trickiest to classify, and close confidence scores between two poses are a normal sign of being "between" states rather than a bug. Students also learn that pose classification only cares about keypoint positions, so it works regardless of clothing or background. Includes an accuracy quiz, common errors (inconsistent framing, single-person training data, testing only clean poses), and a full live-activity checklist.
- Teacher: First Admin
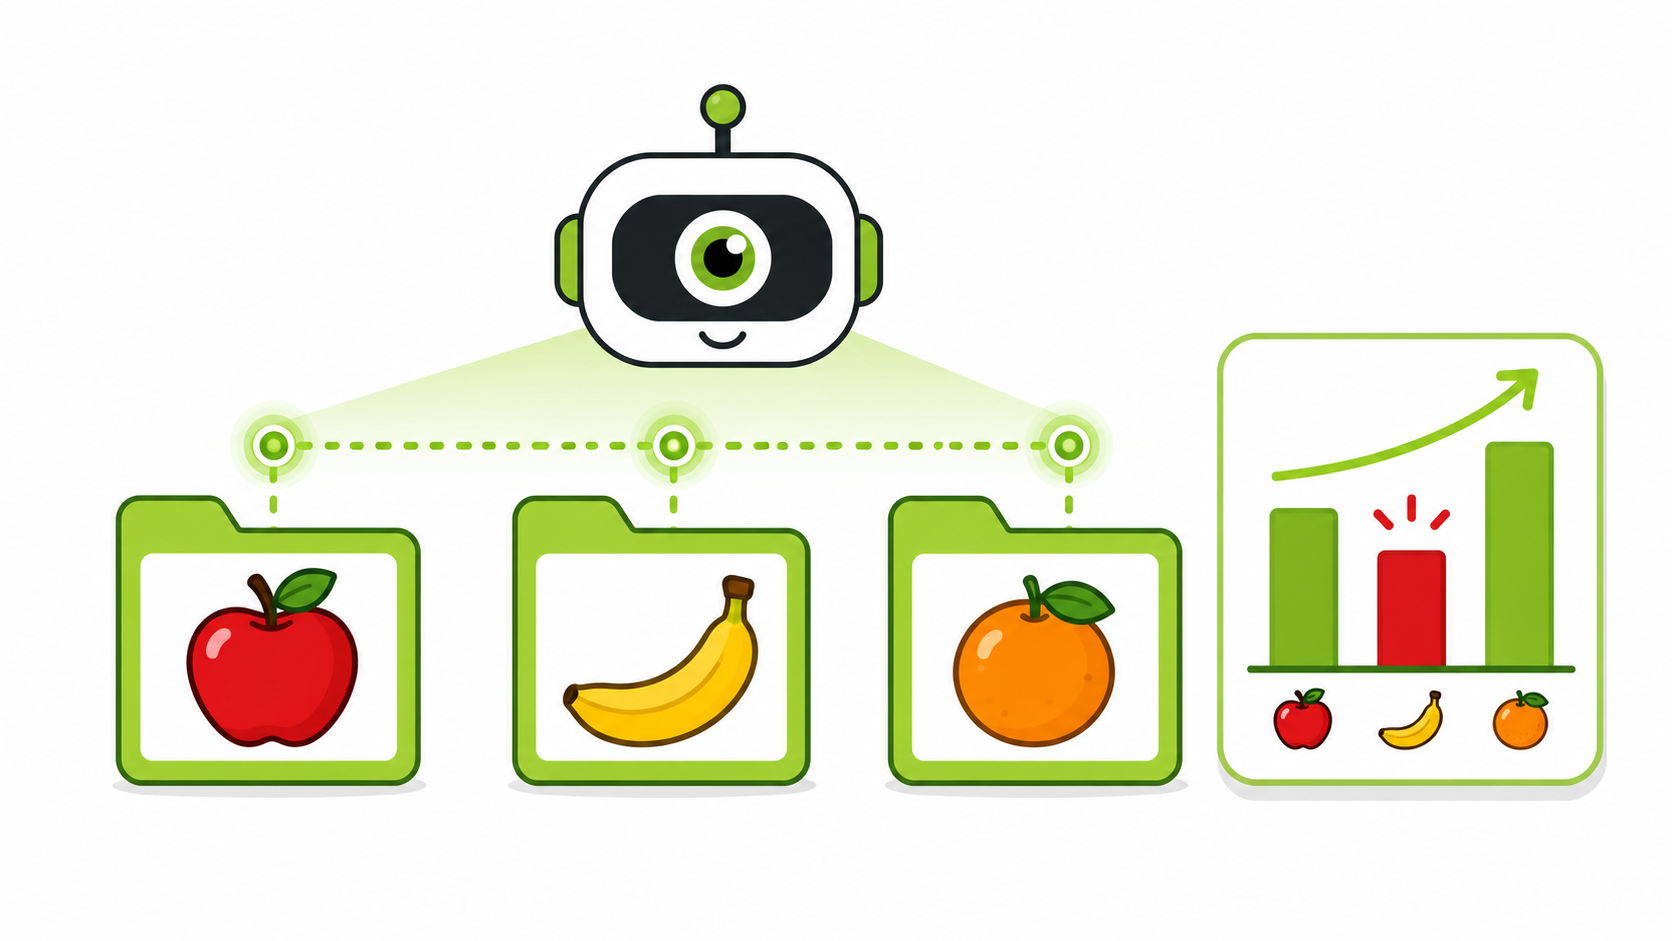
This mini project pushes students beyond simple two-class models into multi-class classification, training a model to tell apart three fruits — Apple, Banana, and Orange. Students learn that with three classes, random guessing only succeeds about 33% of the time, making an above-80%-accuracy goal a meaningful bar for real learning. After gathering 30+ varied photos per fruit and training the model, students test all three classes fairly (not just their favorite), record results in a table, and calculate accuracy. In the featured example, 9/10 correct (90%) exceeds the goal, but one Banana misclassified as Orange highlights exactly where more targeted training data is needed. Beyond the technical loop of test-diagnose-add-retrain (familiar from a prior lesson), this project adds a presentation component: students report overall accuracy, identify which fruit was easiest and hardest to classify, and explain likely causes of confusion — like a yellow-green banana resembling an apple's color, or a distant orange looking round like an apple. Includes an accuracy-calculation quiz, common multi-class errors (uneven photo counts across classes, testing only one class, stopping too early), and a full activity checklist.
- Teacher: First Admin
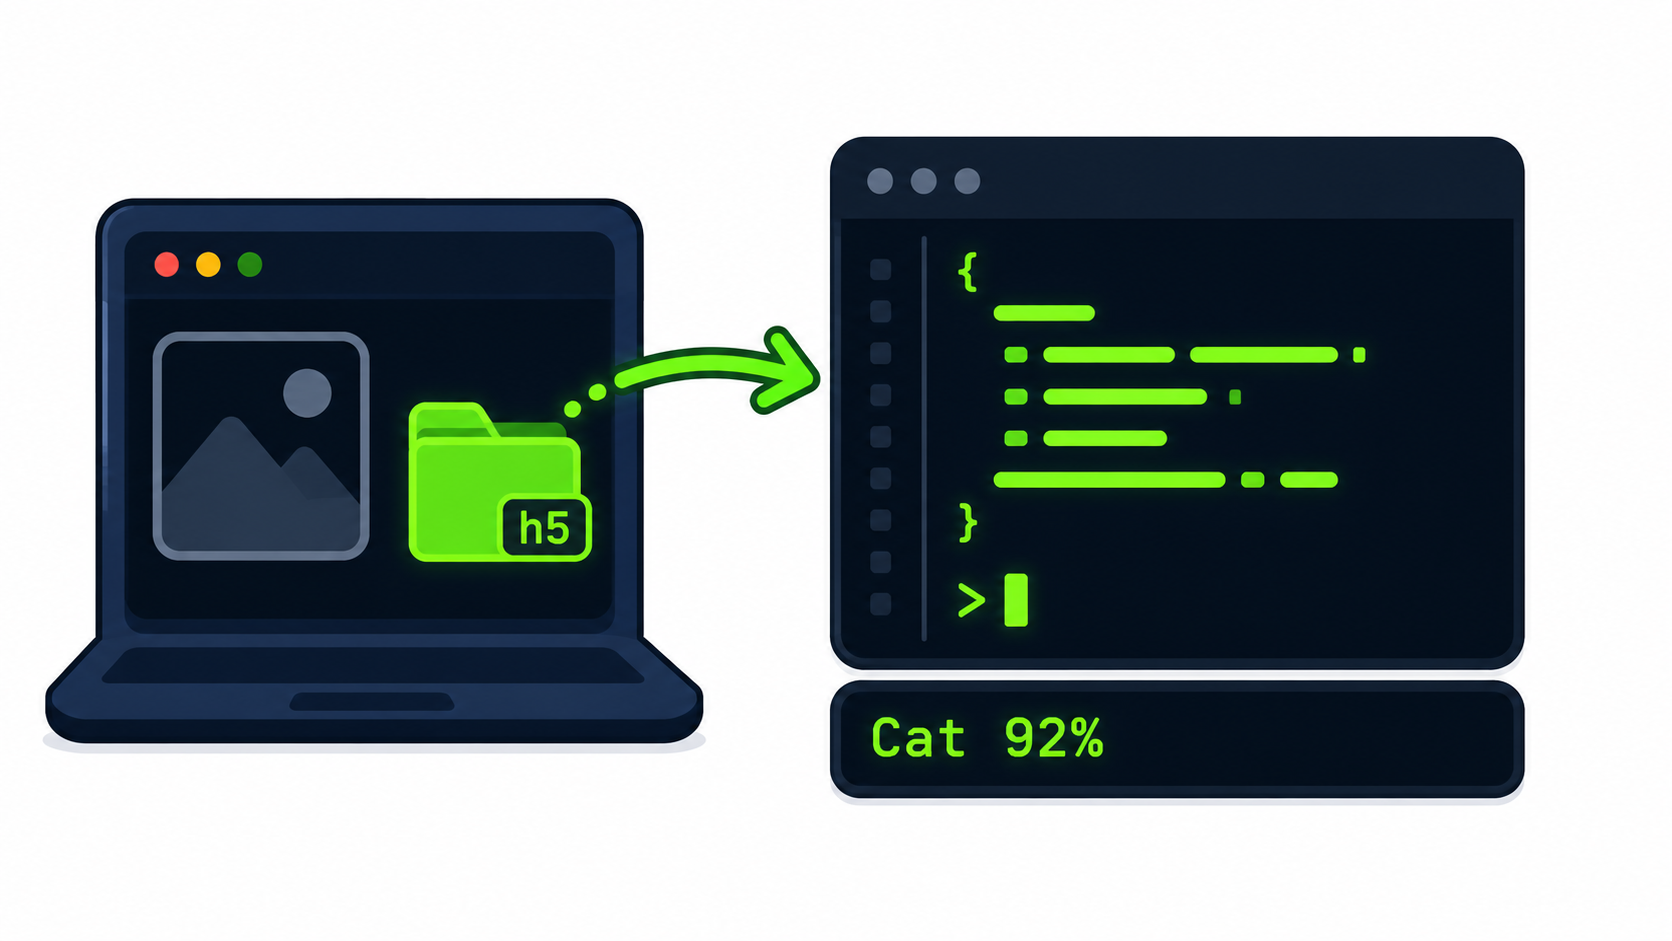
This lesson bridges the gap between training a model in the browser and running it as real, portable code — the exact step real AI products take when going from prototype to production. Students export their previously-trained Cat vs Dog model from Teachable Machine as Keras format, producing two files: keras_model.h5 (the trained "brain") and labels.txt (the class-name list). They then open a free Google Colab notebook, upload both files, and run actual Python code that loads the model, opens and resizes a test photo, calls model.predict() to get confidence scores, and uses np.argmax() to find the winning class. Students learn to read prediction output correctly — scores always sum to 100%, and the highest score is the model's answer, with a close score (like 55% vs 45%) signaling low confidence. The lesson connects this hands-on process to real-world AI: Face unlock, Siri, and spam filters all run exported models the same way. Includes a code-matching quiz, common errors (forgetting to upload files first, mismatched resize dimensions, ignoring labels.txt), and a full export-upload-run activity checklist.
- Teacher: First Admin
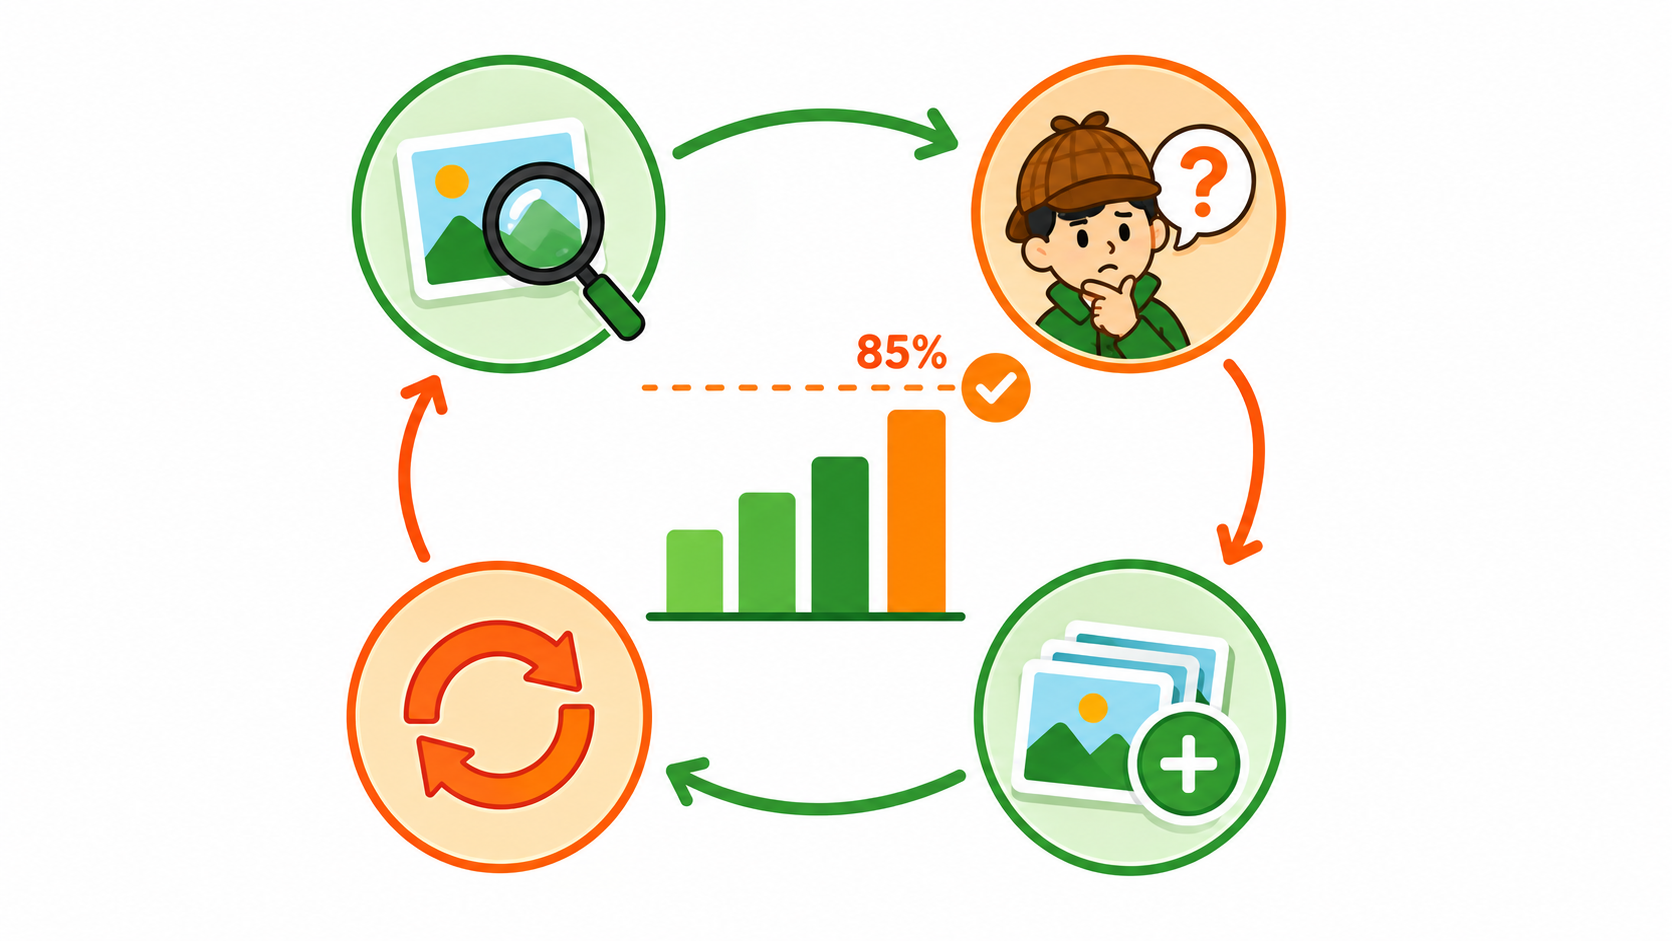
Building on the previously-trained Cat vs Dog model, this lesson teaches the essential AI-builder habit of testing, diagnosing, and retraining rather than stopping at a first attempt. Students learn what accuracy means (correct guesses ÷ total tests × 100) and practice the four-step "Improve Loop": TEST with fresh, never-before-seen photos; DIAGNOSE exactly why any wrong guesses happened (a new angle? busy background? partial visibility?); ADD targeted data specifically for that weak spot rather than random extra photos; and RETRAIN. In the main activity, students record 10 test results in a table, calculate their model's accuracy, and — if below the 85% target — add the missing data and repeat the loop, following a sample journey where accuracy climbs from 60% to 80% to 90% across three rounds of targeted improvement. The lesson also discusses when to stop improving (a class game vs. a medical tool need very different accuracy bars), includes an accuracy-calculation quiz, and covers common mistakes like testing on training photos, adding random instead of targeted data, or forgetting to retrain after adding new samples.
- Teacher: First Admin
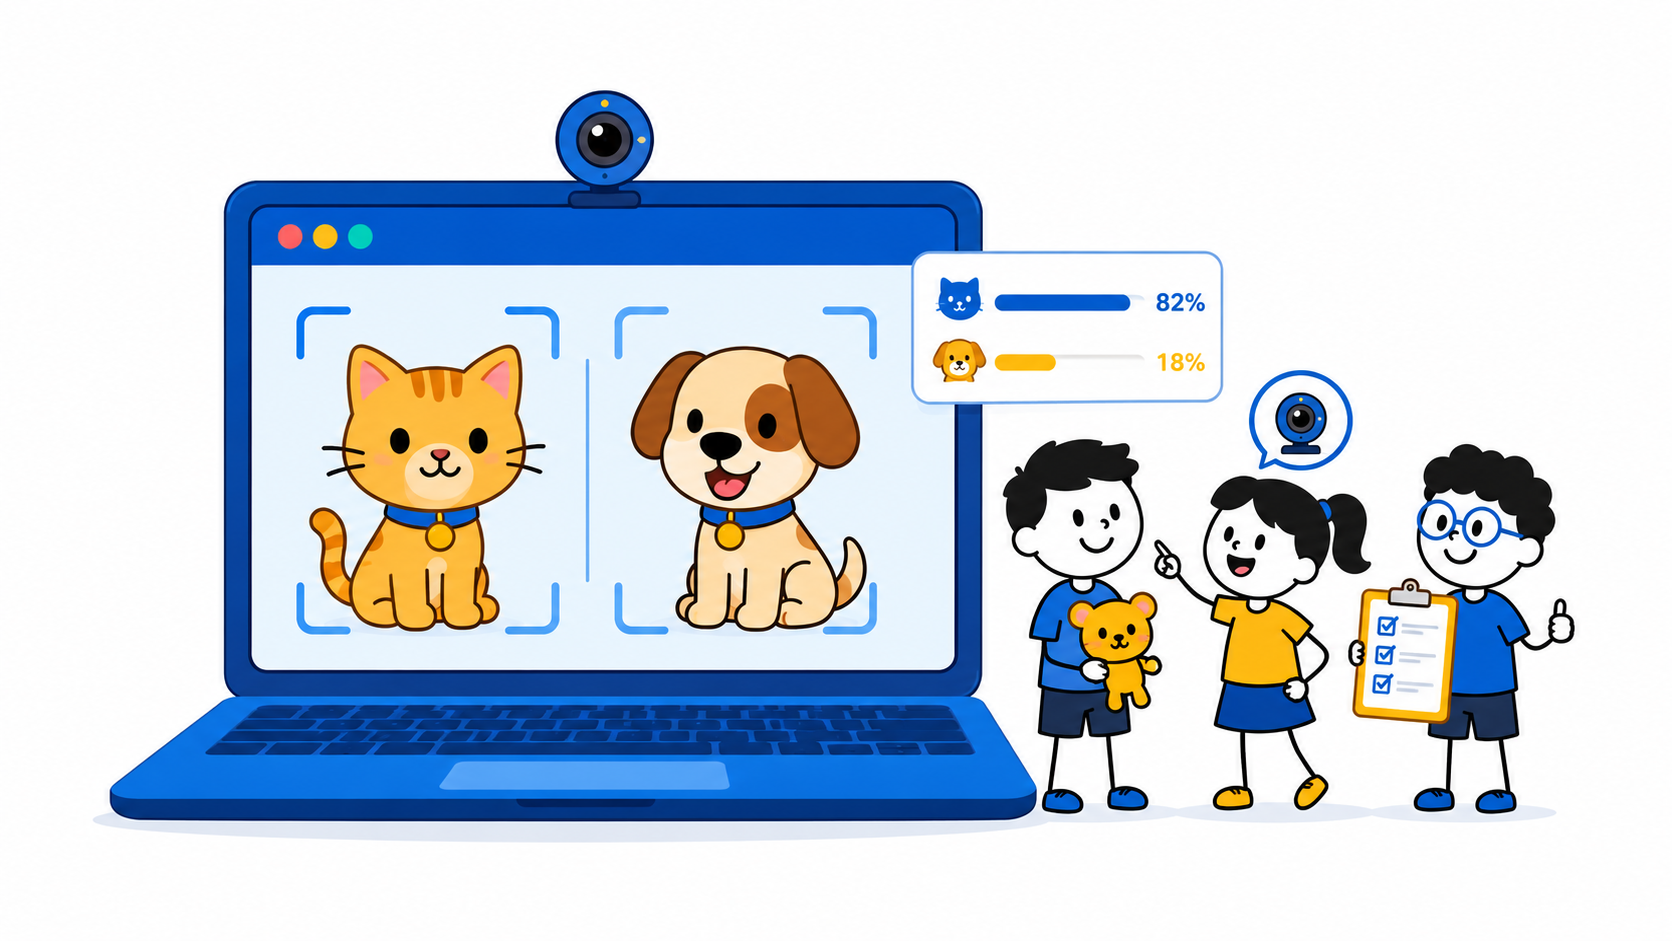
Students move from exploring Teachable Machine to actually training their first real AI model — a Cat vs Dog classifier — using live webcam photos captured in groups. Working in teams (photo-holder, capturer, counter), students set up two classes in a new Image Project, then use "Hold to Record" to rapidly capture 30+ varied photos per class, moving the object between shots for different angles. The lesson reinforces "bad data = bad model" by showing a sample group's results at increasing sample sizes: 5 photos (confused, ~50/50 guesses), 15 photos same angle (fails on new angles), and 30+ varied photos across multiple backgrounds (confident, reliable predictions). After training and live-testing with a brand-new photo, students learn pro techniques — varying backgrounds/angles/distance, and critically, adding a third "Background"/"Neither" class so the model doesn't force every object into Cat or Dog. Includes a troubleshooting quiz matching symptoms (50/50 guesses, angle sensitivity, works in class but not at home) to root causes, common mistakes and fixes, and a hands-on activity checklist.
- Teacher: First Admin
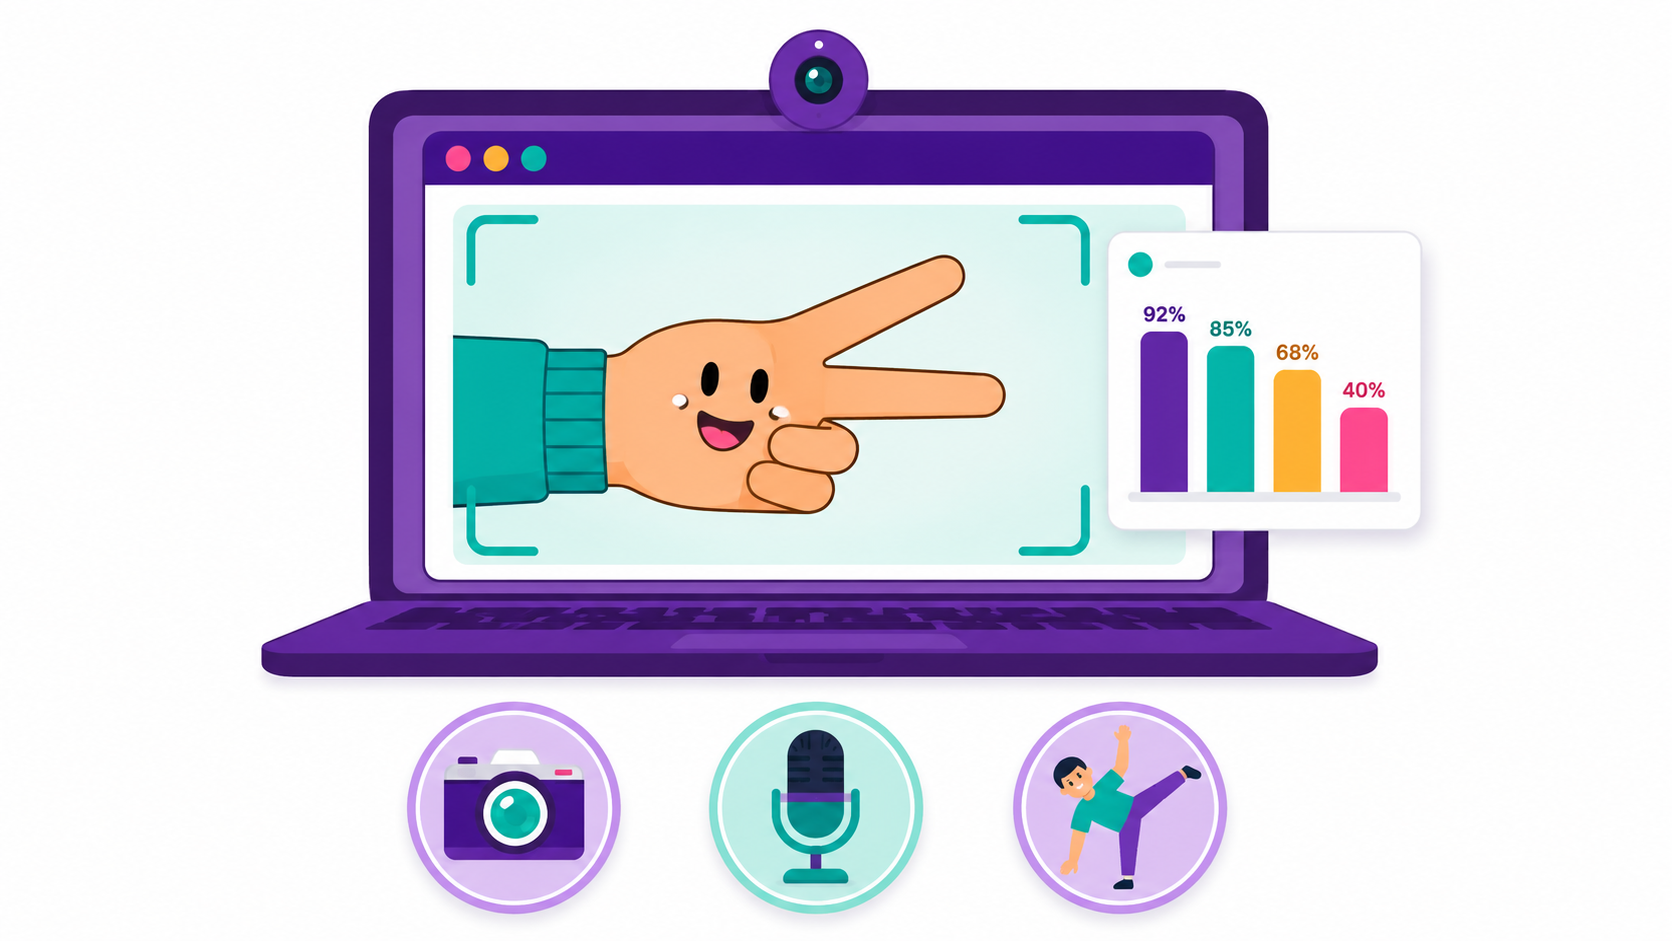
An introduction to Google's Teachable Machine — a free, no-code website that lets students train real AI models entirely in the browser. Building directly on the previously-learned ML pipeline (Data → Features → Model → Prediction), this lesson maps that same pipeline onto Teachable Machine's three-column interface: Gather (collecting examples into classes — the Data step), Train (one click builds the Model), and Export/Preview (live predictions shown with confidence percentages). Students learn the three available project types — Image, Audio, and Pose — then explore the Examples gallery, trying pre-trained demos like Rock/Paper/Scissors hand-gesture recognition, a cat-vs-dog Pet Sorter, a Clap Detector, and a Pose Checker, watching live confidence bars respond in real time. Rather than building their own model yet, this lesson is deliberately exploration-only — getting familiar with the interface and imagining future project ideas — before a future lesson has them gather their own data and train a model from scratch. Includes a quiz matching interface parts to their functions, common mix-ups (no coding needed, more samples train better, confidence isn't always 100%), and a hands-on exploration checklist.
- Teacher: First Admin
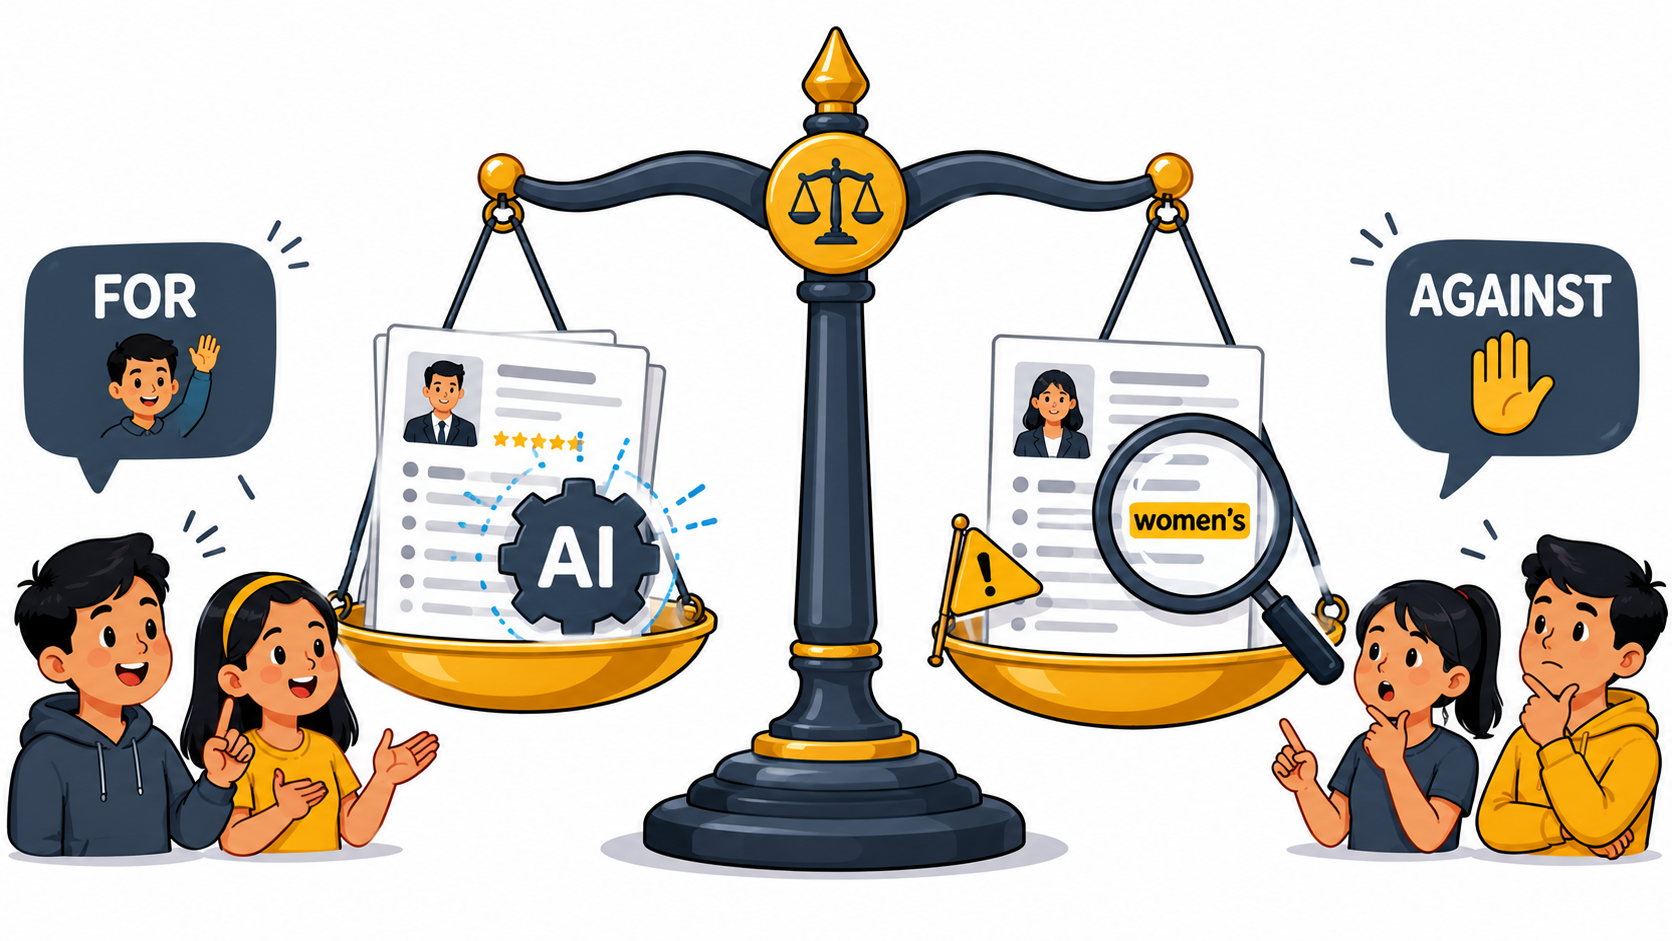
Can AI be biased? This lesson tackles a serious question through a real, well-known case study: a large tech company built an AI tool to score job resumes, trained on 10 years of past applications — most of which happened to come from men. The tool learned that imbalance as a pattern and began downgrading resumes containing "women's" (like "captain of the women's chess club") and graduates of all-women's colleges — not because anyone told it to, but because that's what the biased data taught it. When engineers discovered the problem, they couldn't be sure they'd caught every unfair pattern, so the company simply stopped using the tool — an example of responsible AI in action. Students then hold a respectful group debate — "Should companies use AI tools to help with hiring?" — split into Team FOR (speed, testability, consistency) and Team AGAINST (bias risk, unfair harm, career-altering mistakes), using evidence from the case study rather than opinions. The lesson closes with practical fixes (varied training data, pre-launch bias testing, human review, the right to appeal), a true/false quiz, and a common-mix-ups guide distinguishing "biased data" from "evil AI". Introduction to AI.
- Teacher: First Admin
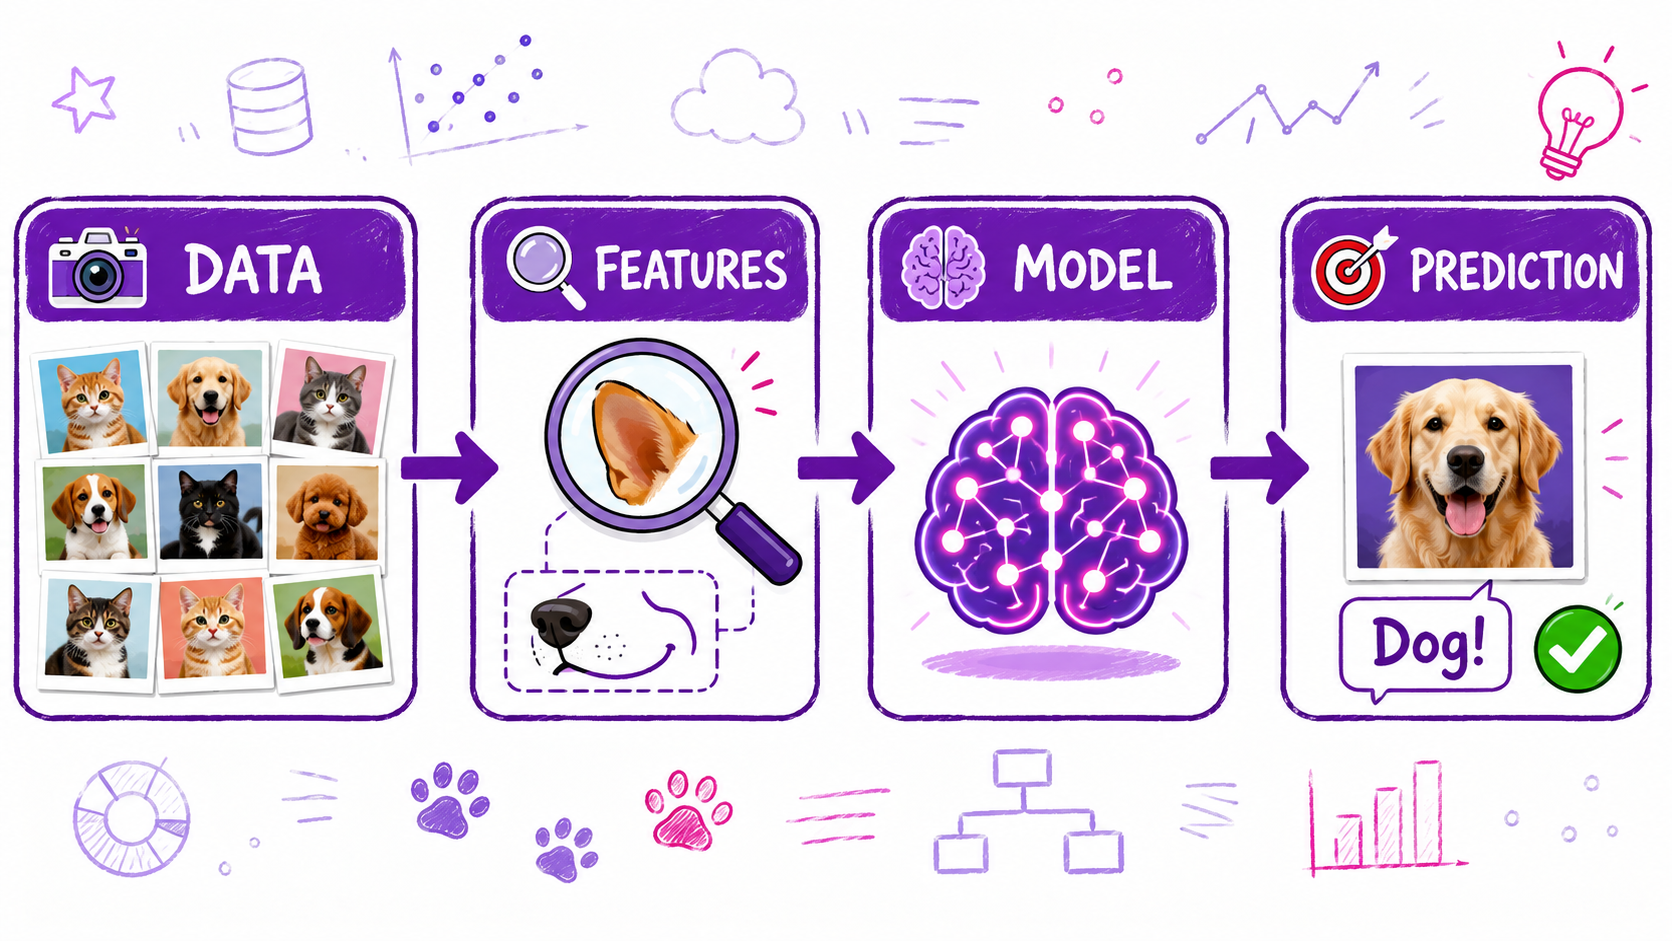
Data → Features → Model → Prediction — draw it! This lesson opens up the ML "black box" to reveal the same four-step pipeline behind every machine learning system, from Netflix to self-driving cars. Following one running example — teaching a computer to tell cats from dogs — students see DATA (thousands of labeled photos), FEATURES (measurable clues like ear shape, snout length, and fur pattern), MODEL (the pattern the computer learns by training on data + features), and PREDICTION (the model's guess — "cat" or "dog" — on a brand-new photo). A second example, predicting rain from weather records, proves the exact same four steps work for any problem. The hands-on activity has students draw the four-box pipeline with arrows on a whiteboard, label each step, and add their own example underneath. They also learn the "Garbage In, Garbage Out" principle — if all the training photos are biased (e.g. only white fluffy cats), the model learns the wrong lesson and fails on new cases. Students then design their own pipeline for a fresh problem (song genre, spam detection, predicting an order), followed by a quiz and a common-mix-ups guide. Introduction to AI.
- Teacher: First Admin
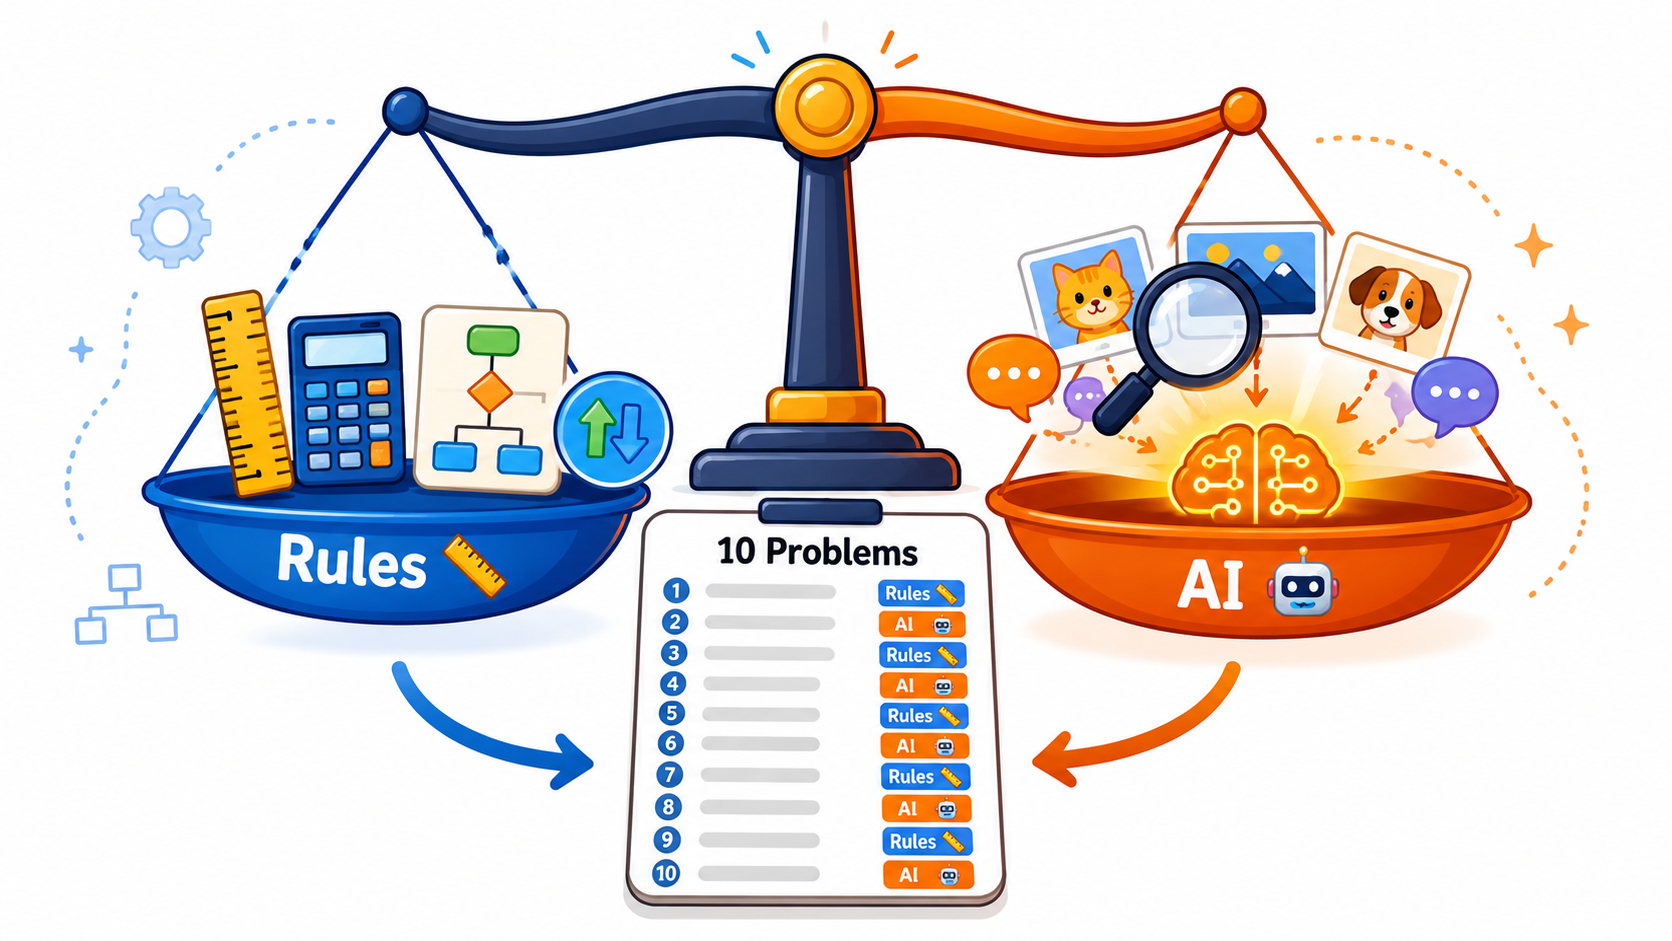
"AI or Not?" — classify 10 problems! This lesson teaches students the crucial difference between the two ways a computer can solve a problem: Traditional Programming, where a human writes exact step-by-step rules (great for math, sorting, unit conversion — everything they've coded so far), and Machine Learning, where a human gives lots of labeled examples and the computer finds the pattern itself (great for fuzzy problems like recognizing faces, understanding speech, or recommending videos). Using "is this number even or odd?" as a clear first clue — a problem with an obvious rule doesn't need AI at all — students learn to ask "could I write an exact rule for this myself?" The centerpiece activity has them classify 10 real-world problems (area of a rectangle, face recognition, spam detection, translation, and more) as needing AI or just Rules, checked against an answer key. The big reveal: most real apps mix BOTH — Netflix uses Traditional code for its play button but ML to pick recommendations; a self-driving car uses Traditional rules for its brakes but ML to interpret camera footage. A quiz and a common-mix-ups guide (AI isn't always better, ML still needs human-labeled data) round out the lesson. Introduction to AI.
- Teacher: First Admin
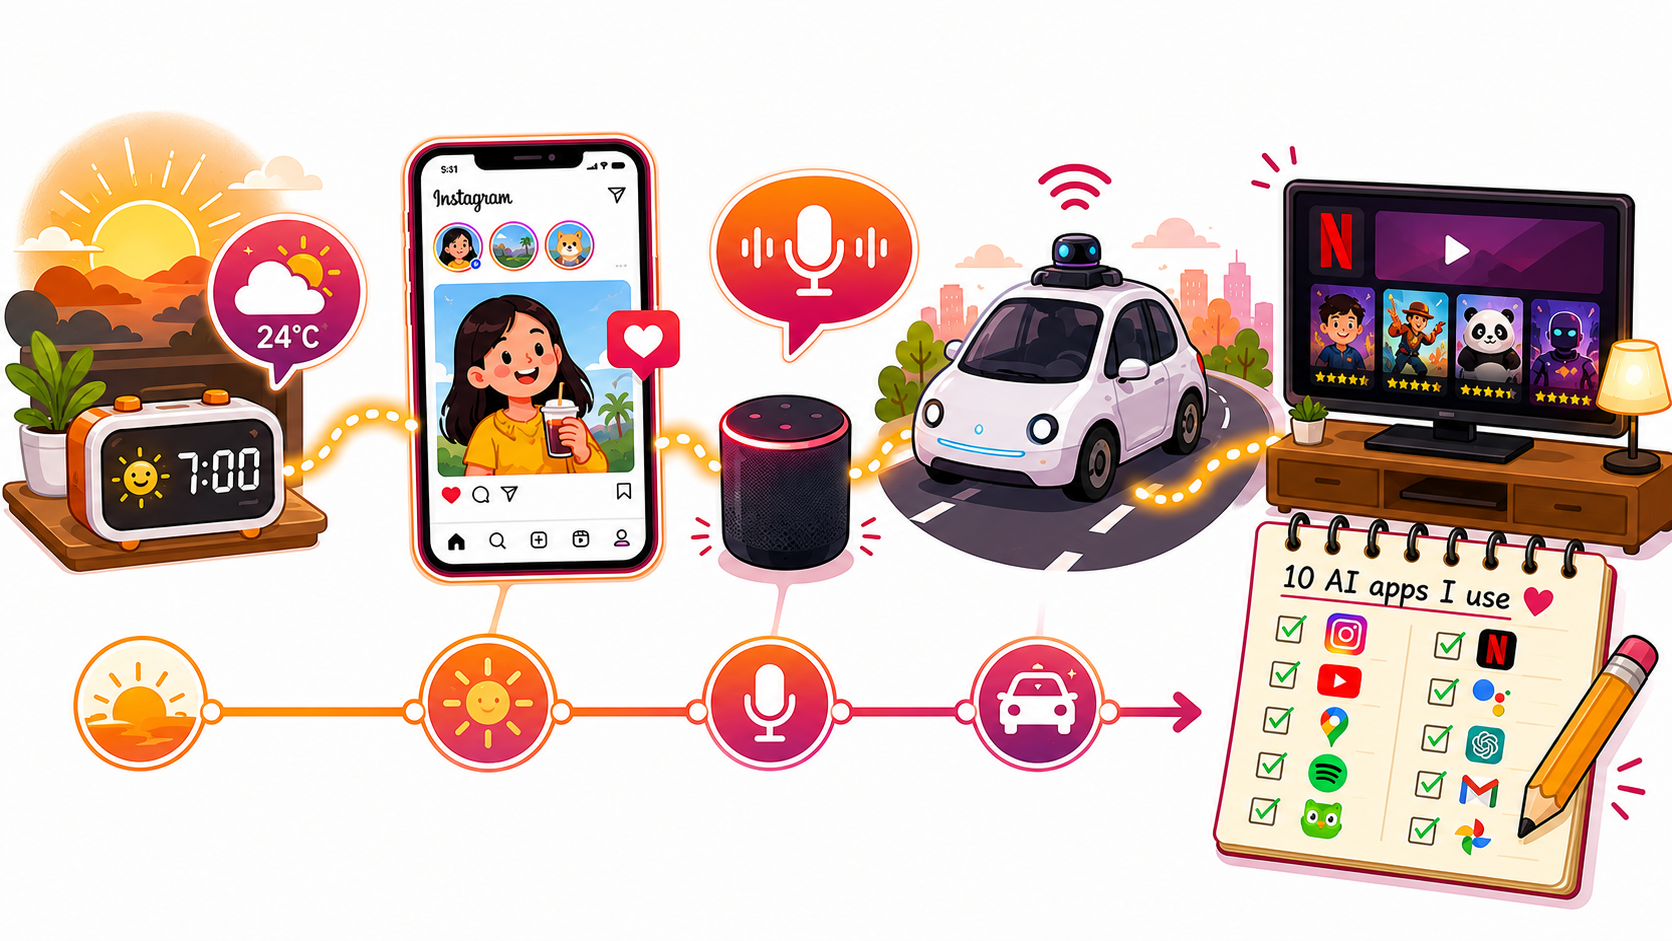
Netflix, Siri, cars, — list 10 AI apps you use! This lesson makes AI concrete by tracing it through a typical day: a weather app predicting your morning, Instagram deciding what shows up in your feed, Siri answering a question, Maps or a self-driving car finding the way, Netflix suggesting what to watch. Students recap that every one of these is Narrow AI — trained for exactly one job — and dig into how it actually works: Recommendation AI (Netflix) studies your past choices; Voice AI (Siri, Alexa) turns sound into understanding; Self-Driving AI uses cameras and sensors to decide when to stop or turn. All of them share the same trick: studying PATTERNS in data rather than truly "knowing" anything. The centerpiece activity has students personally list 10 AI apps from their own life and note what each one's AI does, then categorize their list by type (Recommendation, Voice, Self-Driving, Feed-Ranking). Discussion ideas (timing an hour to spot AI, asking a parent about their AI use), a matching quiz, and a common-mix-ups guide round out the lesson. Class 6–8 · Introduction to AI.
- Teacher: First Admin
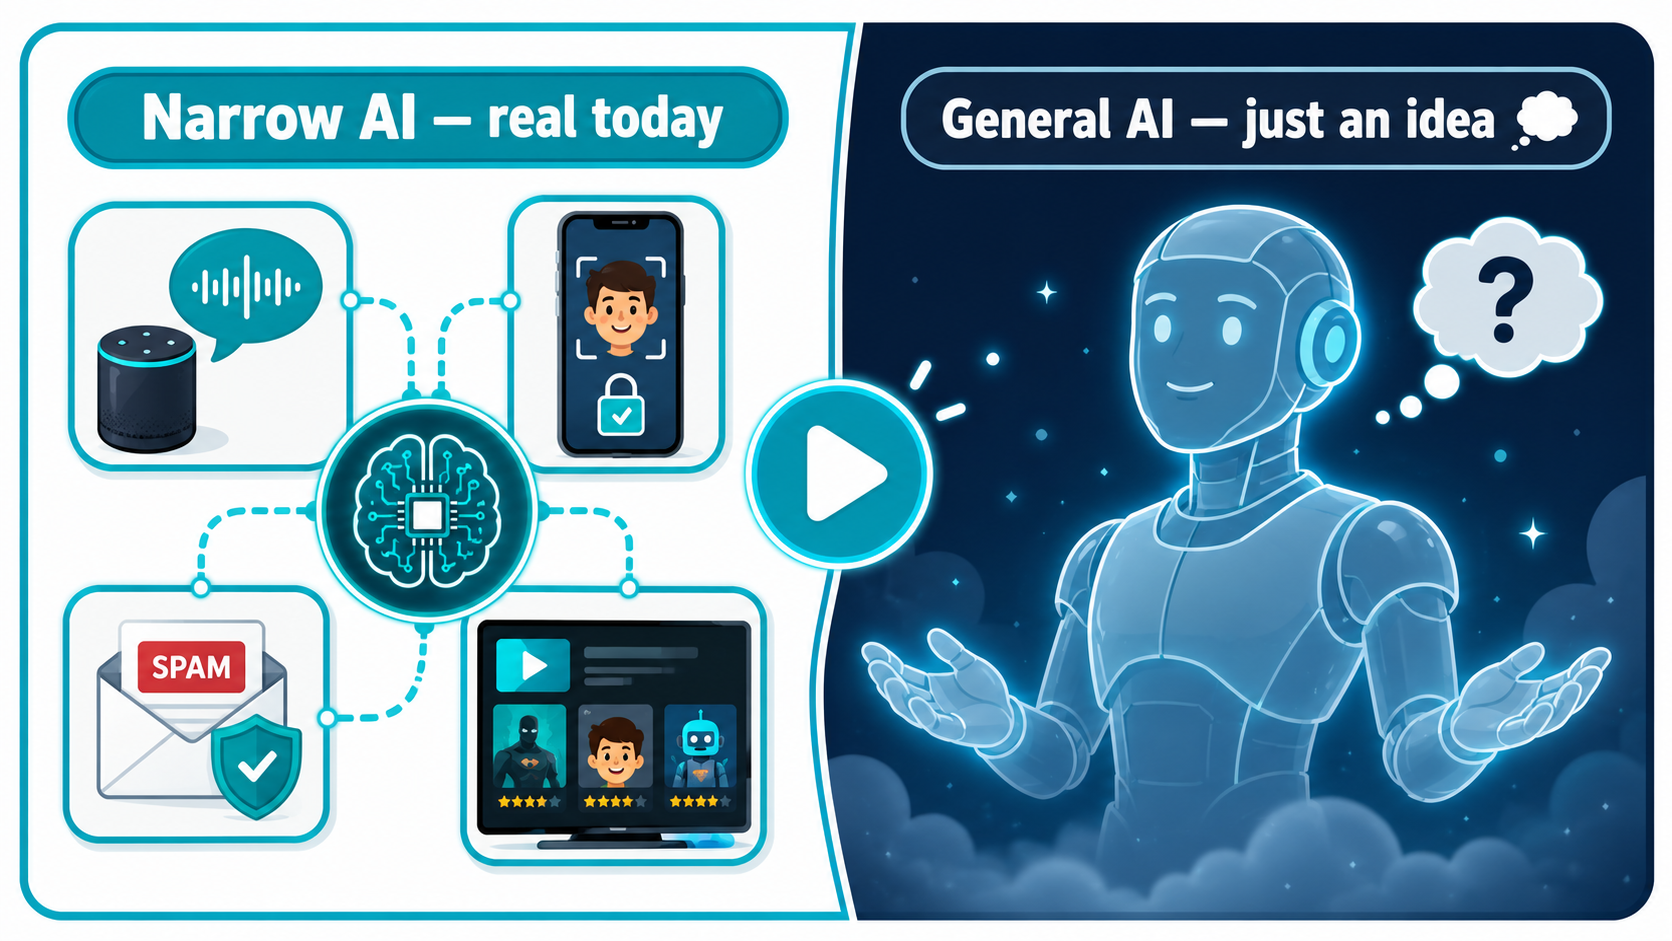
Narrow AI vs General AI — watch and discover! This introductory lesson breaks down what "Artificial Intelligence" really means: a machine doing tasks that normally need human intelligence, like recognizing pictures, understanding speech, or making decisions. Students spot AI already hiding in their daily lives — voice assistants, Netflix recommendations, face unlock, maps, spam filters, autocorrect — then learn the crucial distinction between Narrow AI (trained for just ONE task, and the ONLY kind that actually exists today) and General AI (as flexible as a human mind, able to do anything — but still just an idea, not yet built, despite what movies show). The centerpiece is a short video activity: students watch "What is AI?", note down examples they see, and discuss whether each is Narrow or General. A movies-vs-reality comparison busts common myths (AI isn't a human-like robot, doesn't take over the world, and can absolutely make mistakes), followed by a quiz and a common-mix-ups guide. Class 6–8 · Introduction to AI.
- Teacher: First Admin
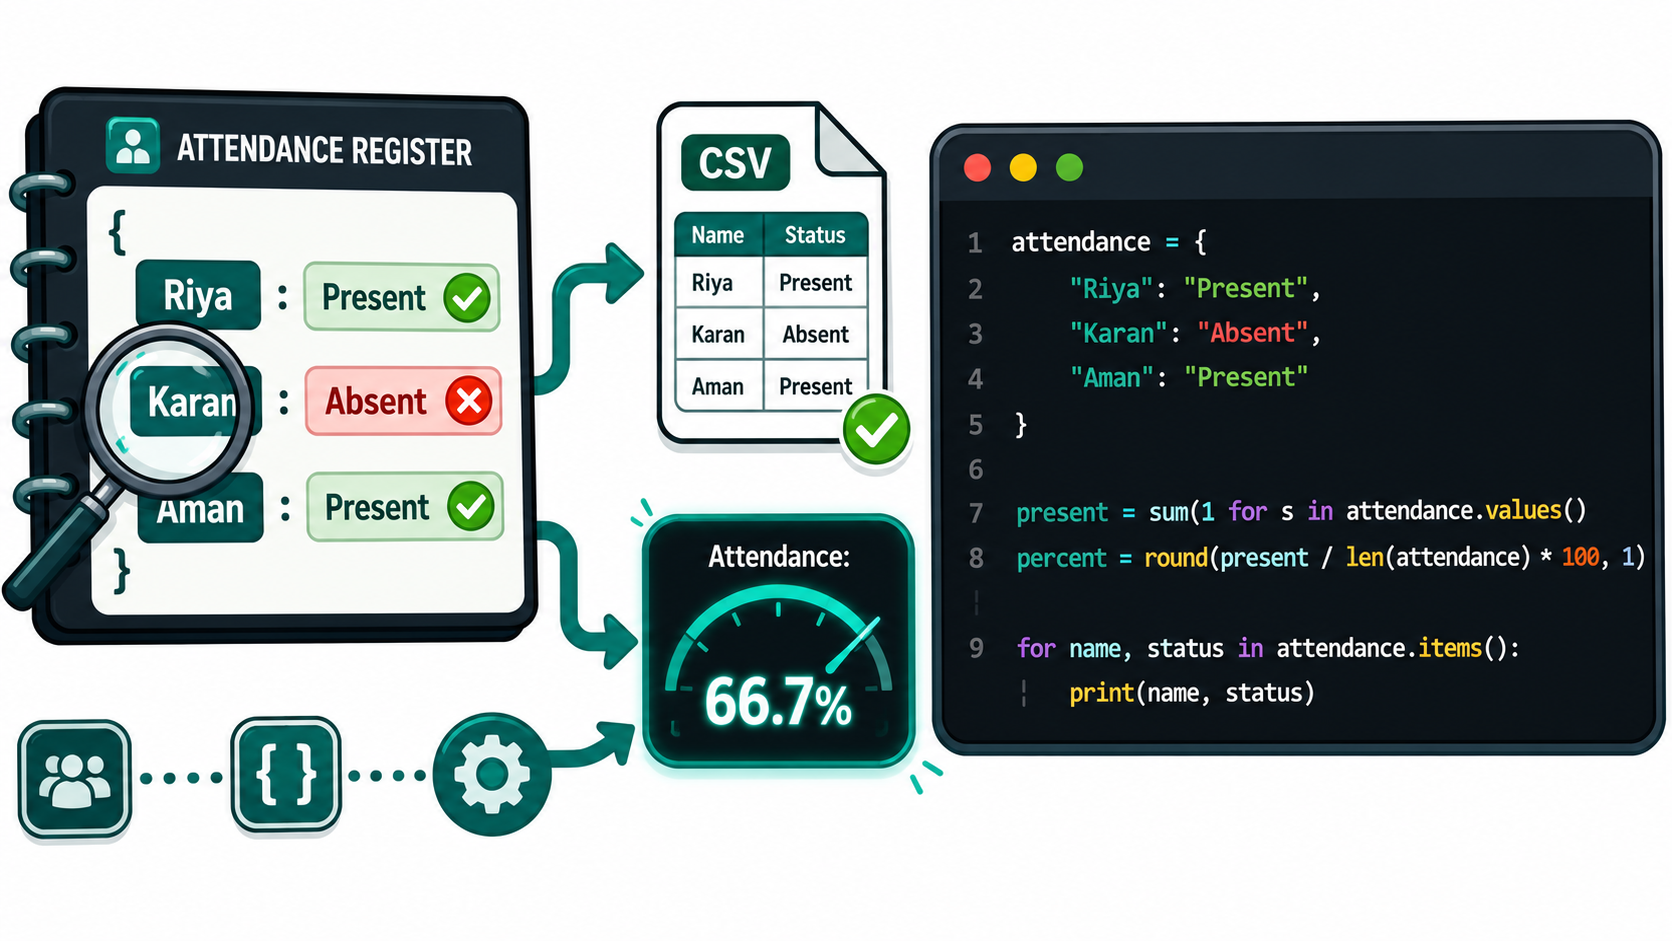
Mark, calculate, save — and find who's absent! This capstone project brings together nearly everything from the course: dictionaries, loops, math, and file I/O in one real, working program. Attendance is stored as a dictionary mapping each student's name to "Present" or "Absent", and a single for name, status in attendance.items(): loop does double duty — counting how many are present AND writing each student's row into an attendance.csv file at the same time. Students calculate the attendance percentage with round(present / total * 100, 1), then level up by reading the saved file back — skipping the header with lines[1:], splitting each row with .split(",") — to build a list of exactly who was absent. Upgrades (a date column, live teacher input, a best-attendance function, a present list), a quiz, and a common-errors guide (ZeroDivisionError, forgetting to skip the header, overwriting saved data with "w") complete this real school-software mini-project. Class 6–8 · Python Programming.
- Teacher: First Admin
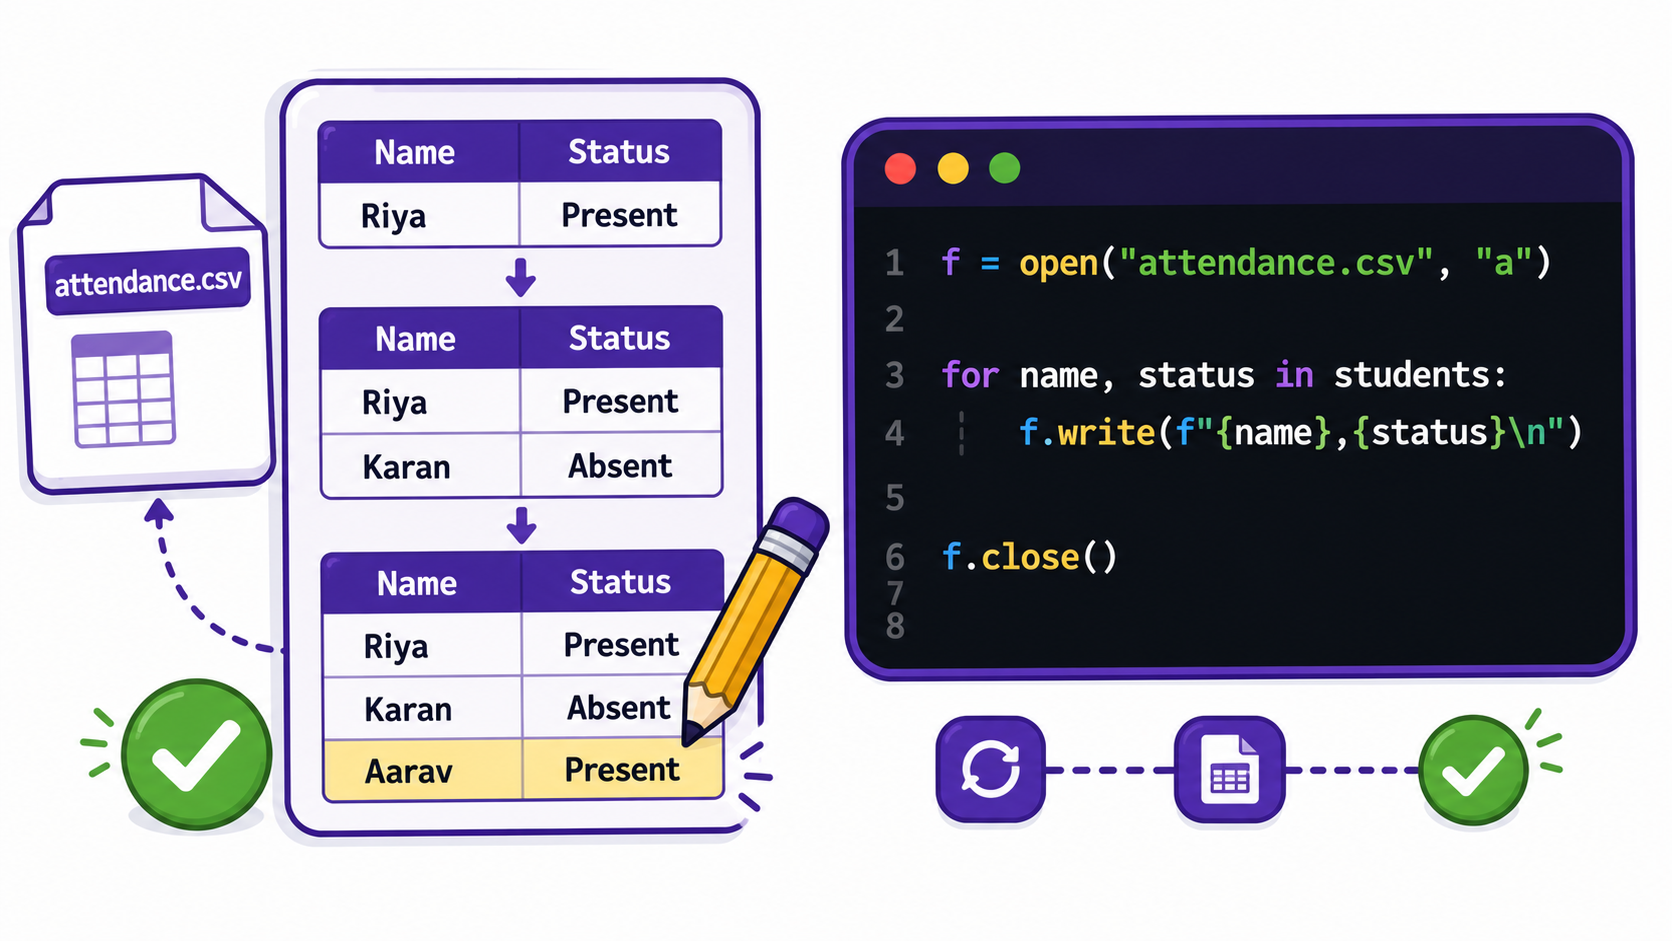
write() and append mode — save attendance to CSV! This lesson teaches how to make data outlive a program by writing it to a file. Students learn "w" mode opens a file for writing — creating it if needed, but ERASING all old content if it already exists — while "a" (append) mode adds new content to the END without touching what's already there. They discover that .write() writes exactly the string given, with no automatic newline (unlike print()), so "\n" must be added by hand, and learn the CSV format: comma-separated values, one row per line, with a header row naming each column. The capstone activity writes a header with "w", appends two students' attendance with "a", then reads the file back with "r" to confirm it saved correctly — proving "w" starts fresh while "a" builds on top. Students then upgrade to a for loop with f-strings (f"{name},{status}\n") to write any number of rows at once, just like a real attendance system. Upgrades (a date column, a present-count, an overwrite confirmation), a "w" vs "a" quiz, and a common-errors guide round out the lesson. Class 6–8 · Python Programming.
- Teacher: First Admin
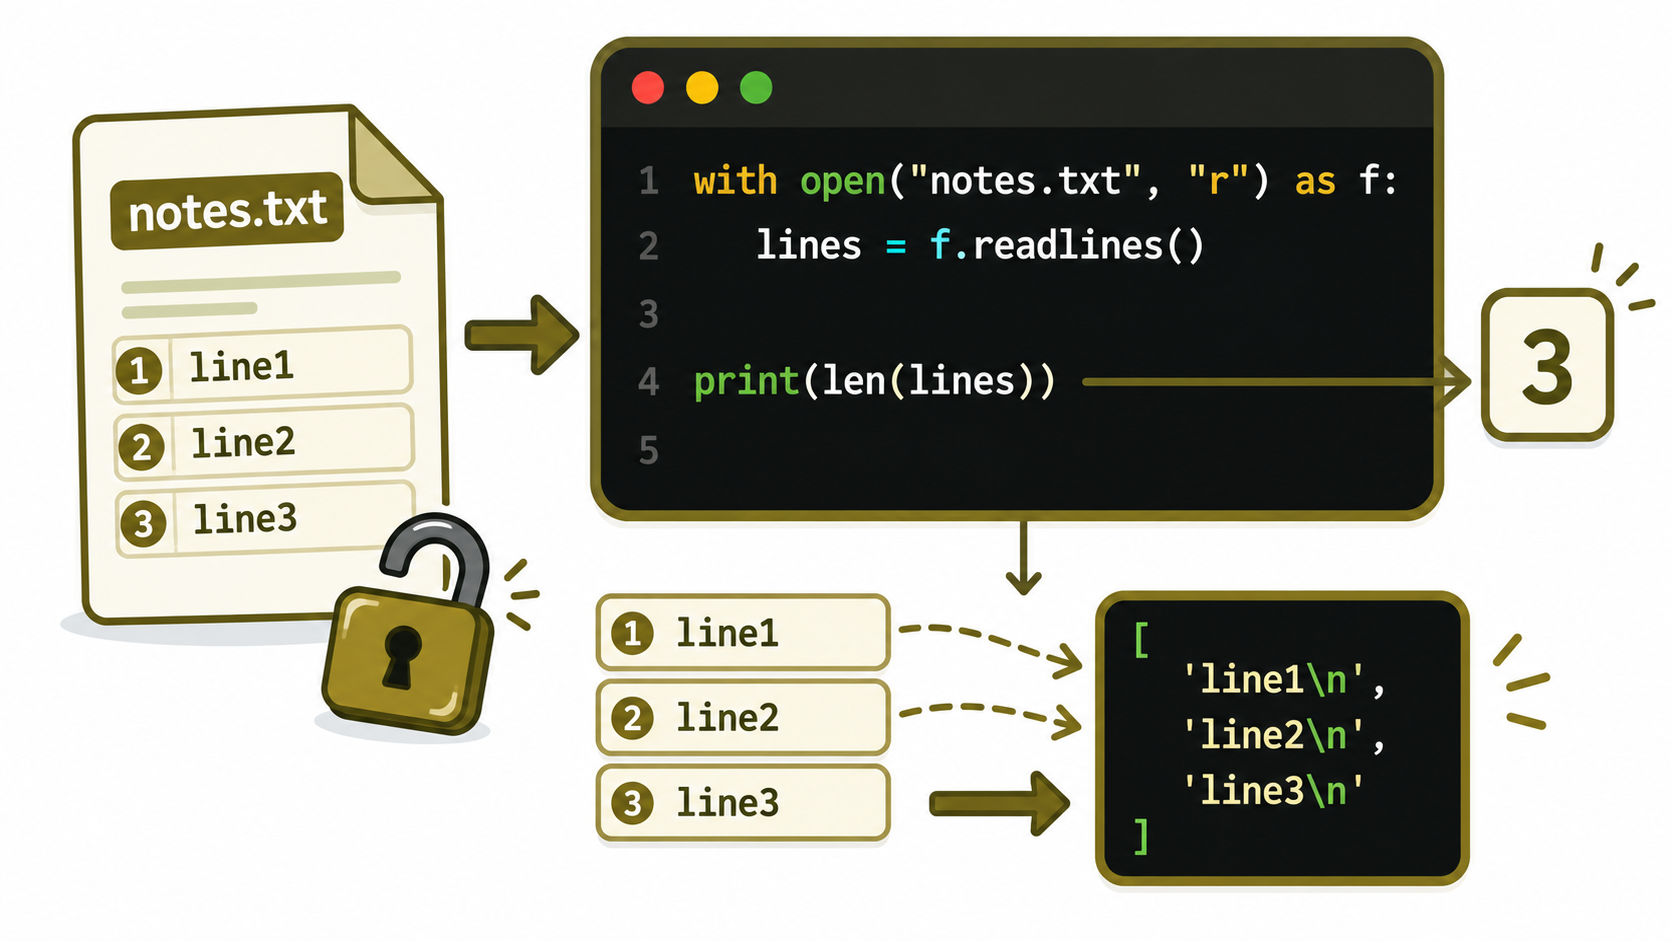
open(), read(), readlines() — count the lines! This lesson brings outside text into a Python program by reading a file. Students learn open("notes.txt", "r") connects Python to a file in read mode, returning a file object. From there, .read() grabs the WHOLE file as one long string (great for printing, but len() on it only counts characters), while .readlines() splits the file into a LIST — one string per line — so len(lines) gives the actual line count. The capstone activity opens a file, reads all its lines, and prints the total (3 lines counted in one line of code), while always remembering to .close() the file afterward. Students then meet the safer, more Pythonic pattern with open(...) as f:, which closes the file automatically — even if an error happens inside. Upgrades (counting characters too, numbering each line, stripping \n, counting blank lines), a read()-vs-readlines() quiz, and a common-errors guide (FileNotFoundError, forgetting to close, confusing char count with line count) round out the lesson. Class 6–8 · Python Programming.
- Teacher: First Admin
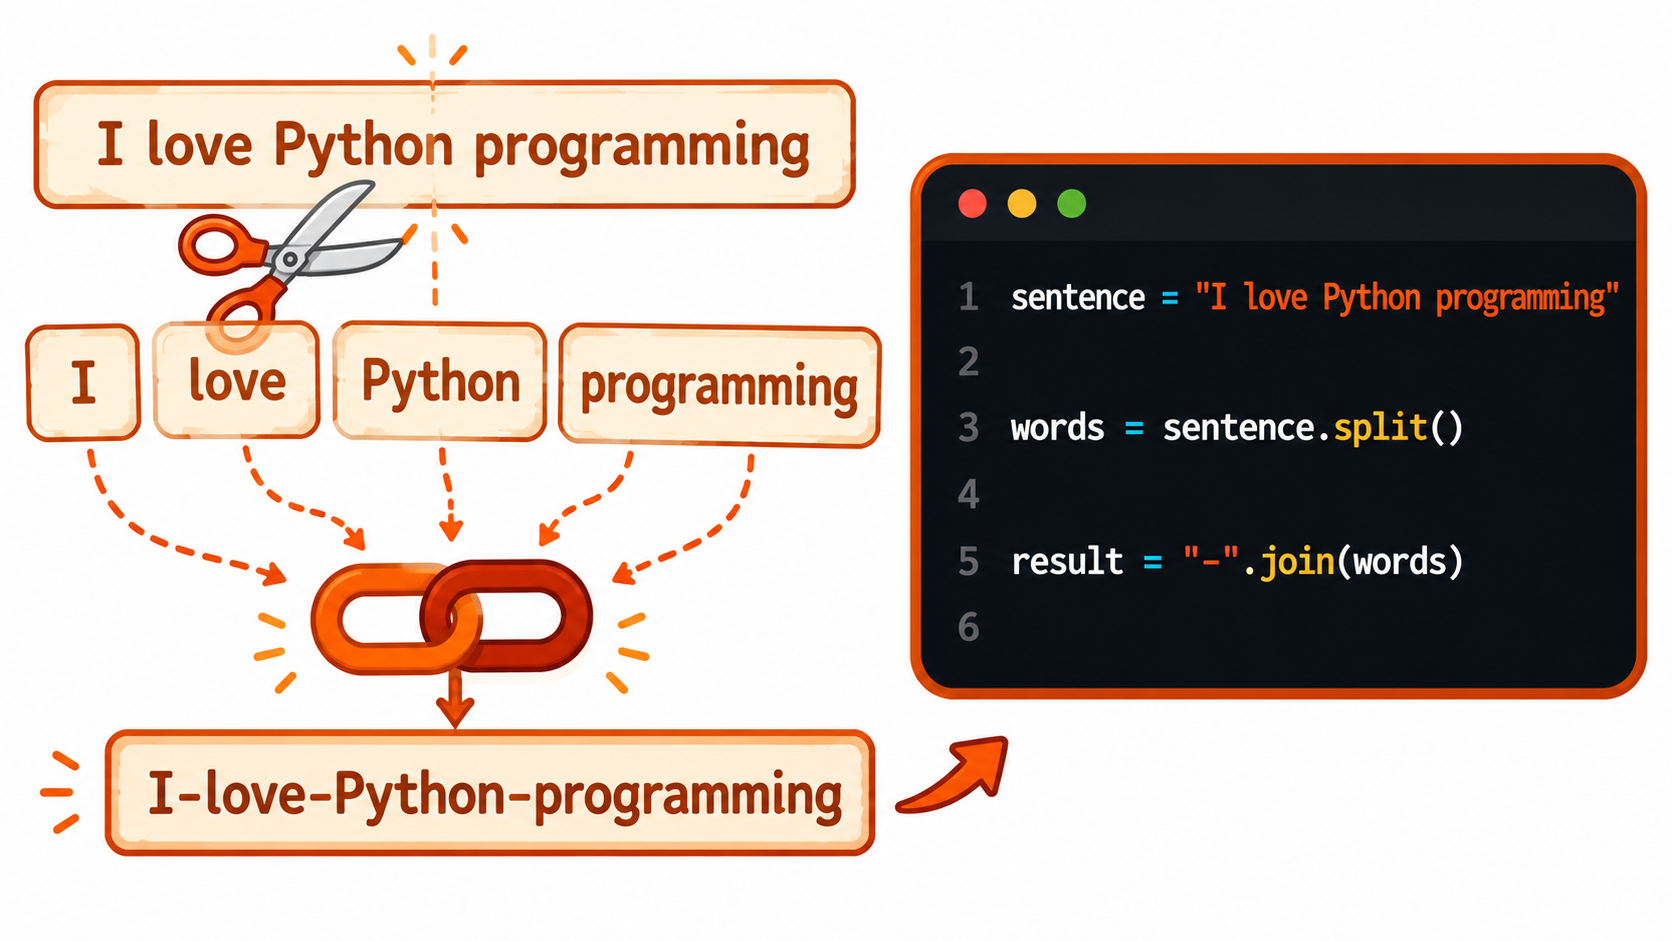
Split a sentence, then join with hyphens! This lesson covers two mirror-image string methods: .split() breaks a string into a list of words (using spaces by default, or any character like a comma), while .join() does the reverse — combining a list of strings back into one, with sep.join(list) placing the chosen separator between each item. Students see that .split() turns a string into a LIST and .join() turns a list back into a STRING, and that changing the separator changes the look entirely (-, _, " and ", even nothing at all). The capstone activity splits "I love Python programming" into 4 words, counts them with len(), and rejoins them as "I-love-Python-programming" — proving split() and join() are perfect opposites. Upgrades (fancy separators, splitting a name on a comma, reversing word order, building a hashtag), a quiz, and a common-errors guide (calling join() on the wrong thing, forgetting split() returns a list, joining numbers) round out the lesson. Class 6–8 · Python Programming.
- Teacher: First Admin
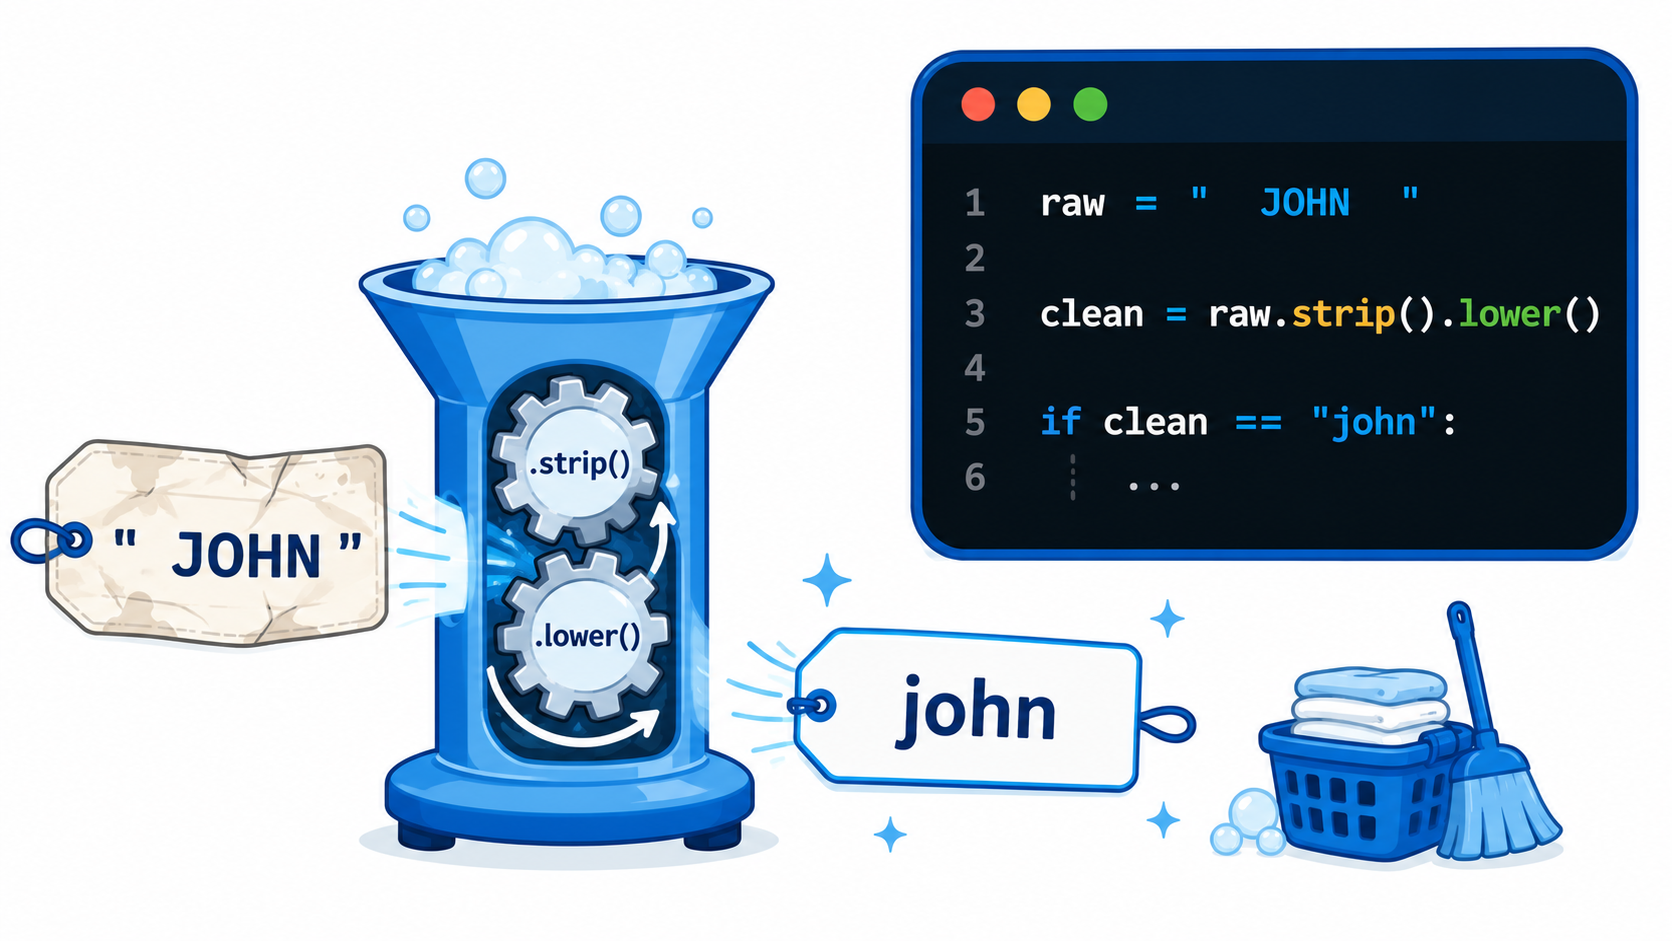
Clean up messy user input! People type the same word in wildly different ways — "John", " John", "JOHN", "john " — but Python treats every one as a completely different string, comparing character by character including spaces. This lesson introduces three essential cleaning tools: .upper() (turns text ALL CAPS), .lower() (turns text all lowercase), and .strip() (removes spaces from the start and end only — not the middle). Students learn that all three return a brand-new string, leaving the original variable untouched, and build an activity that takes raw input, cleans it with raw.strip().lower(), and checks it against a stored value — proving that " JOHN " and "john" now match. They master chaining methods together in one line, then explore upgrades like cleaning an email, using .capitalize(), and catching empty input. A quiz and common-errors guide (forgetting the parentheses, expecting strip() to clean the middle, forgetting to reassign the result) round out the lesson. Class 6–8 · Python Programming.
- Teacher: First Admin
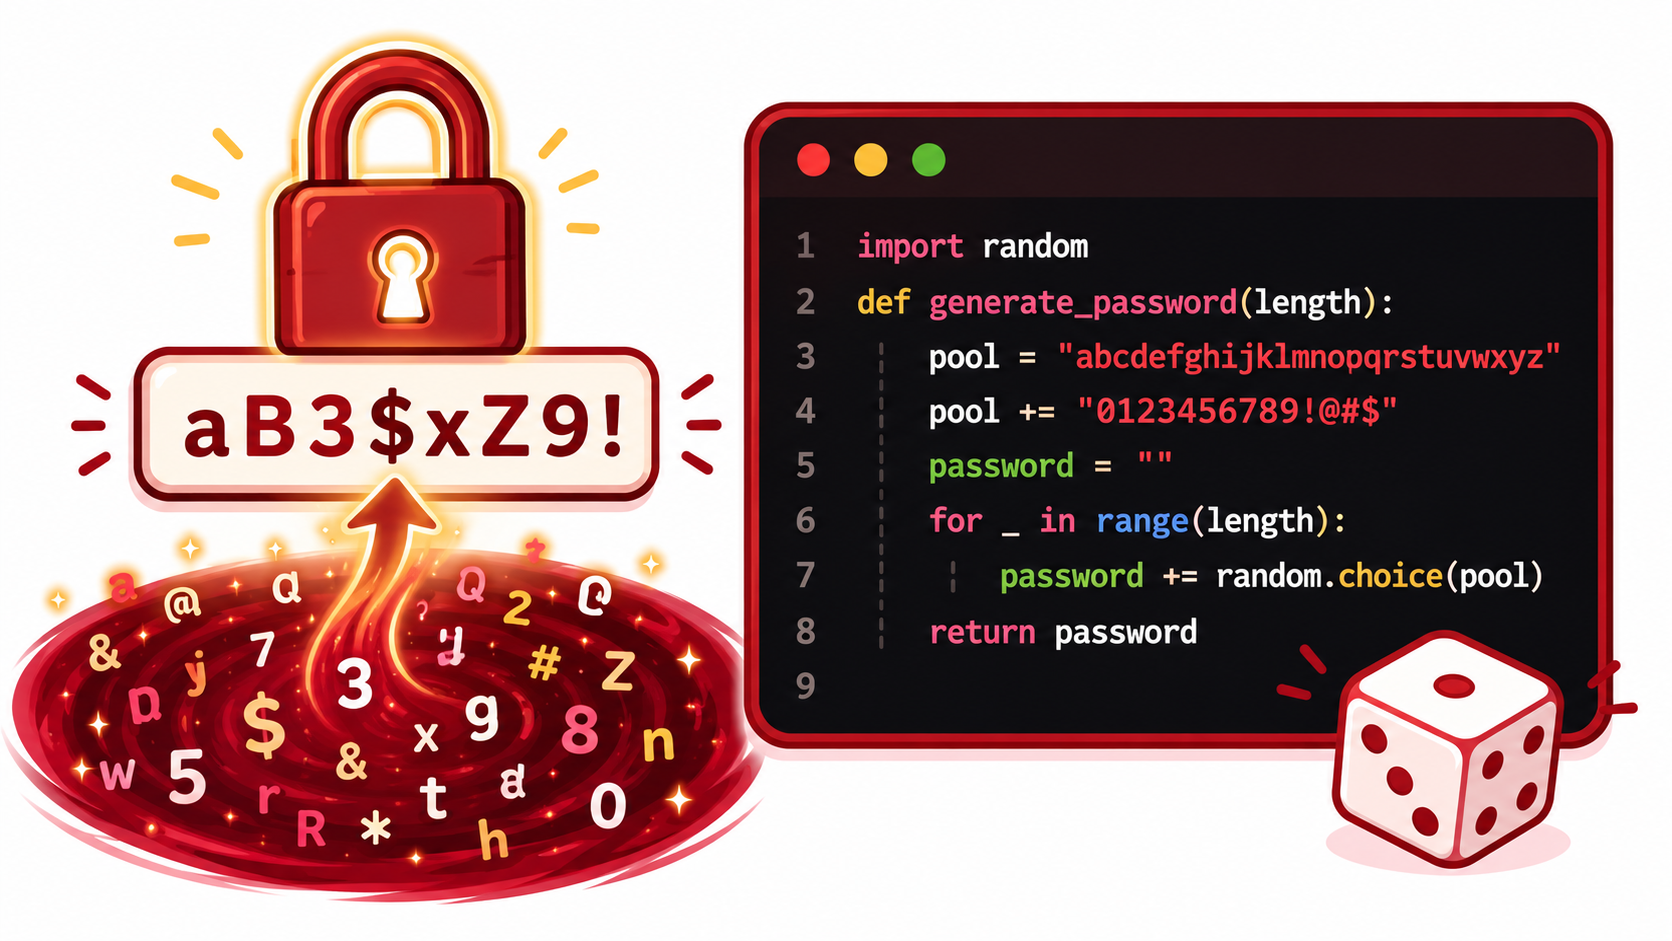
Create strong passwords with random characters! In this capstone project, students build a real password generator that combines nearly everything they've learned. They start with a character pool — letters, digits, and symbols joined together (pool = letters + digits + symbols) — and use random.choice(pool) to pick one random character at a time. A for loop repeats this length times to build up the password character by character, and turning the fixed number into a length parameter makes the function generate_password(length) reusable for any size. The function returns the finished password, so calling generate_password(8) gives a fresh result like "aB3$xZ9!" every single run. Students learn why import random is required at the top of the file (recalling it from the Guessing Game project), then extend the generator — guaranteeing a digit, avoiding confusing letters like l/1/O/0, generating several passwords to choose from, or letting the user pick the length. A quiz and common-errors guide complete the lesson.
- Teacher: First Admin
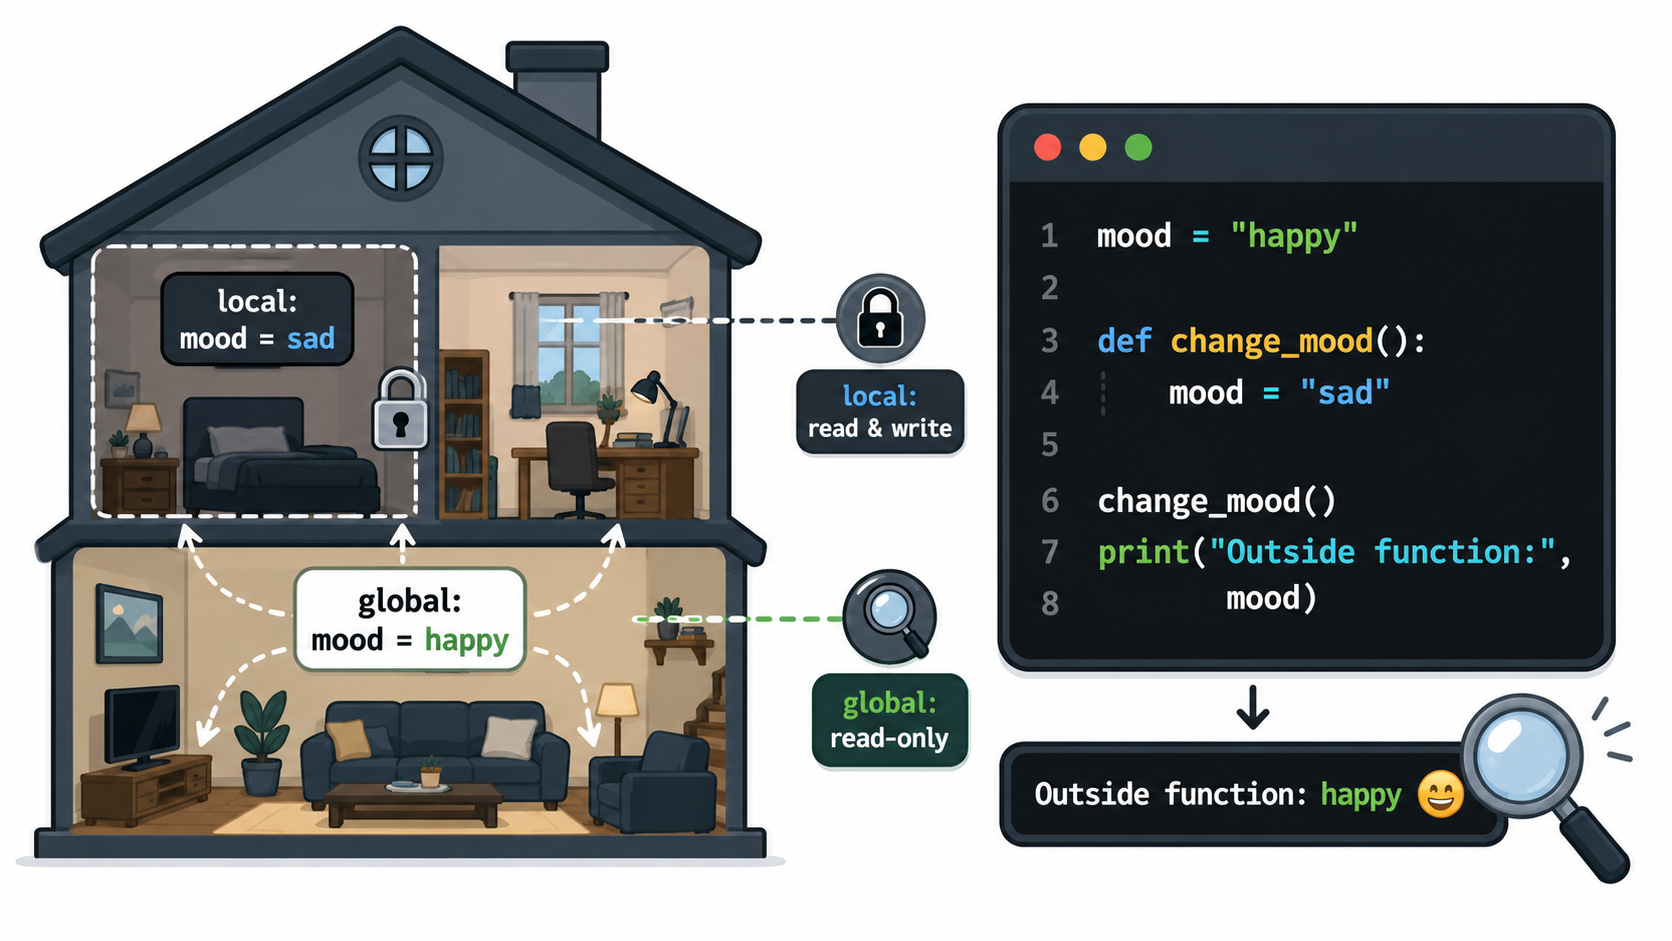
Experiment with variables inside and outside! This lesson tackles scope — where a variable can be used — through the house analogy: a local variable is like your bedroom stuff (only yours, only exists inside its function), while a global variable is like the living room (visible everywhere). Students see that local variables reset fresh on every function call, that functions can freely READ a global variable, and the classic surprise: assigning to a variable inside a function creates a brand-new LOCAL copy, leaving the global one completely untouched. Through a "mood" experiment — one global variable, two functions — students trace exactly what each function sees, discovering the global is only ever read, never truly changed. They then meet the global keyword for the rare case a real change is needed, learning that parameters and return are usually the cleaner choice. A quiz, upgrades, and a common-errors guide round out the lesson. Class 6–8 · Python Programming.
- Teacher: First Admin
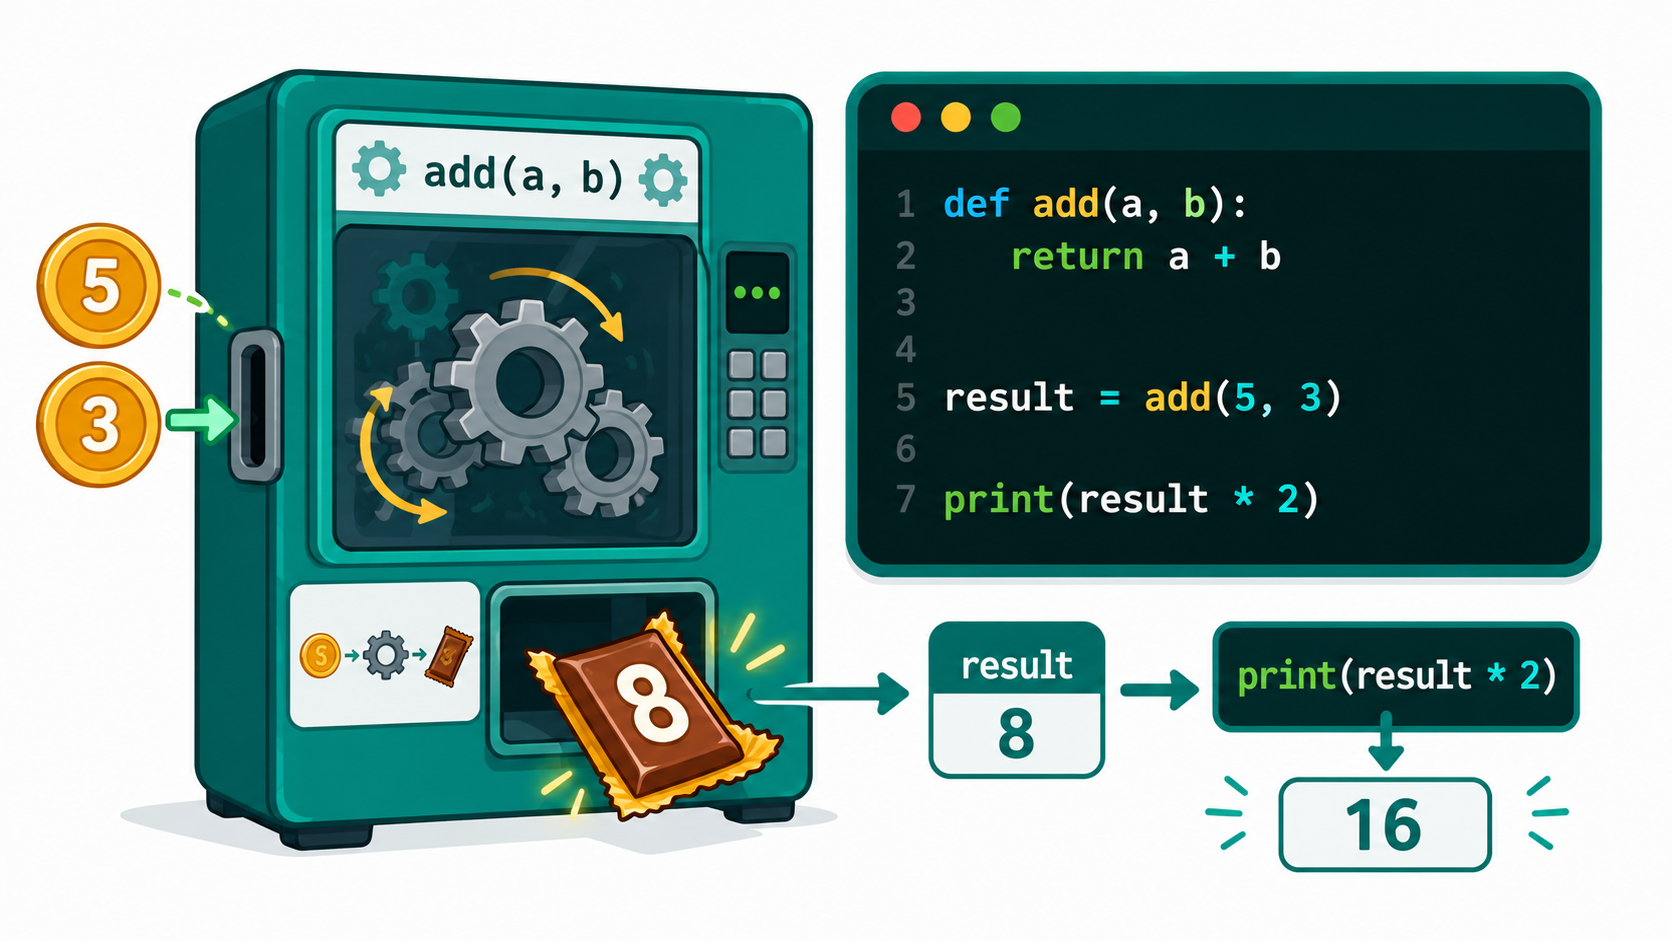
Add two numbers and return the result! This lesson introduces return — the keyword that hands a value BACK from a function so your code can reuse it, unlike print() which only displays it on screen and then the value is gone. Using the vending-machine analogy (arguments in, function works, return value out), students learn the return keyword, how to catch the returned value with result = add(5, 3), and how to use that stored result just like any normal variable — multiplying it, adding to it, or printing it again. The capstone activity defines add(a, b) once and reuses it for two different sums, proving each call computes and returns its own separate answer. Students also learn a key gotcha: return ends the function immediately, so any code written after it in the same function never runs. With upgrades (subtract, multiply, chaining calls, returning text), a print()-vs-return quiz, and a common-errors guide, students write functions that hand back real, reusable answers. Class 6–8 · Python Programming.
- Teacher: First Admin
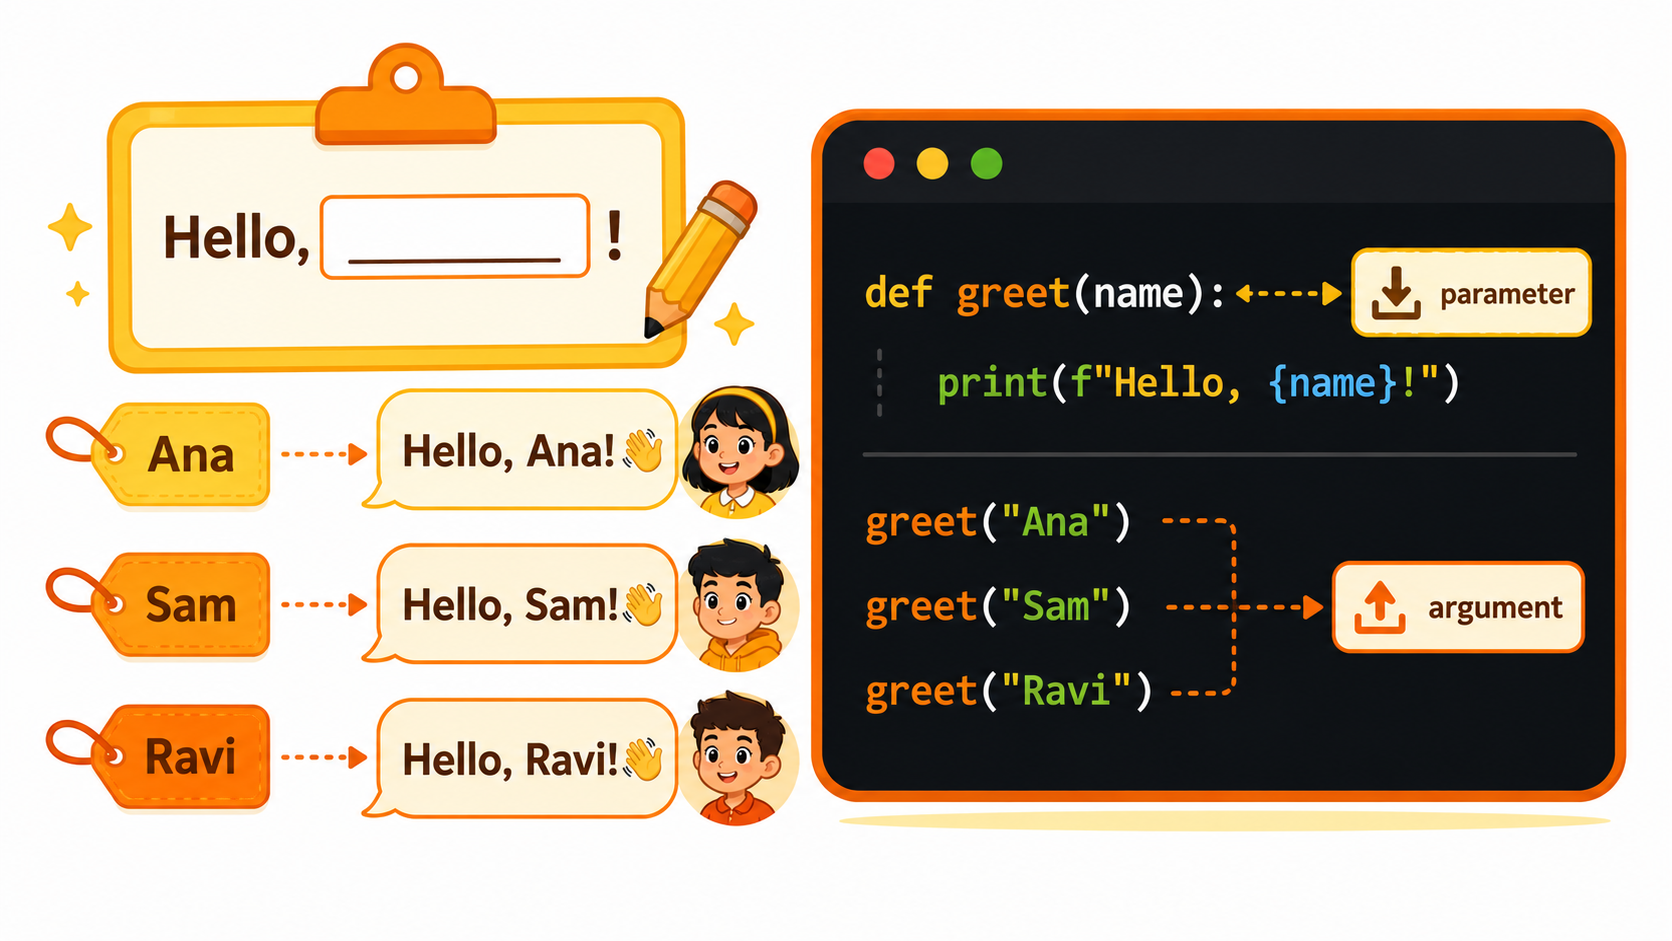
Greet any user by name! This lesson upgrades a plain greet() function into one that can address anyone, using parameters and arguments — two related but distinct ideas students learn to tell apart. A parameter (like name in def greet(name) is a placeholder written into the function's definition; an argument (like "Ana" in greet("Ana")) is the real value supplied at the call, just like filling in a blank on a form. Students add a parameter, use it inside the function body with string concatenation ("Hello, " + name + "!"), and call the same function with different arguments — greet("Ana"), greet("Sam"), greet("Ravi") — to see the same code produce different results. They then extend to multiple parameters (def greet(name, age), learning that arguments must match parameter order. Upgrades (emojis, a grade parameter, a peek at default values, greeting a whole list), a matching quiz, and a common-errors guide round out the lesson. Class 6–8 · Python Programming
- Teacher: First Admin
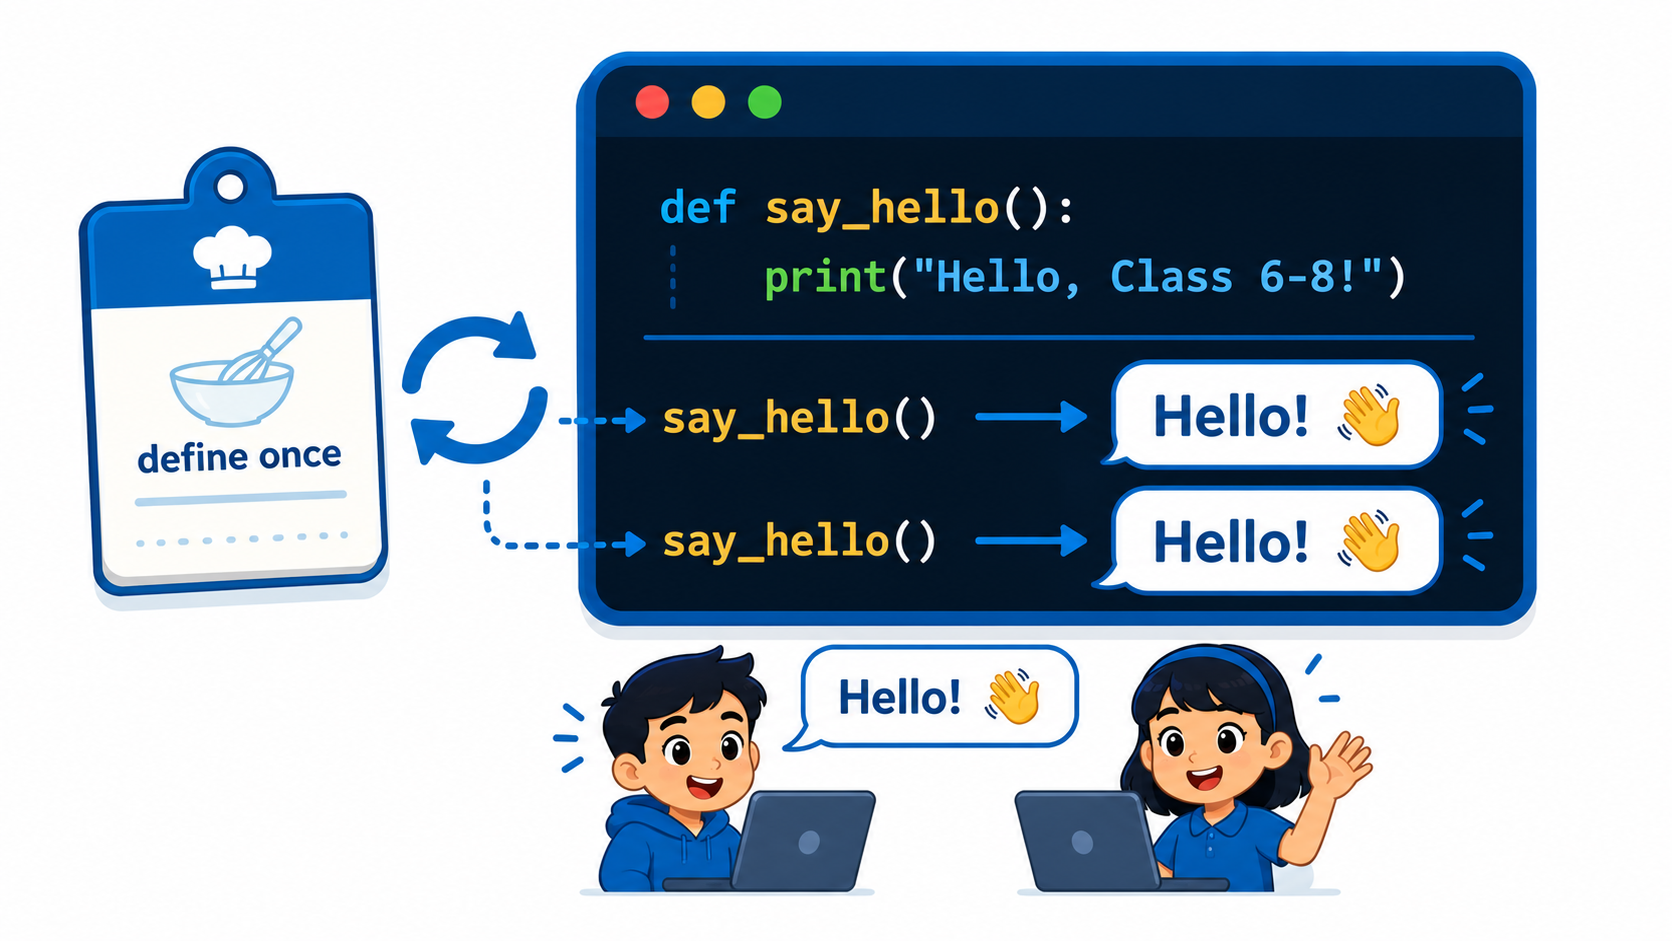
Write a function that says hello! This lesson introduces one of programming's biggest ideas — the function: a named set of instructions you write once and use again and again, like a recipe. Students learn the def keyword and the shape of a definition (def + a name +  + a colon + an indented body), and the crucial distinction that defining a function doesn't run it — only calling it with name() does. They discover that a function must be defined before it's called (or Python raises a NameError), then build a say_hello() function with a two-line body and call it twice — no retyping. With the power of reusable code (fix a bug once, every call benefits), upgrades (custom messages, emojis, longer bodies, a peek at parameters), a "define or call?" quiz, and a common-errors guide, students write and run their very first Python functions. Class 6–8 · Python Programming.
- Teacher: First Admin
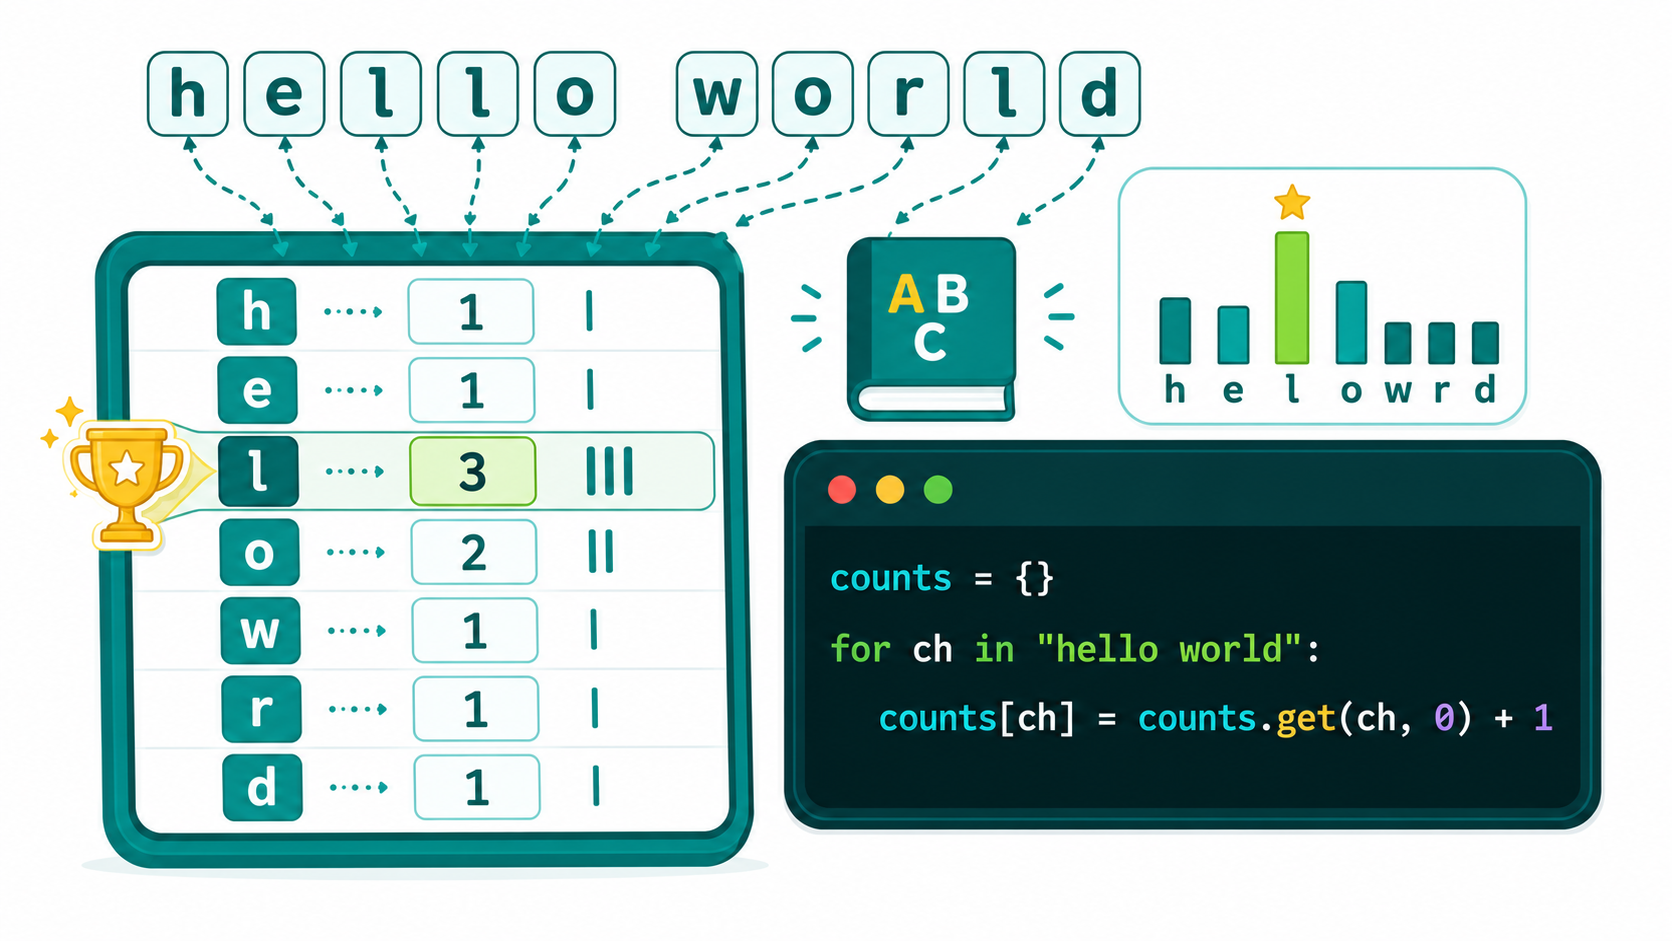
Count letters and find the most frequent! In this capstone project, students build a Word Counter that tallies how often each letter appears in a sentence and then crowns the winner. They learn that a string can be looped one character at a time (for ch in sentence, and that a dictionary is the perfect place to keep a running tally — a new letter starts at 1, a repeated letter adds one more. Students master both the if/else way and the neat counts.get(ch, 0) + 1 shortcut, skip spaces while counting, then find the most frequent letter by comparing each count against a best variable (started at None). The full activity counts every letter in "hello world" and reports that 'l' appears 3 times. Upgrades (ignore case, skip punctuation, count whole words, show the top 3), a "banana" quiz, and a common-errors guide round it out. Combines strings, dictionaries, loops, and comparisons. Class 6–8 · Python Programming.
- Teacher: First Admin
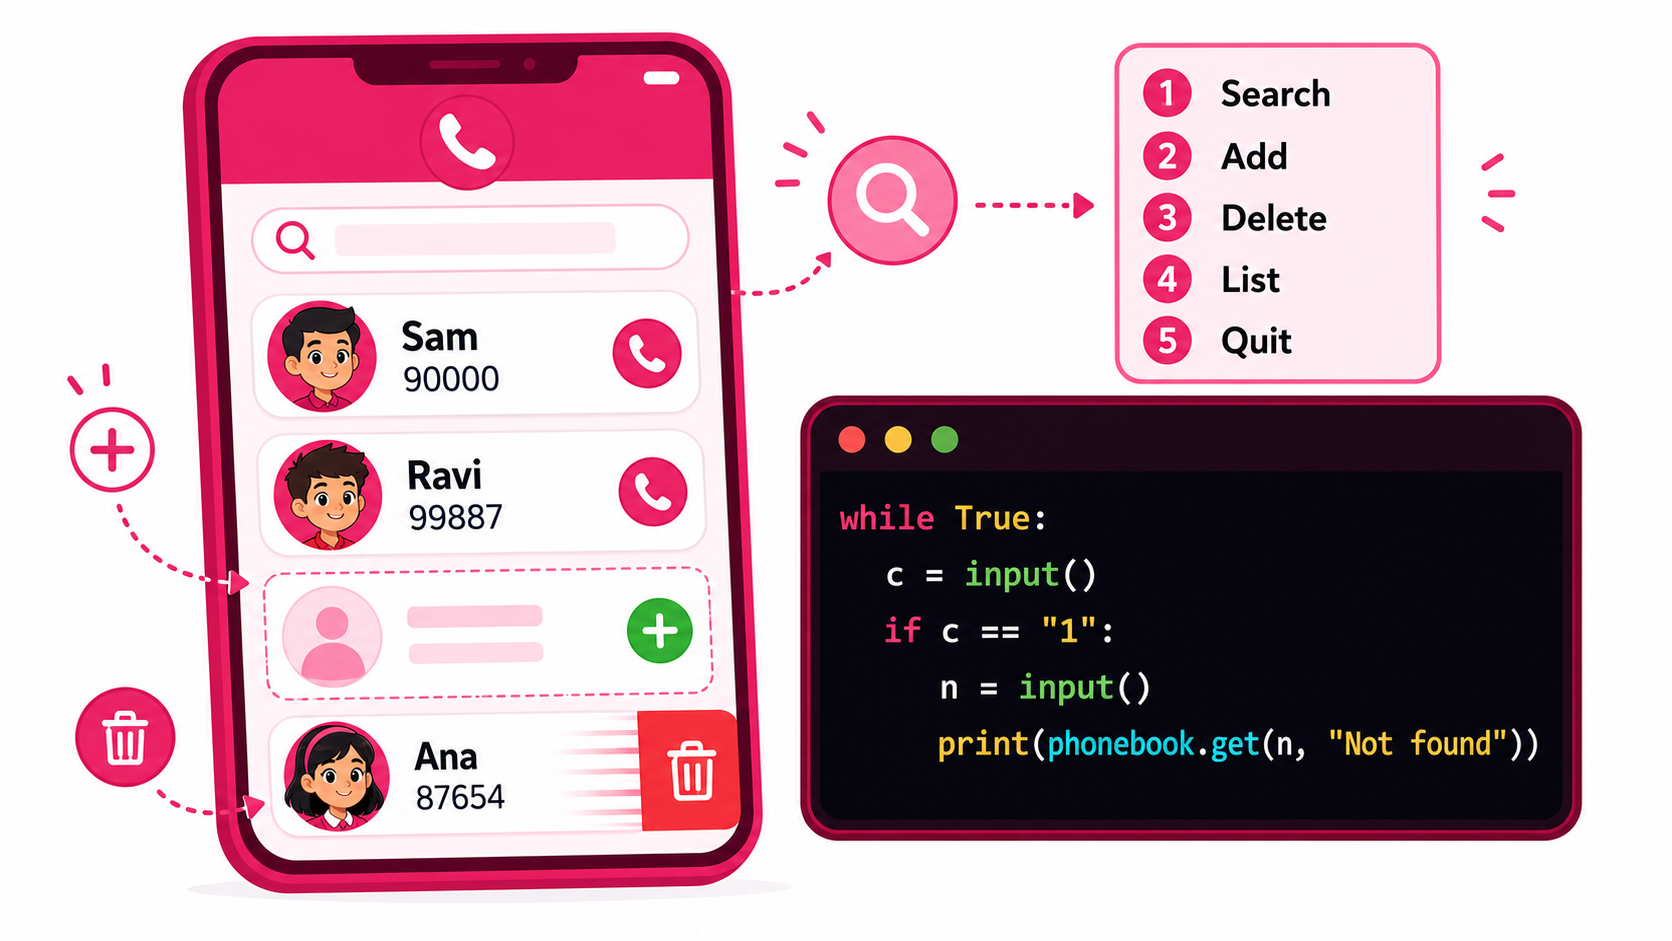
Search, add, delete, and list contacts! In this capstone project, students build a complete menu-driven Phonebook App that ties together everything they've learned about dictionaries. Contacts are stored in one dictionary (the name is the key, the number is the value), and a while True menu loop shows five numbered choices again and again until the user quits. An if/elif chain runs the chosen action: search a contact (checking with "in" or the safe phonebook.get(name, "Not found")), add one (phonebook[name] = number), delete one safely (if name in phonebook: del …), and list all with a for loop. Students learn the crucial safety habit of always checking "in" before reading or deleting so a missing name never crashes with a KeyError, trace a sample session as the dictionary changes, then make it their own with case-insensitive search, a contact count, a delete confirmation, or a sorted A–Z list. Combines dictionaries, loops, conditionals, and input. Class 6–8 · Python Programming.
- Teacher: First Admin
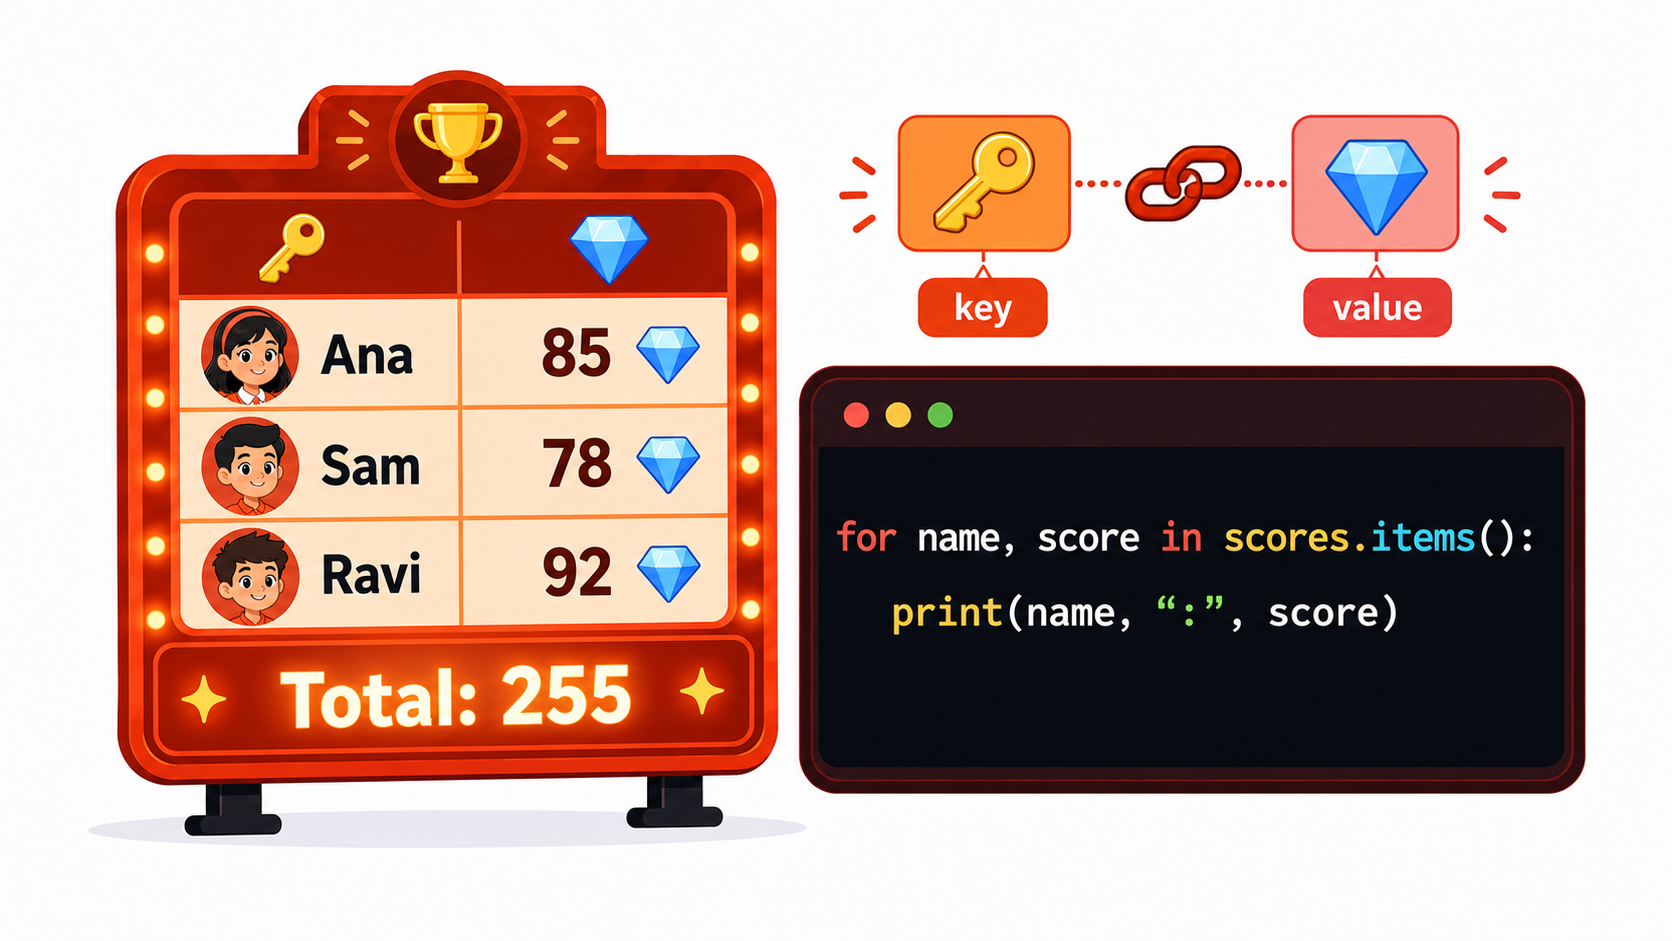
Print all keys and values! This lesson shows how to loop through a whole dictionary — not just fetch one value, but visit every entry. Students meet the three views: .keys() (just the names), .values() (just the numbers, great for sum(scores.values())), and .items() (each (key, value) pair together). They learn the cleanest and most common pattern — unpacking in the loop with for name, score in scores.items(): — so the key and value each get their own variable. The capstone activity prints every name and score from a scoreboard dictionary while keeping a running total (85 + 78 + 92 = 255), traced step by step. More tricks (enumerate(), sum(), sorted(), max()), upgrades (average, filtering, leaderboards), a "which method?" quiz, and a common-errors guide round it out. Class 6–8 · Python Programming.
- Teacher: First Admin
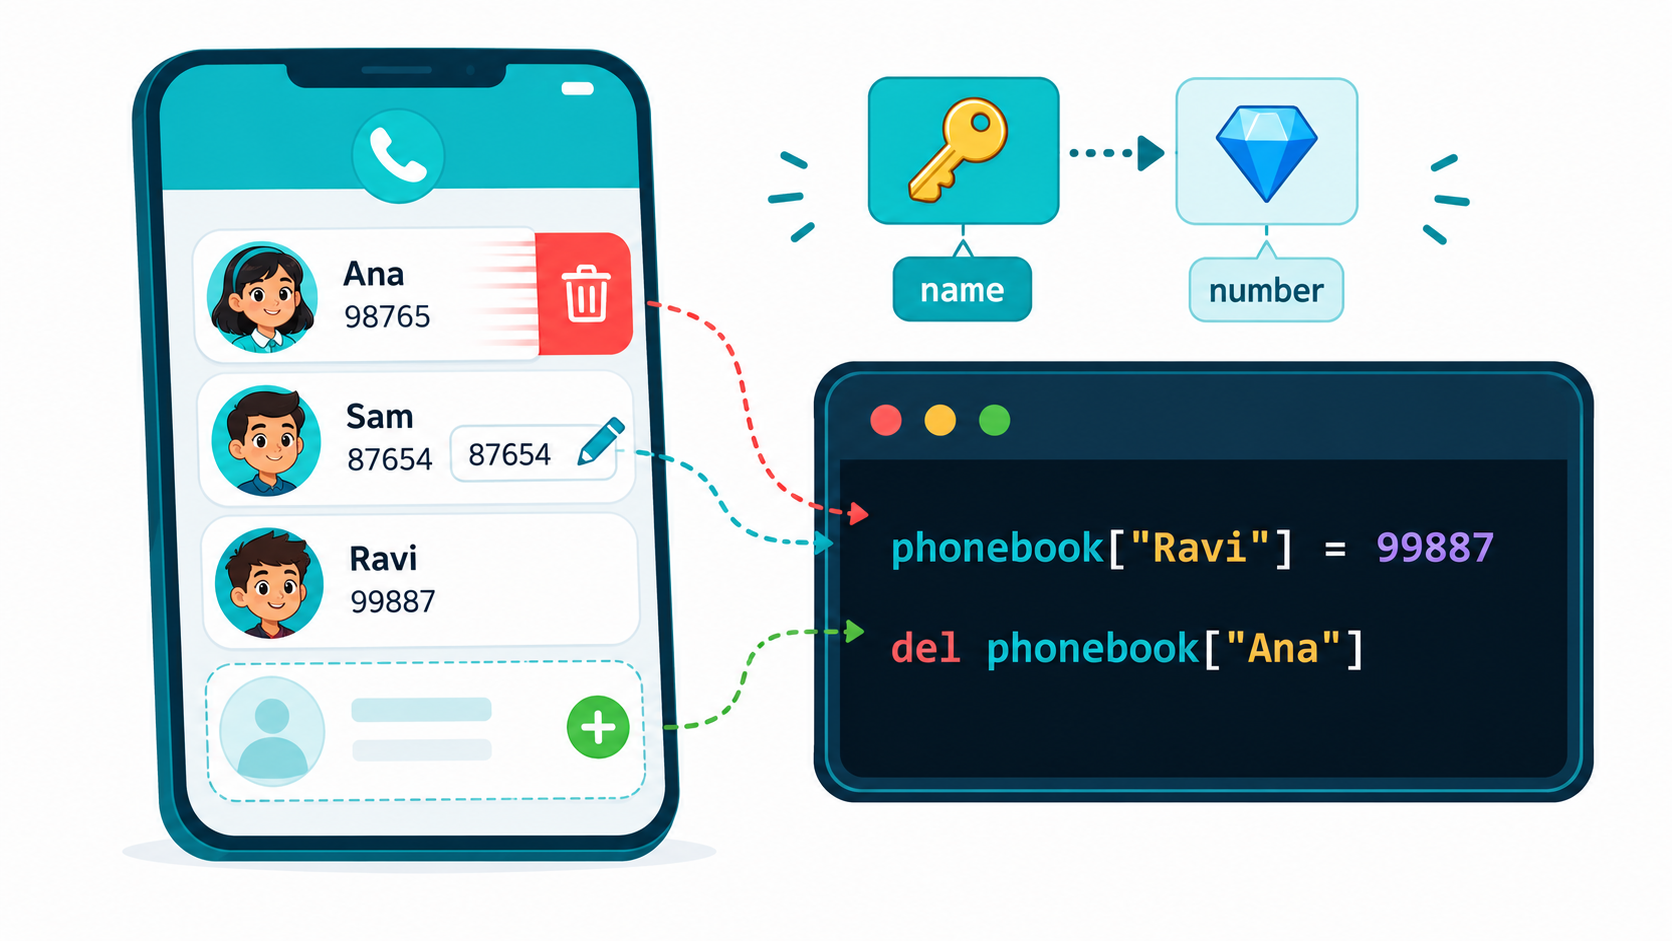
Build and manage a phonebook! This lesson uses a real-world phonebook — a dictionary that maps names to phone numbers — to teach how to change dictionaries after they're made. Students learn that adding a contact and updating a number use the exact same phonebook["name"] = number syntax: Python adds a brand-new key or updates an existing one depending on whether the key is already there. They then learn two ways to remove a contact — the del keyword (deletes the key-value pair) and pop() (deletes it AND hands back the value) — and the crucial safety habit of checking if "name" in phonebook: before deleting, so a missing key never crashes the program with a KeyError. The capstone activity combines add, update, and safe delete on one phonebook, and safe tools (in, get(), len(), pop(key, default)), a quiz, and a common-errors guide round it out. Class 6–8 · Python Programming
- Teacher: First Admin
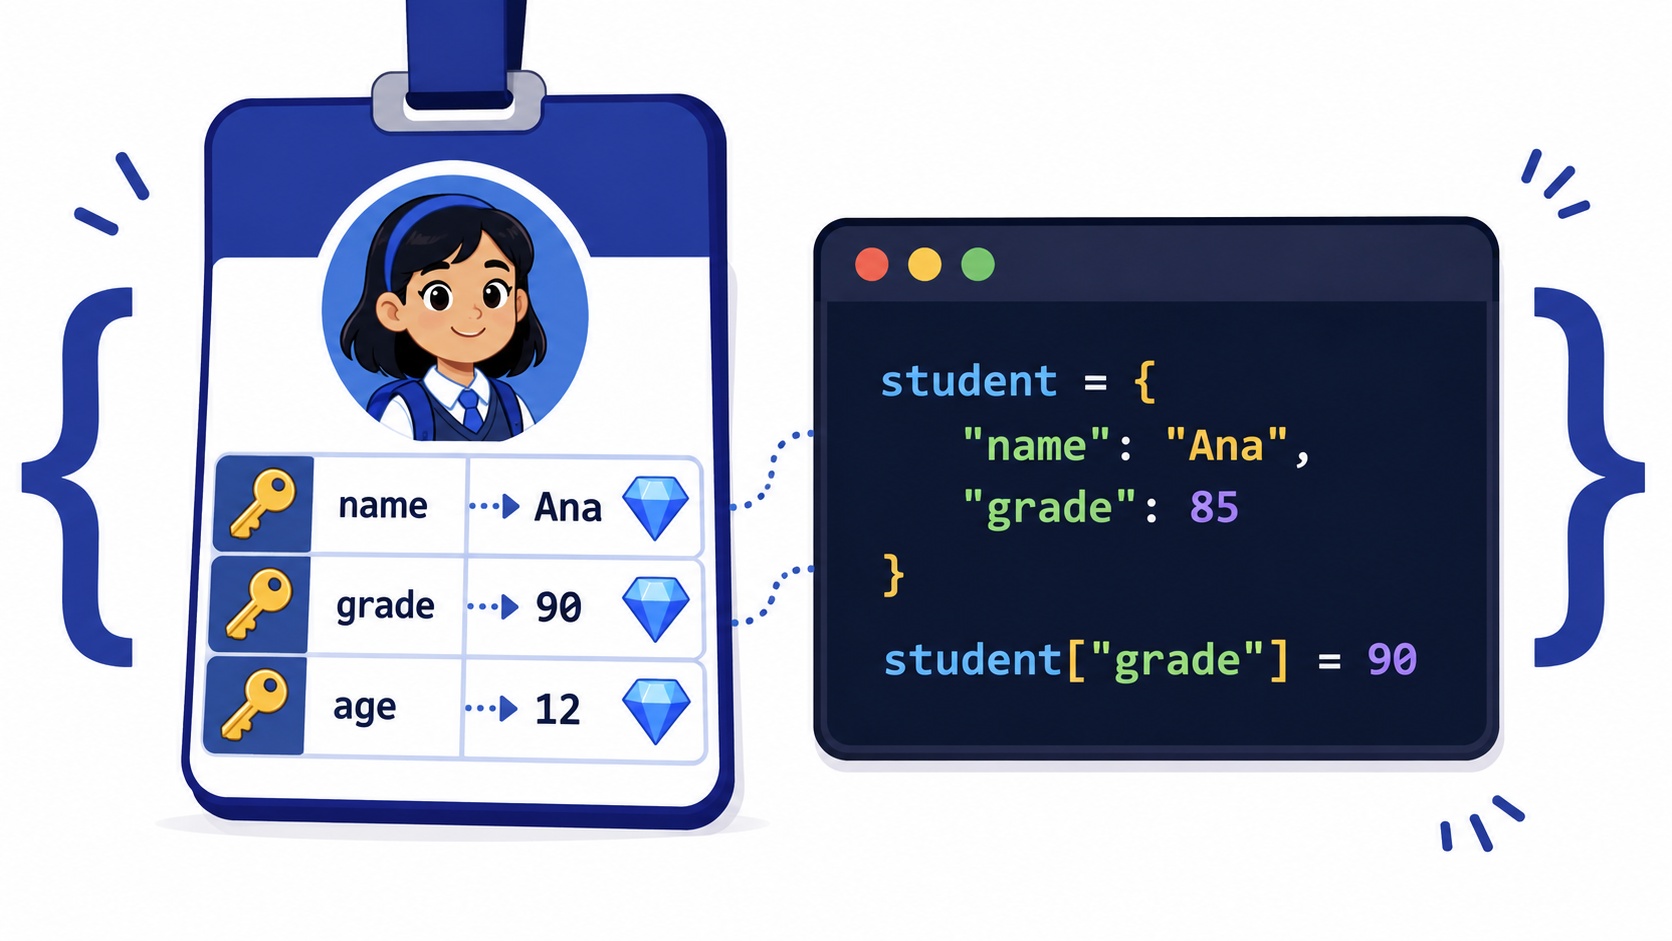
Build a student record! This lesson introduces dictionaries — a way to store information as key : value pairs, just like a school ID card where name → Ana and grade → 85. Unlike a list (which remembers items by position 0, 1, 2), a dictionary remembers by meaningful key names, so you fetch a value with student["name"] instead of a number. Students learn the syntax (curly braces { }, quoted string keys, a colon between key and value, commas between pairs), how to access values with [ ], and the neat trick that assigning to a key both ADDS a new key and CHANGES an existing one — Python decides based on whether the key already exists. They loop through a record with for key in student:, build a full student-record activity, and meet handy tools keys(), values(), items(), and the safe get() (which avoids a KeyError). Class 6–8 · Python Programming.
- Teacher: First Admin
- Teacher: First Admin
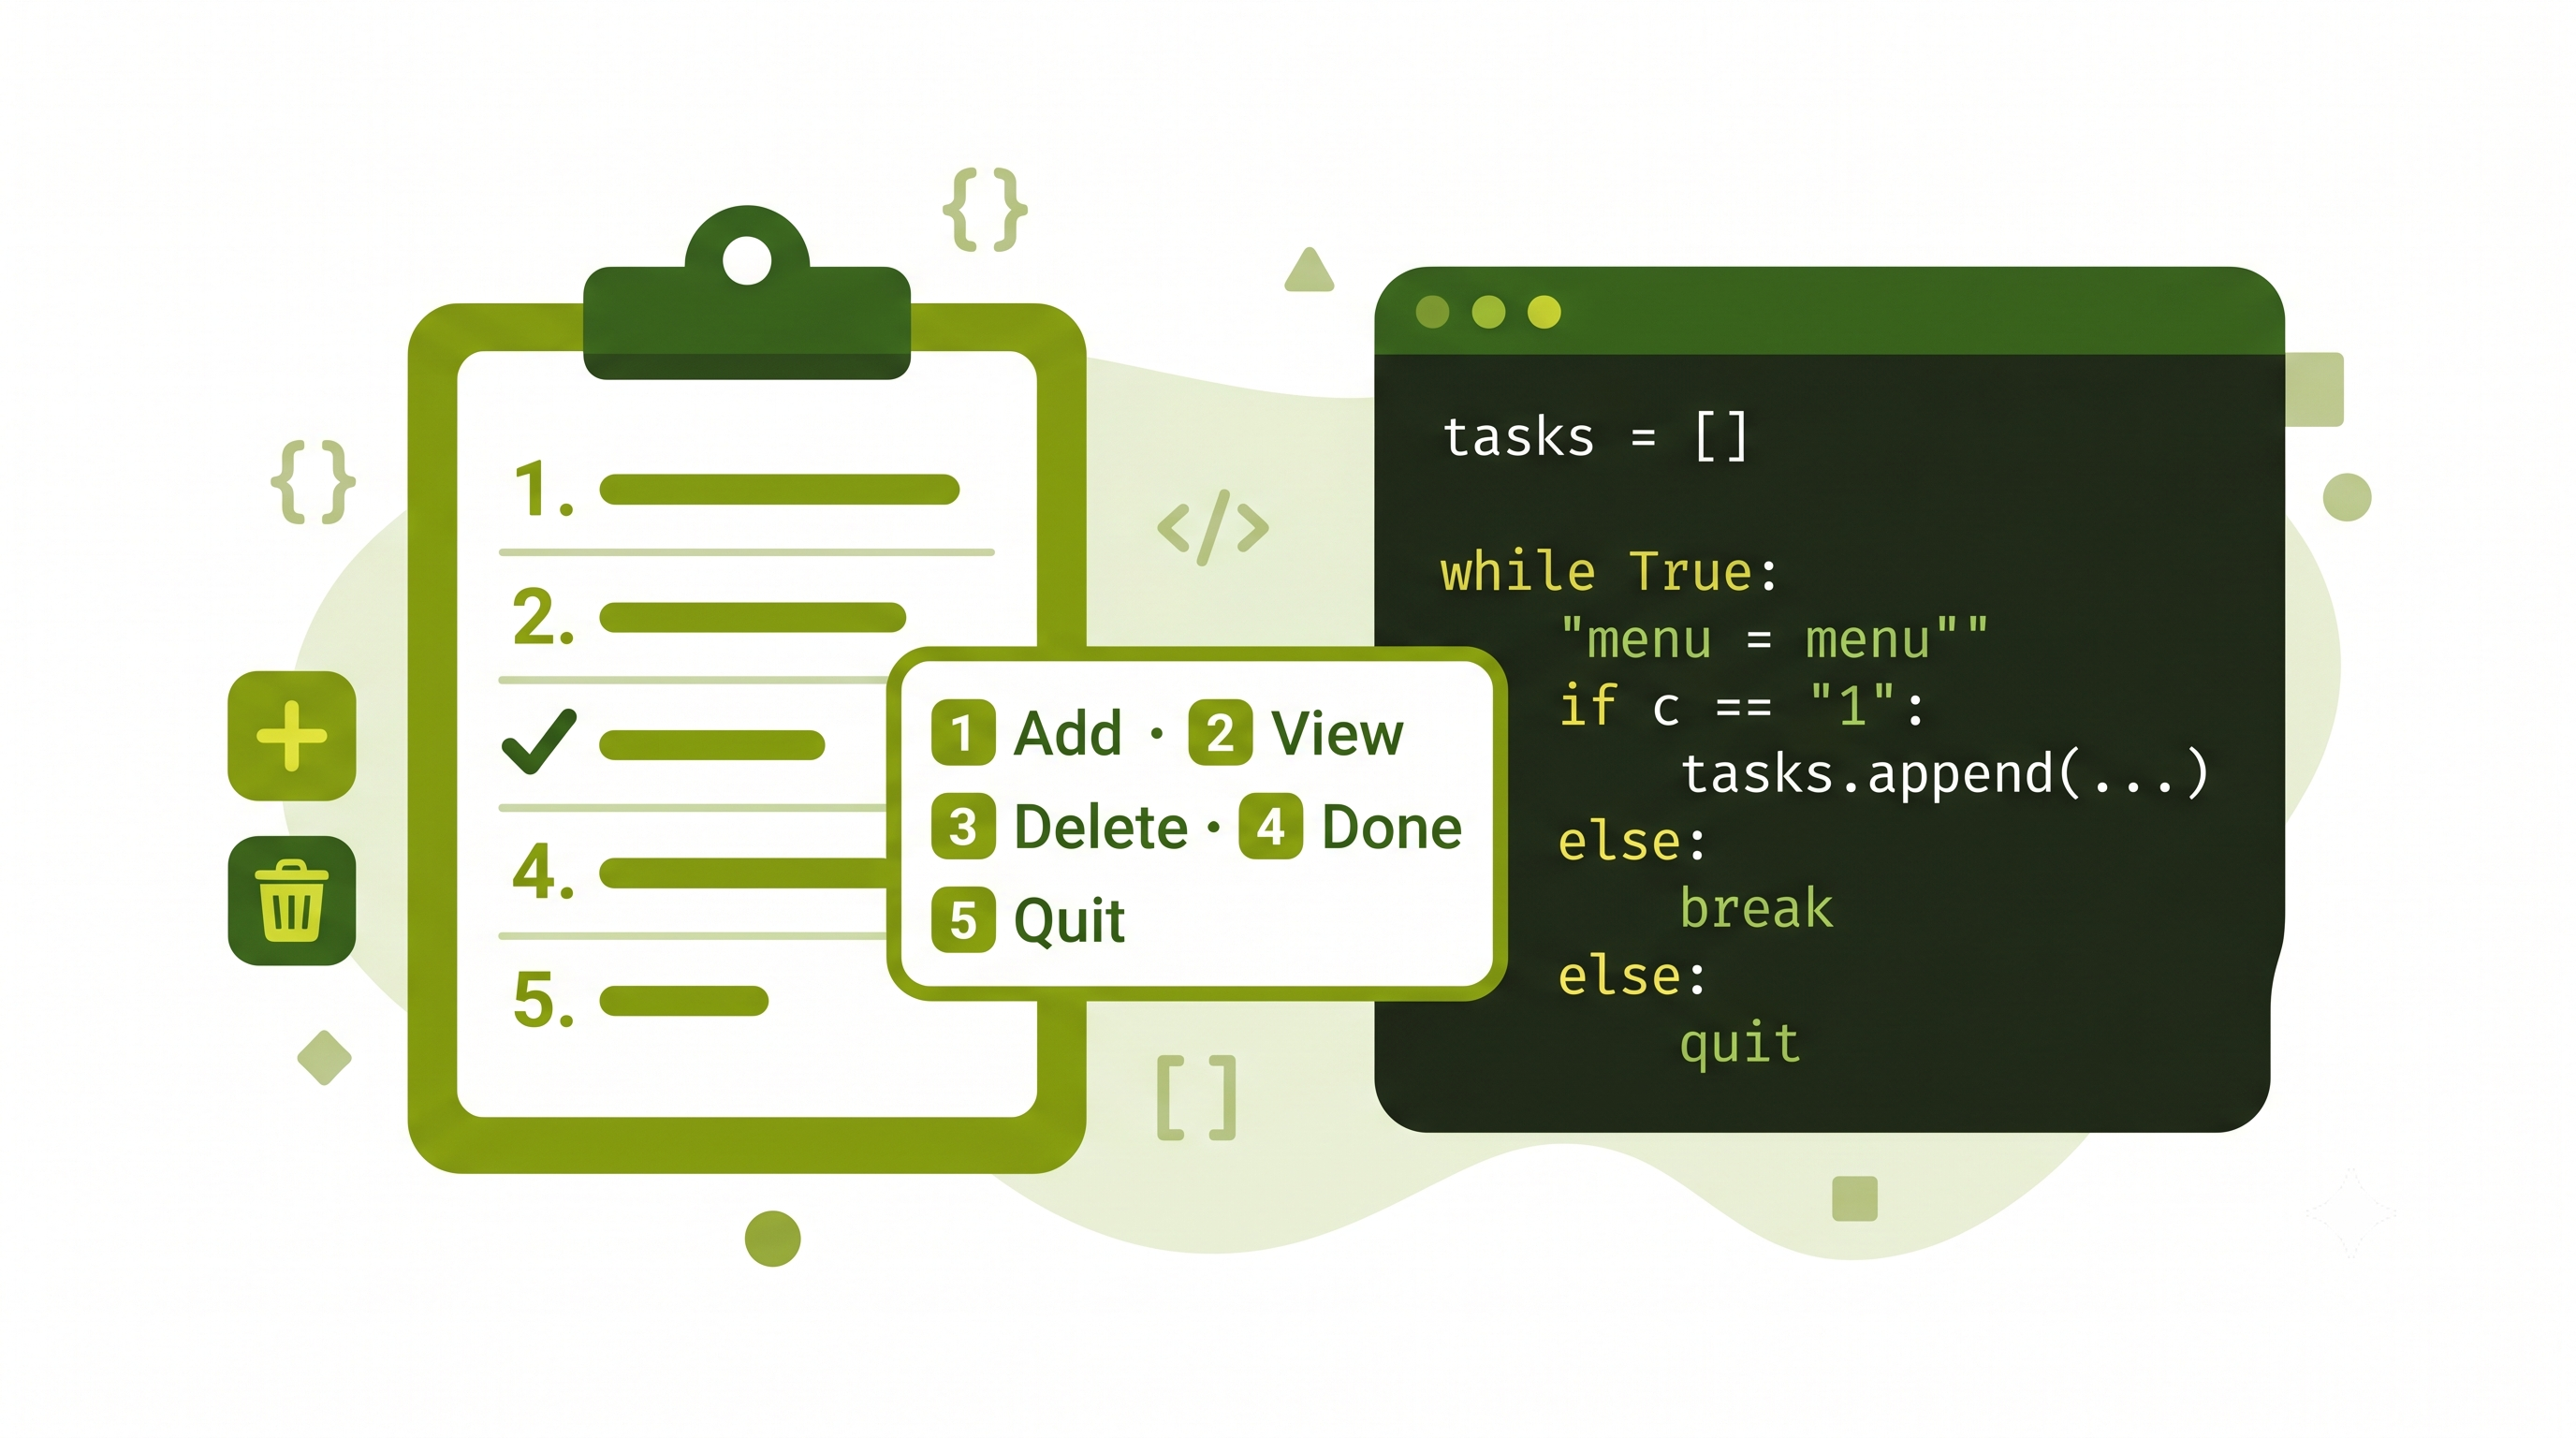
Add, view, delete, and tick off tasks! In this capstone project, students build a complete menu-driven To-Do List Manager that ties together lists, loops, and conditionals. Tasks are stored in one list, and a while True menu loop shows five numbered choices again and again until the user quits. An if/elif chain runs the chosen action: append() to add a task, a for loop to view all tasks (numbered), pop(num − 1) to delete one, and editing the task text (adding a ✓) to mark it done — learning the key idea that a typed "1" becomes index tasks[0] because lists start at 0. Students trace a sample session as the single list changes, then make it their own with task counts, a clear-all, an empty-list check, or priority tags. Combines lists, list methods, loops, if/elif, and input in one real app. Class 6–8 · Python Programming.
- Teacher: First Admin
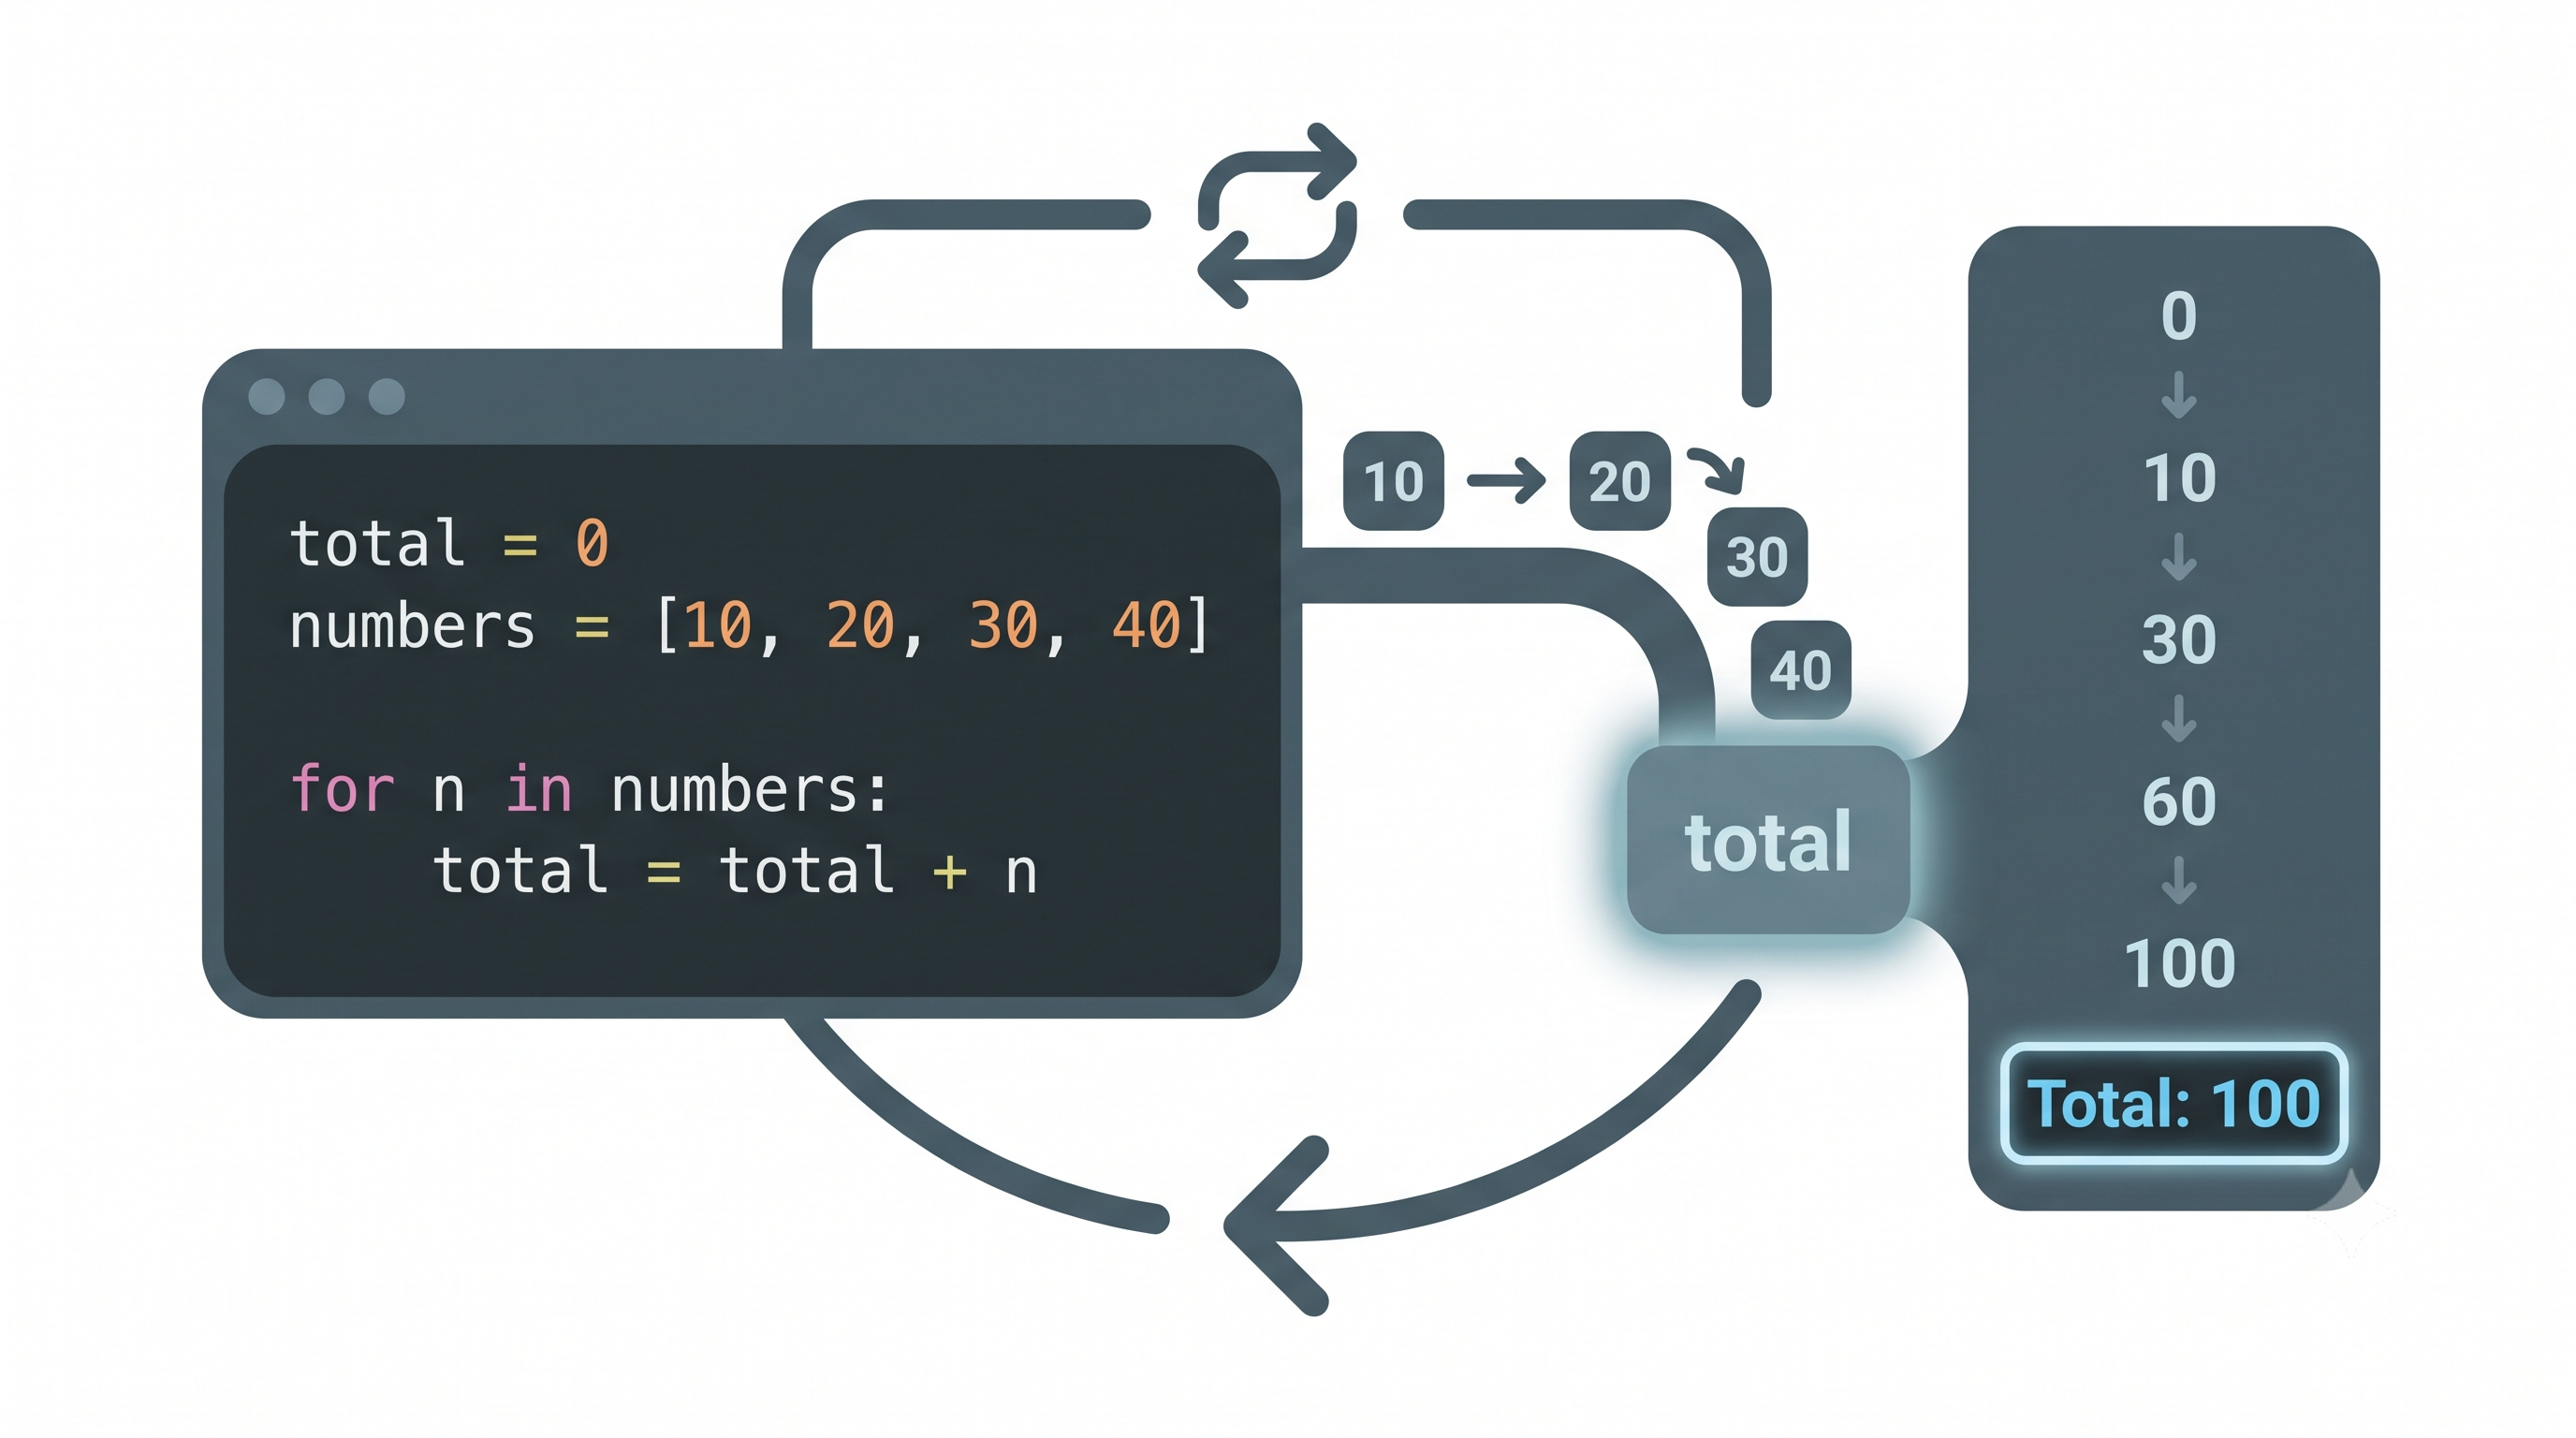
Visit every item, one by one! This lesson shows how a for loop walks through a whole list — for item in list: hands you each value in turn, with no index numbers needed (much cleaner than for i in range(len(...))). Students run an action for every item (like printing each score), then learn the powerful accumulator pattern: start a total = 0 before the loop, add each item with total = total + n (or the short form total += n), and print the result after the loop finishes. They trace the total as it grows 0 → 10 → 30 → 60 → 100, build a sum-the-list activity, and meet the handy sum() built-in. With variations (count items, sum only evens, find an average), real-world examples (cart totals, cricket runs, average marks), a quiz, and a common-errors guide, students learn to process an entire list with one clean loop. Class 6–8 · Python Programming.
- Teacher: First Admin
Take a slice of a list! Where indexing picks just one item, slicing grabs a whole piece — several items at once — like cutting a few slices off a loaf of bread. This lesson teaches the list[start:end] syntax: the start index is included, the end index is left out (exactly like range), so end − start tells you how many items you get. Students learn the handy shortcuts — [:3] for the first three, [2:] for everything from an index to the end, and [:] to copy the whole list — and discover that a slice always makes a NEW list, leaving the original unchanged. The capstone activity extracts the first three items of a list, and with real-world examples (top-3 scores, first-5 headlines, rest-of-playlist), a recap, a quiz, and a common-errors guide, students learn to grab exactly the part of a list they need. Class 6–8 · Python Programming.
- Teacher: First Admin
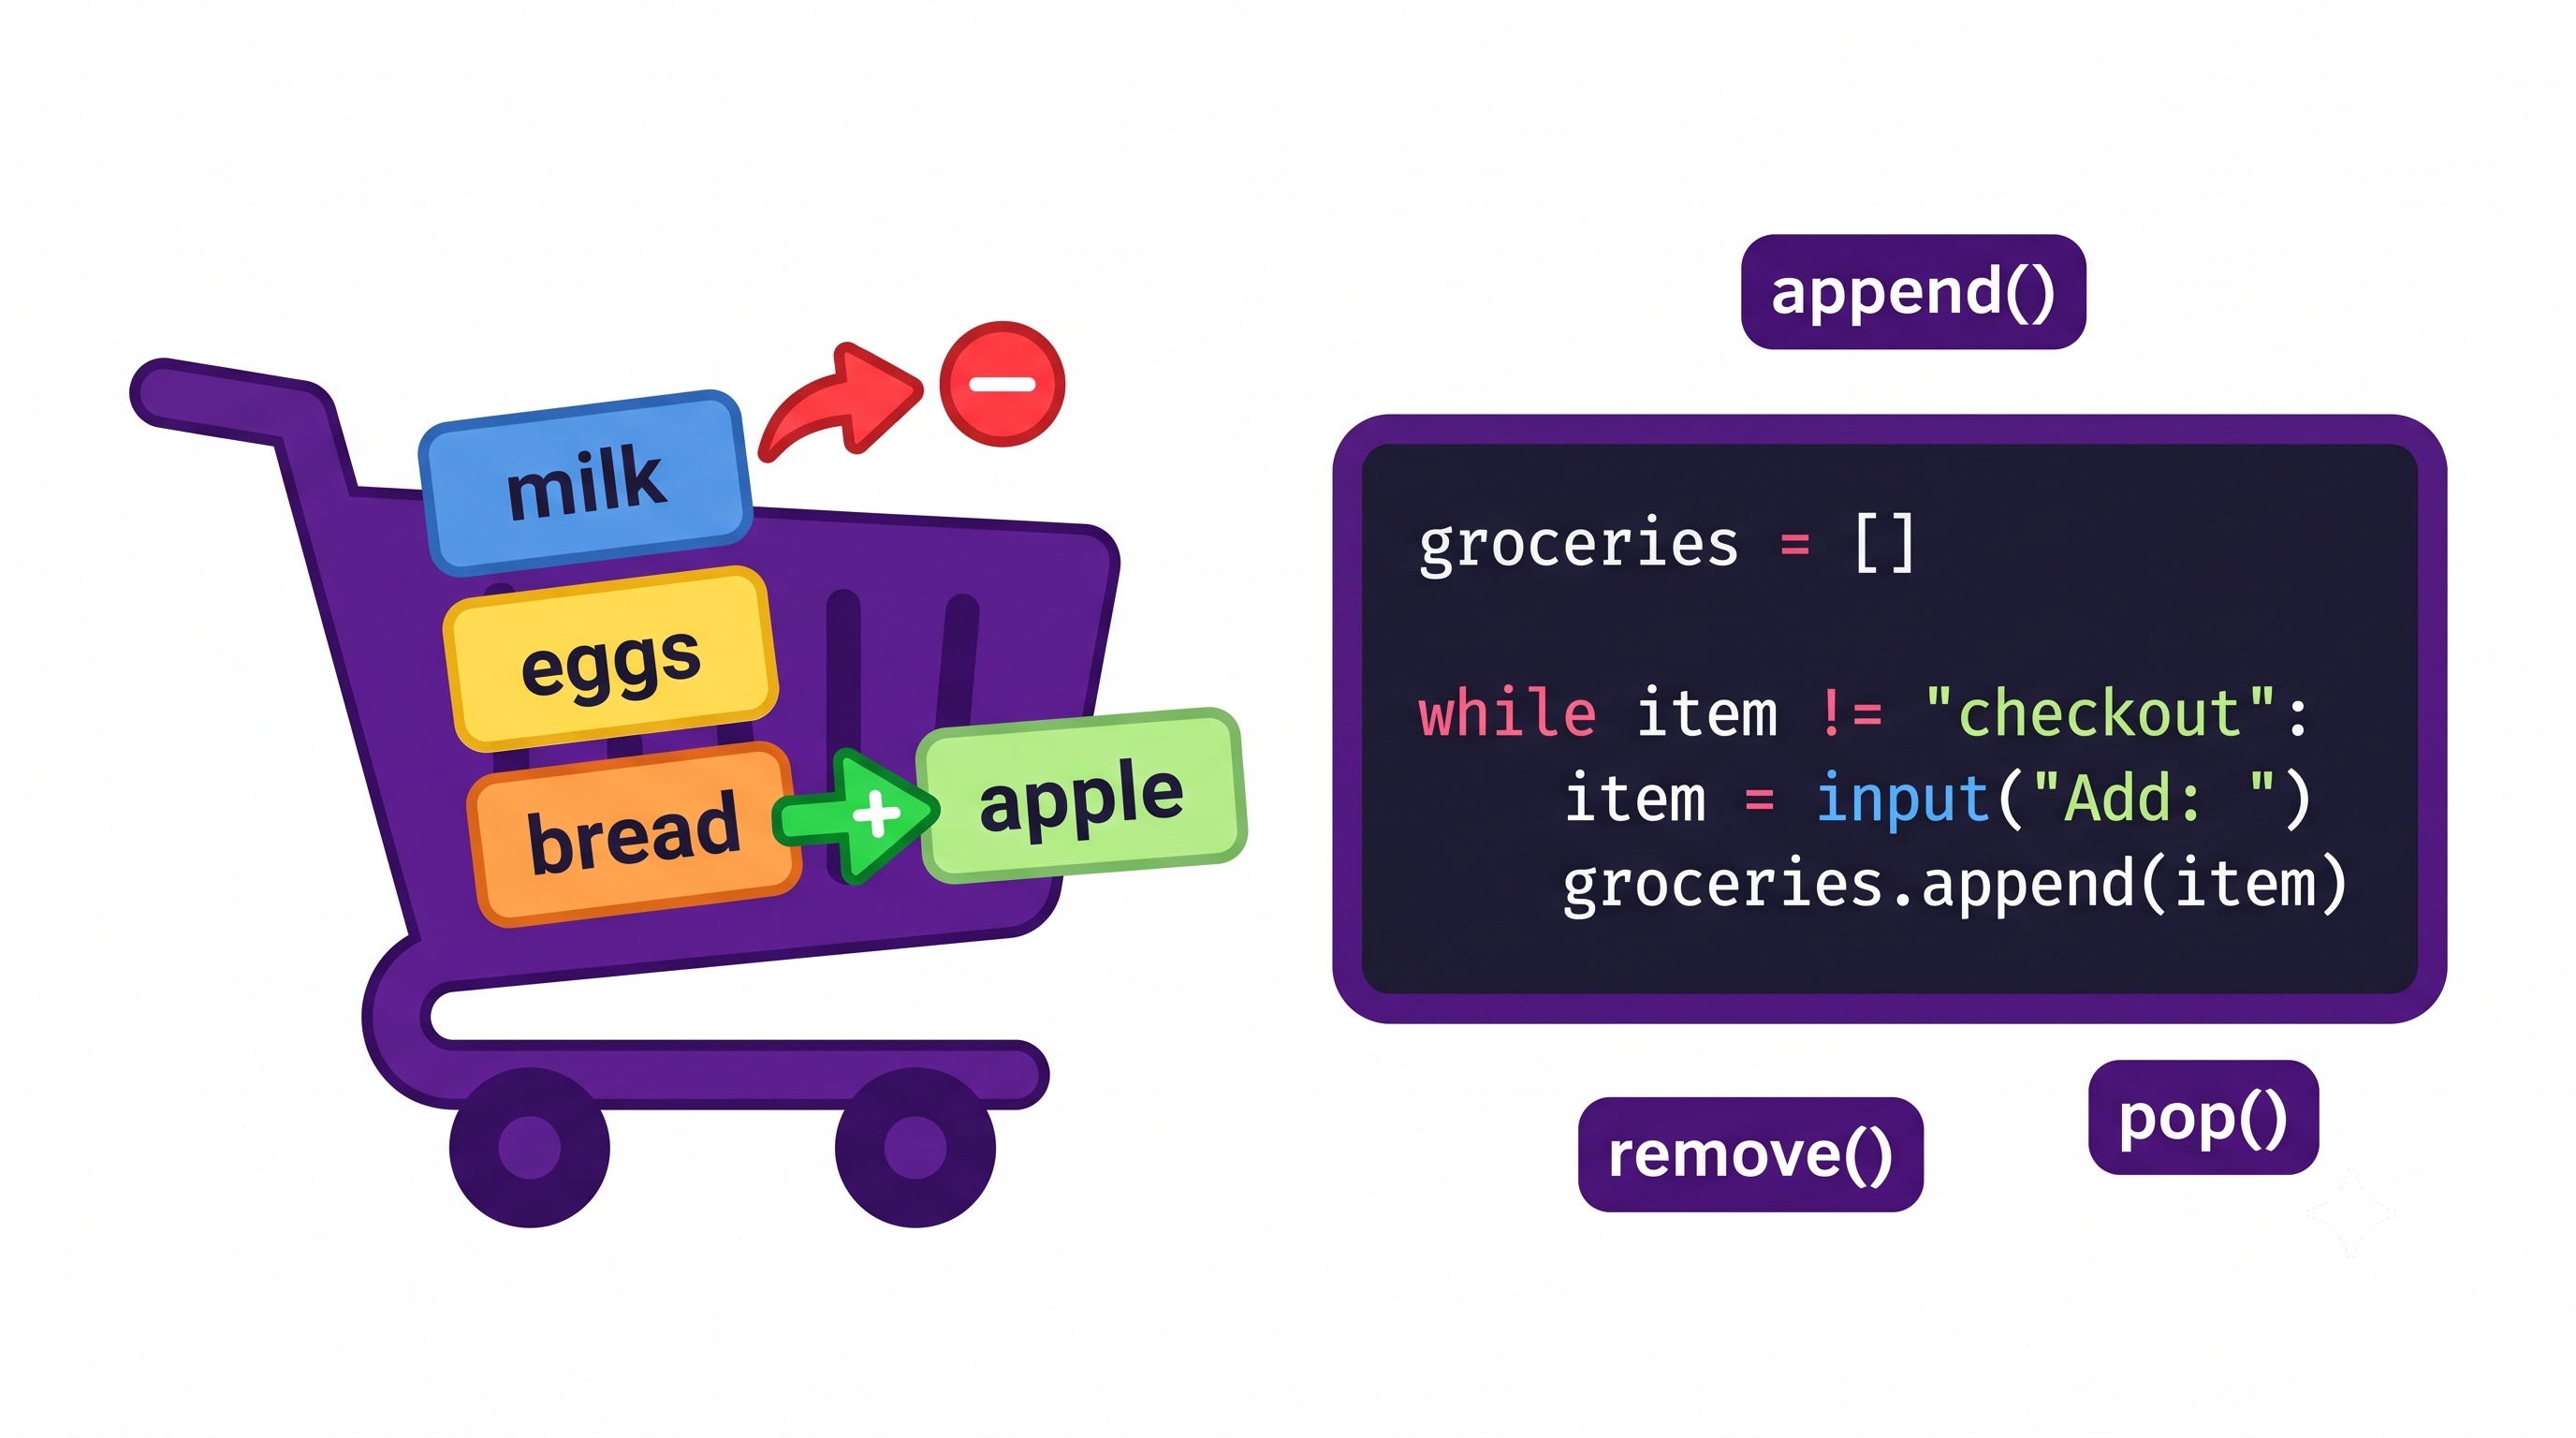
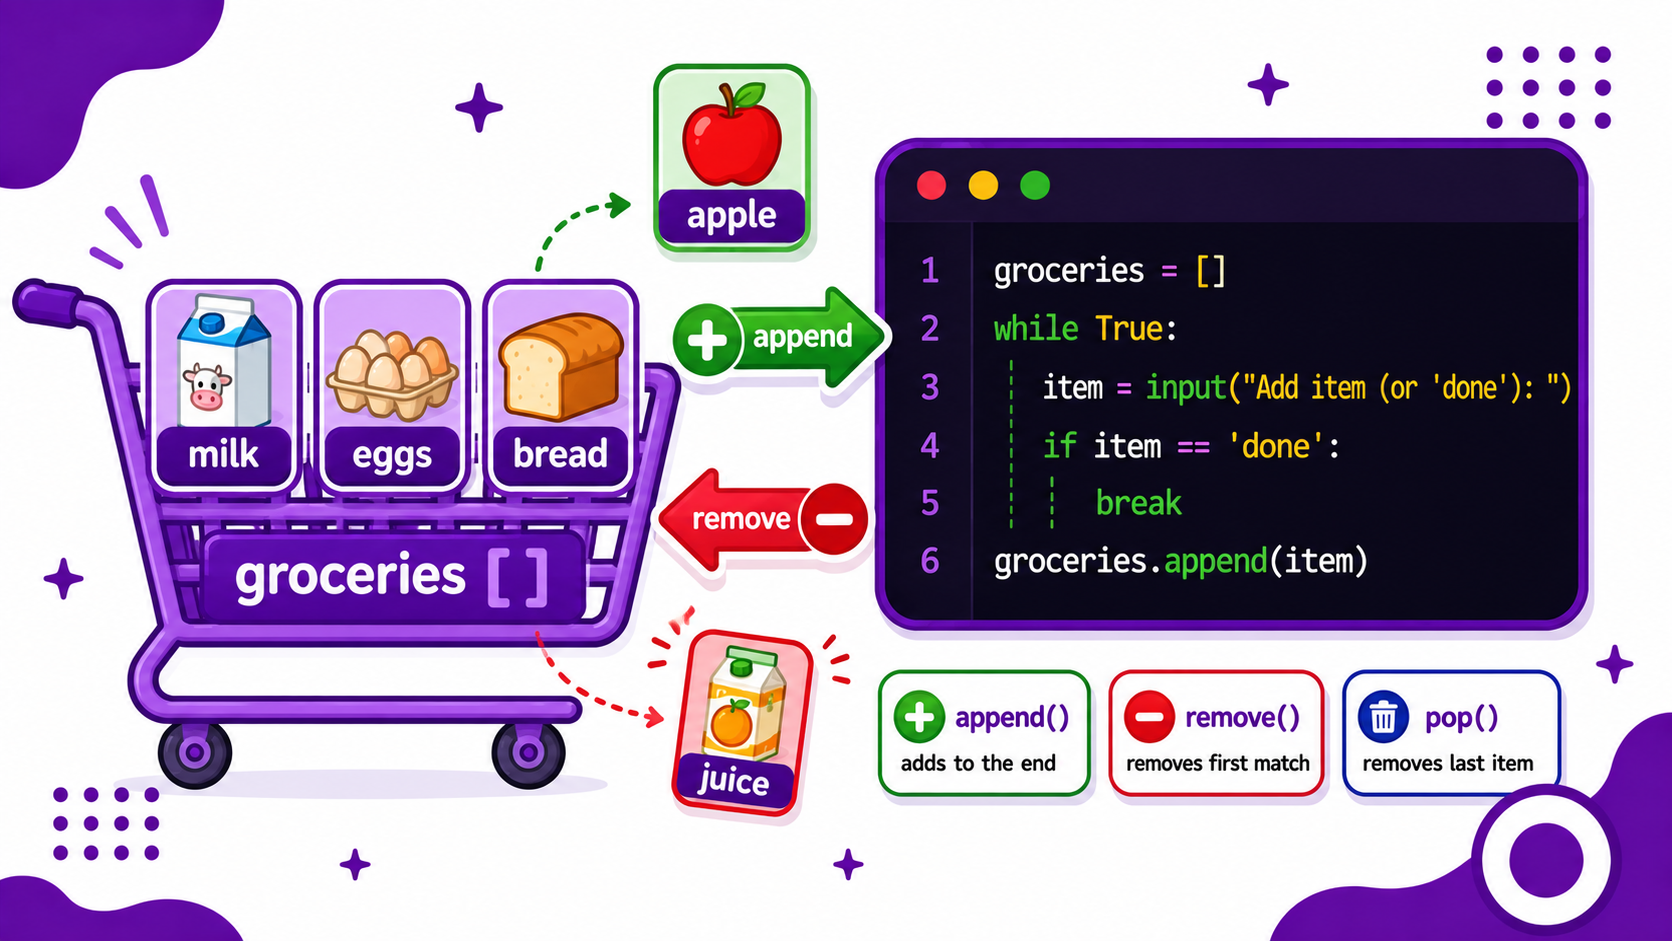
Add and remove items from a list! Lists don't have to stay the same — this lesson shows how they grow and shrink using methods, special actions called with the dot syntax (list.append(...)). Students master three tools: append() adds an item to the end, remove() deletes an item by its value (not its index), and pop() takes out the last item AND hands it back so you can use it (with pop(0) taking the first instead). The capstone is an interactive grocery-list app: start with an empty list [], use a while loop to keep asking for items, append each one, and break when the user types "done". With real-world examples (to-do lists, shopping carts, playlists), a recap of all three methods, a matching quiz, and a common-errors guide, students learn to build lists that change on demand. Class 6–8 · Python Programming.
- Teacher: First Admin
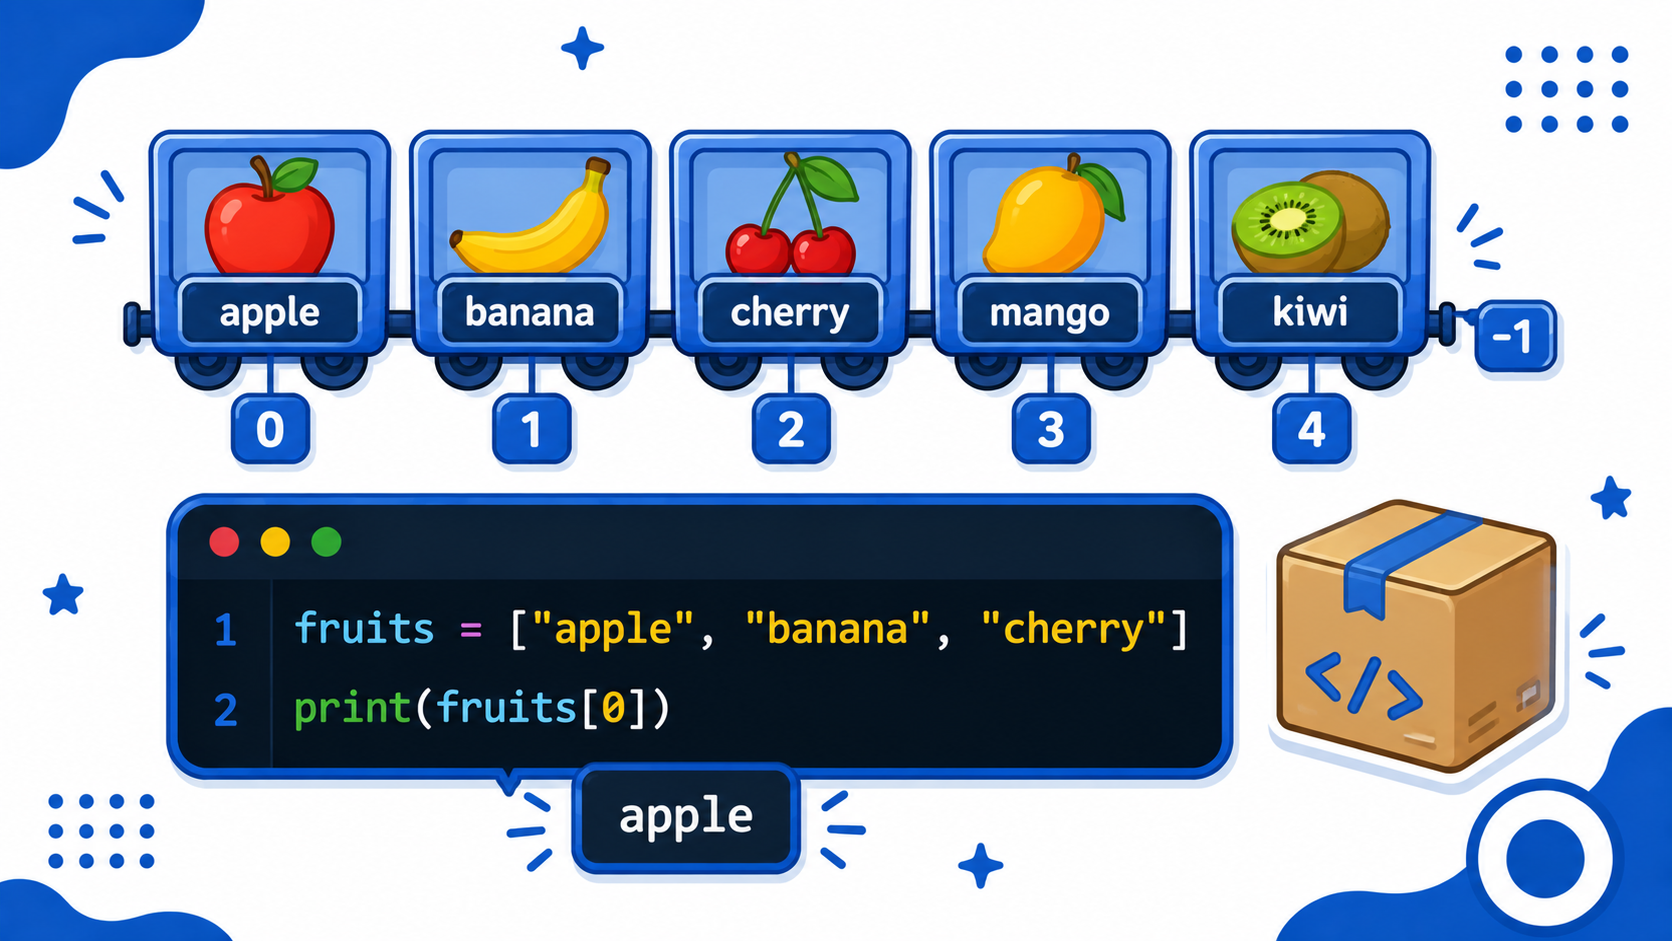
Store many things in one place! This lesson introduces lists — a single variable that holds many values in order, written with square brackets [ ] and commas (instead of clumsy separate variables like f1, f2, f3). Students learn indexing: every item has a position number, and the surprising rule that counting starts at 0, so the first item is list[0]. They access items by index, discover negative indexes (list[-1] is the last item, no length needed), and use len() to count items — learning that the last index is always len − 1. The capstone activity grabs the first, last, and middle items of a 5-item list, and a bonus shows how a for loop visits every item with no index at all. With real-life examples (shopping lists, playlists, high scores), a "what's at that index?" quiz, and a common-errors guide, students learn to store and retrieve collections. Class 6–8 · Python Programming.
- Teacher: First Admin
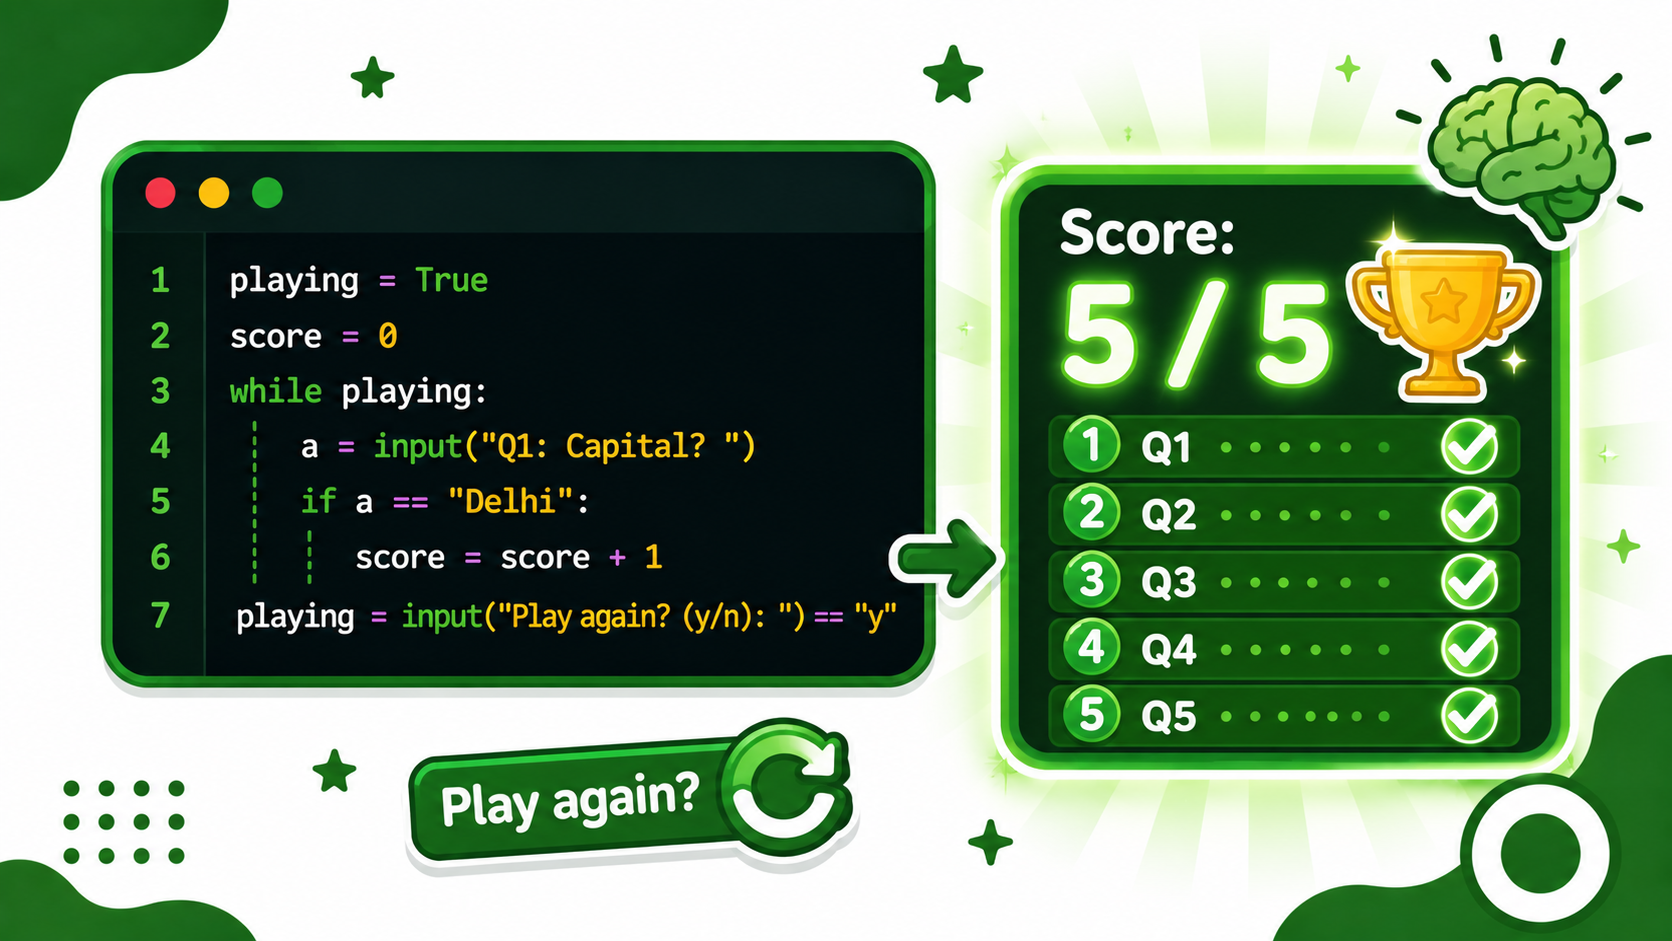
Ask, score, and play again! In this capstone project, students build a complete Quiz App that ties together everything they've learned. The app asks 5 questions one by one with input(), checks each answer with == (discovering that text is case-sensitive — "delhi" ≠ "Delhi"), and keeps a score that starts at 0 and grows by 1 for every correct answer. An if-else gives "Correct ✅" or "Wrong ❌" feedback, the total prints as score / 5, and an outer while playing loop wraps the whole quiz so players can take it again — with the score reset to 0 each round. Students then make it their own (more questions, a pass mark, topics, a best score) and trace the full start-to-finish flow. Combines input, conditionals, counters, and loops in one real program. Class 6–8 · Python Programming.
- Teacher: First Admin
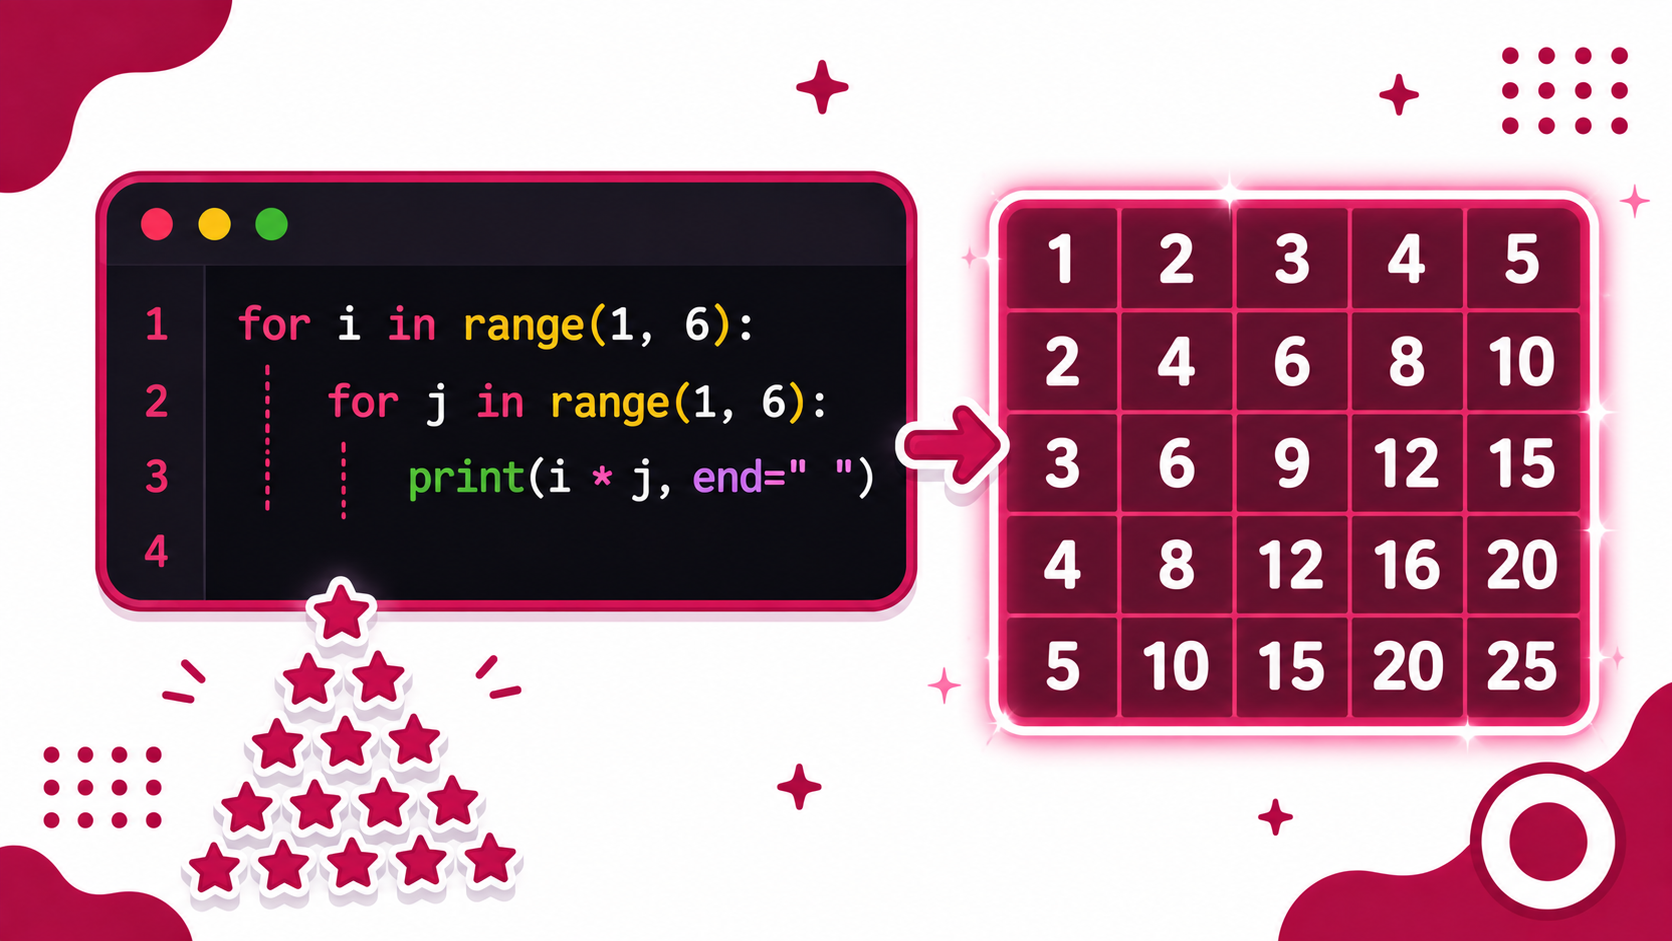
A loop inside a loop! This lesson introduces nested loops — placing one for loop inside another so the inner loop runs fully for every single turn of the outer loop. Students learn the three indent levels (outer, inner, print), trace the (i, j) pairs by hand, and count total runs as outer × inner (so a 5×5 table prints 25 answers). They master end=' ' to keep a row on one line and a plain print() to start the next, then build the capstone: a neat 1–5 multiplication table where the outer loop is the row, the inner loop is the column, and each cell is i × j. A bonus star-triangle pattern shows nested loops can draw shapes too, and a "how many times?" quiz plus real-world examples (grids, game boards, pixels) drive the idea home. Class 6–8 · Python Programming.
- Teacher: First Admin
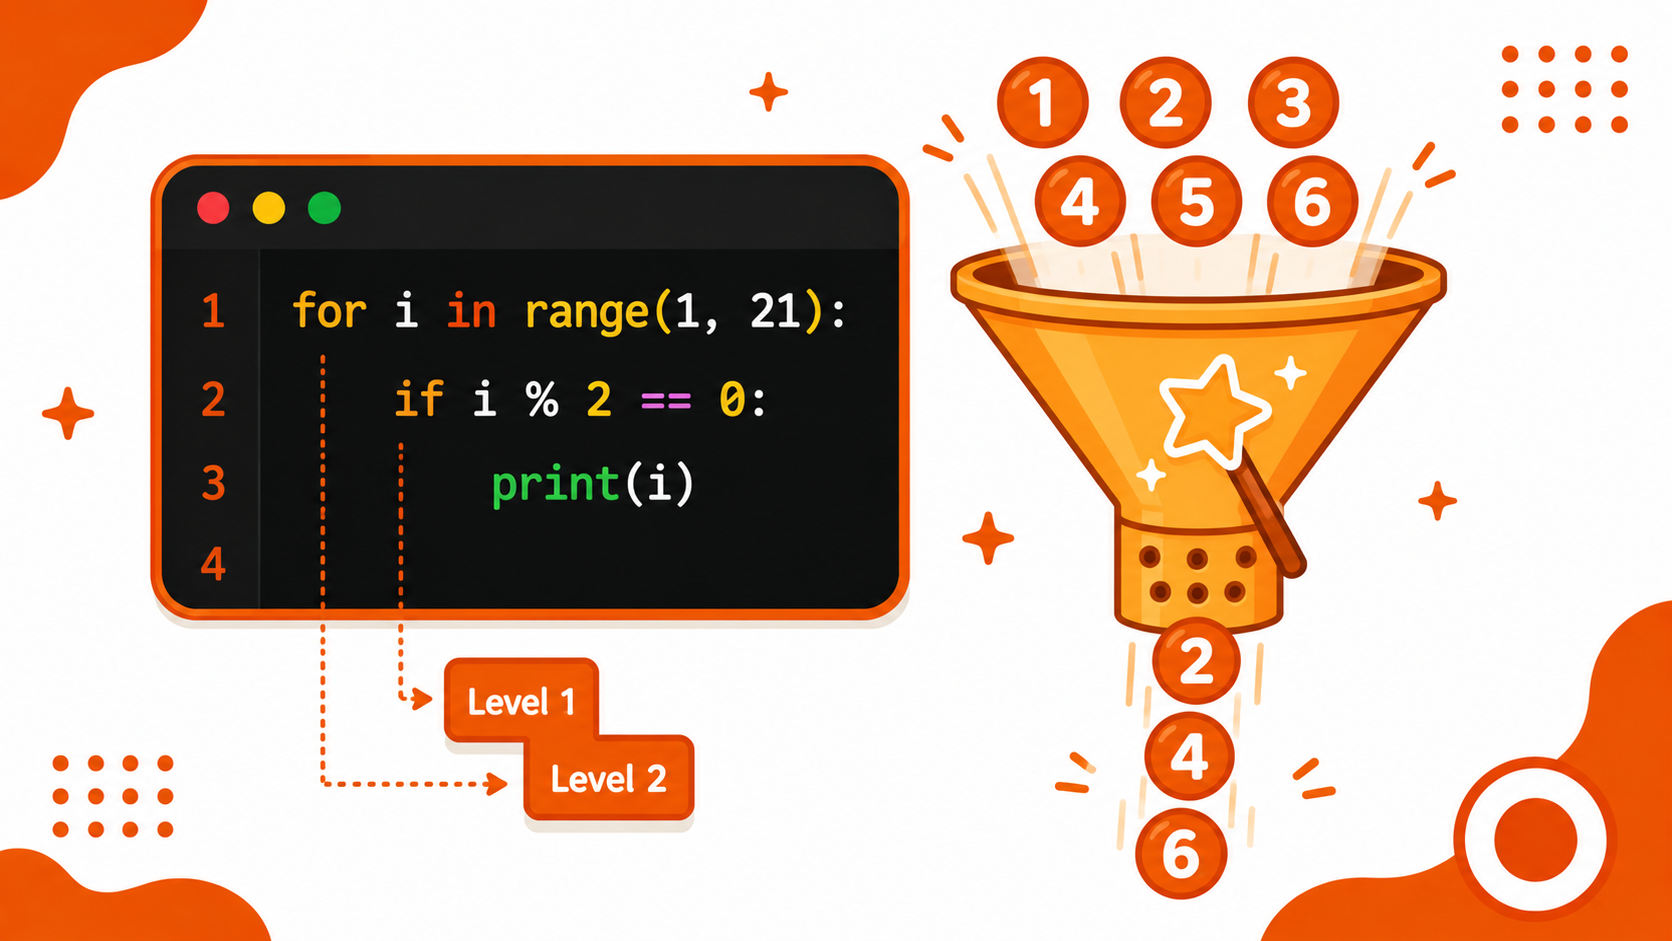
Loop through, check each one! This lesson brings together two powerful tools: the for loop (which visits many items) and the if (which checks one). Place an if INSIDE a for and you can test every item and keep only the ones that pass — the filtering pattern. Students learn the all-important two levels of indentation (for, then if, then print), trace an even-number check by hand, and discover the even test i % 2 == 0. The capstone activity prints every even number up to 20, and by swapping just the if condition students filter odds, multiples of 3, or numbers over 15 — proving that for + if works for ANY rule. With real-code uses, a "what will it print?" quiz, and a common-errors guide, students learn to loop through data and pick exactly what they want. Class 6–8 · Python Programming.
- Teacher: First Admin
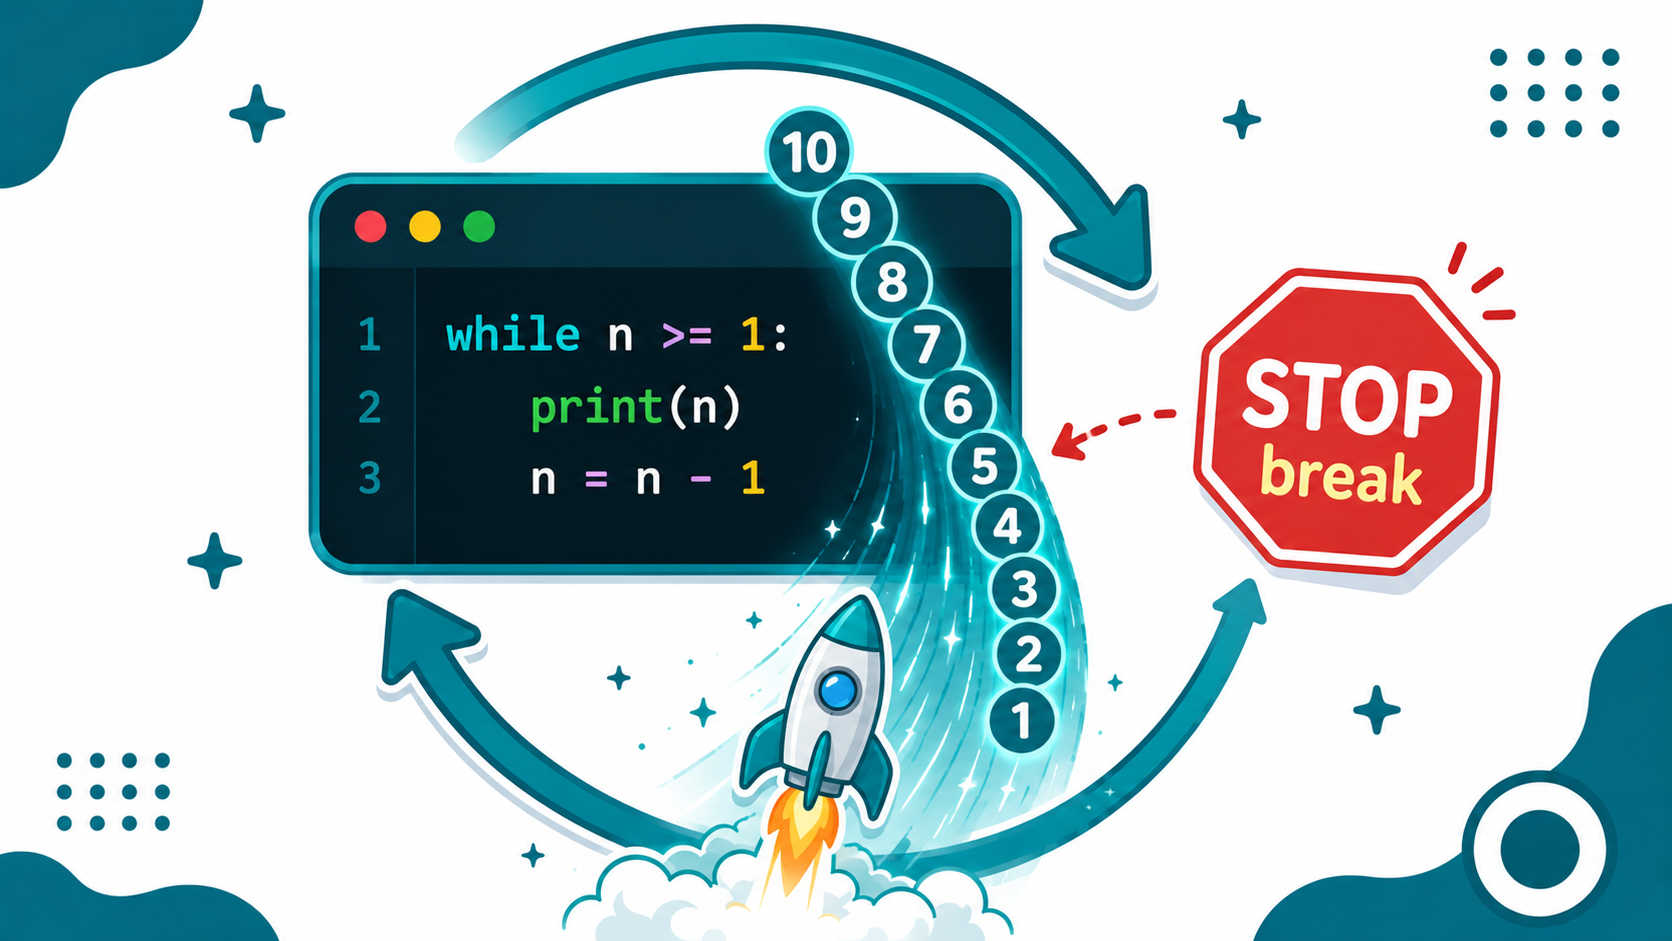
Repeat while it's true — and know when to stop! This lesson covers the while loop: a block that runs over and over WHILE a condition stays True, checked before each turn. Students learn its three parts — set up, check, and update — and discover the classic bug it causes when the update is missing: the infinite loop that prints forever (and how Ctrl + C rescues you). They meet break to jump out of a loop instantly, the powerful while True + break pattern used in menus and games, and build a 10-to-1 countdown that ends in "Blast off! 🚀". With a "will this loop stop?" quiz, real-code uses, and a for-vs-while guide, students learn to repeat safely and stop on purpose. Class 6–8 · Python Programming.
- Teacher: First Admin
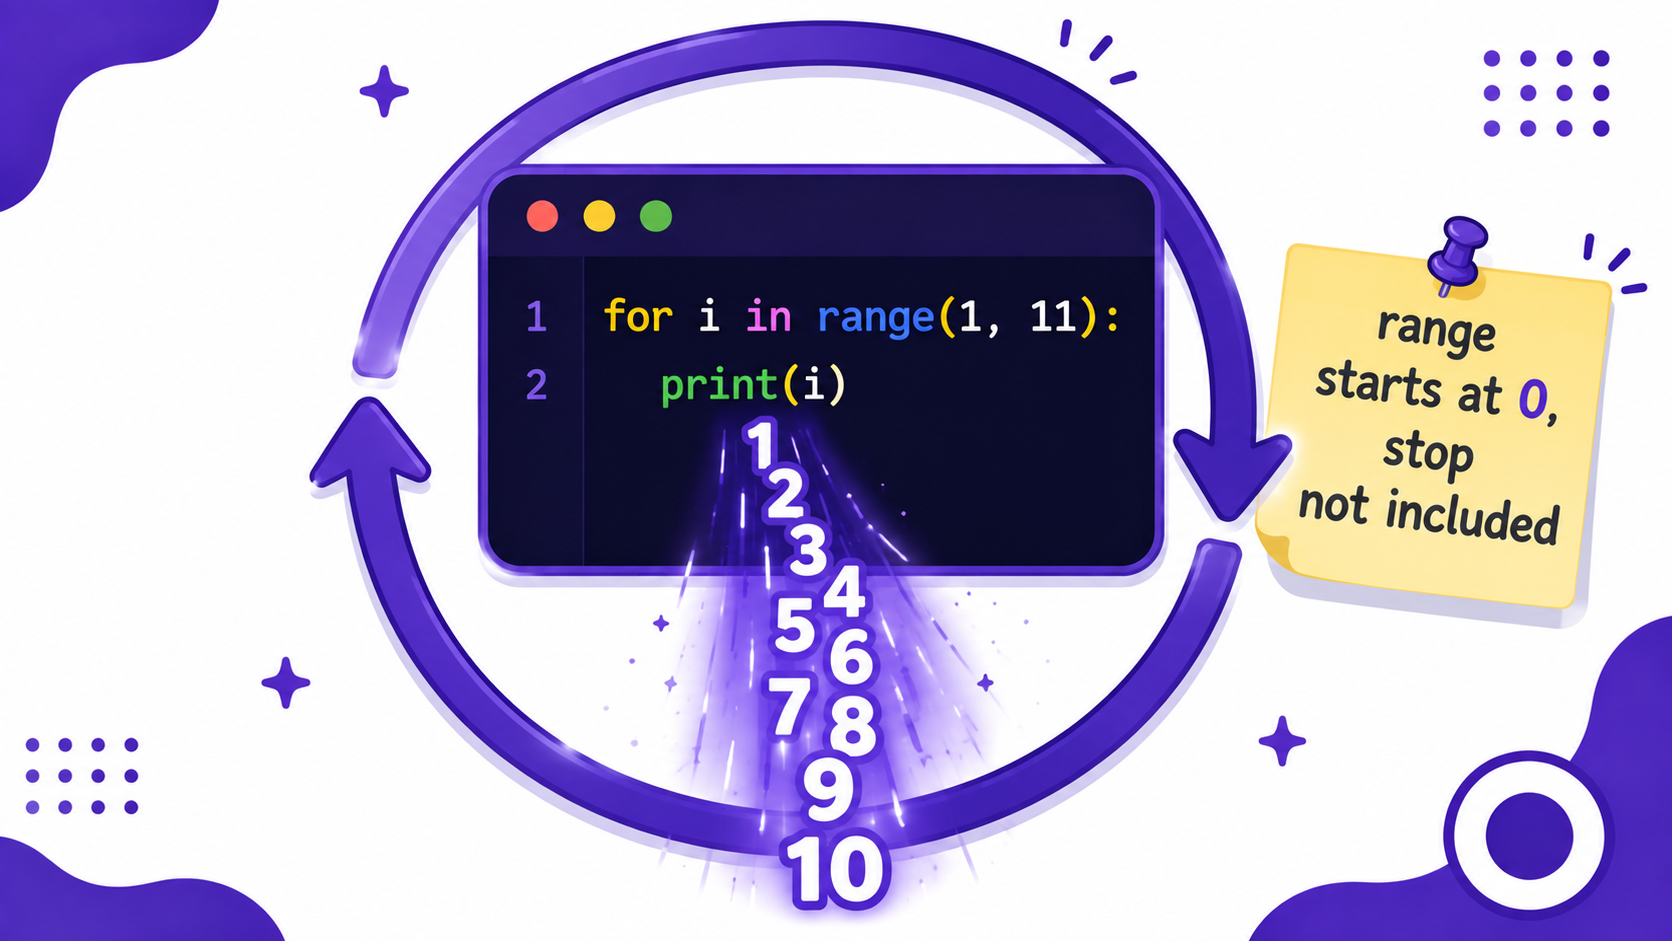
Stop copy-pasting — let the loop do it! This lesson introduces the for loop with range(), the cleanest way to repeat a block a set number of times. Students learn the parts of a for loop (the keyword, the loop variable i, range(...), the colon, and the indented block) and when to pick for over while. The heart of the lesson is range(): it starts at 0, never includes the stop number (so to reach 10 you write range(1, 11)), and takes an optional third number — the step — to count by 2s or even backwards. Through a print-1-to-10 activity, a "what will it print?" quiz, and real uses like times tables and sums, students master fixed-count repetition. Class 6–8 · Python Programming.
- Teacher: First Admin
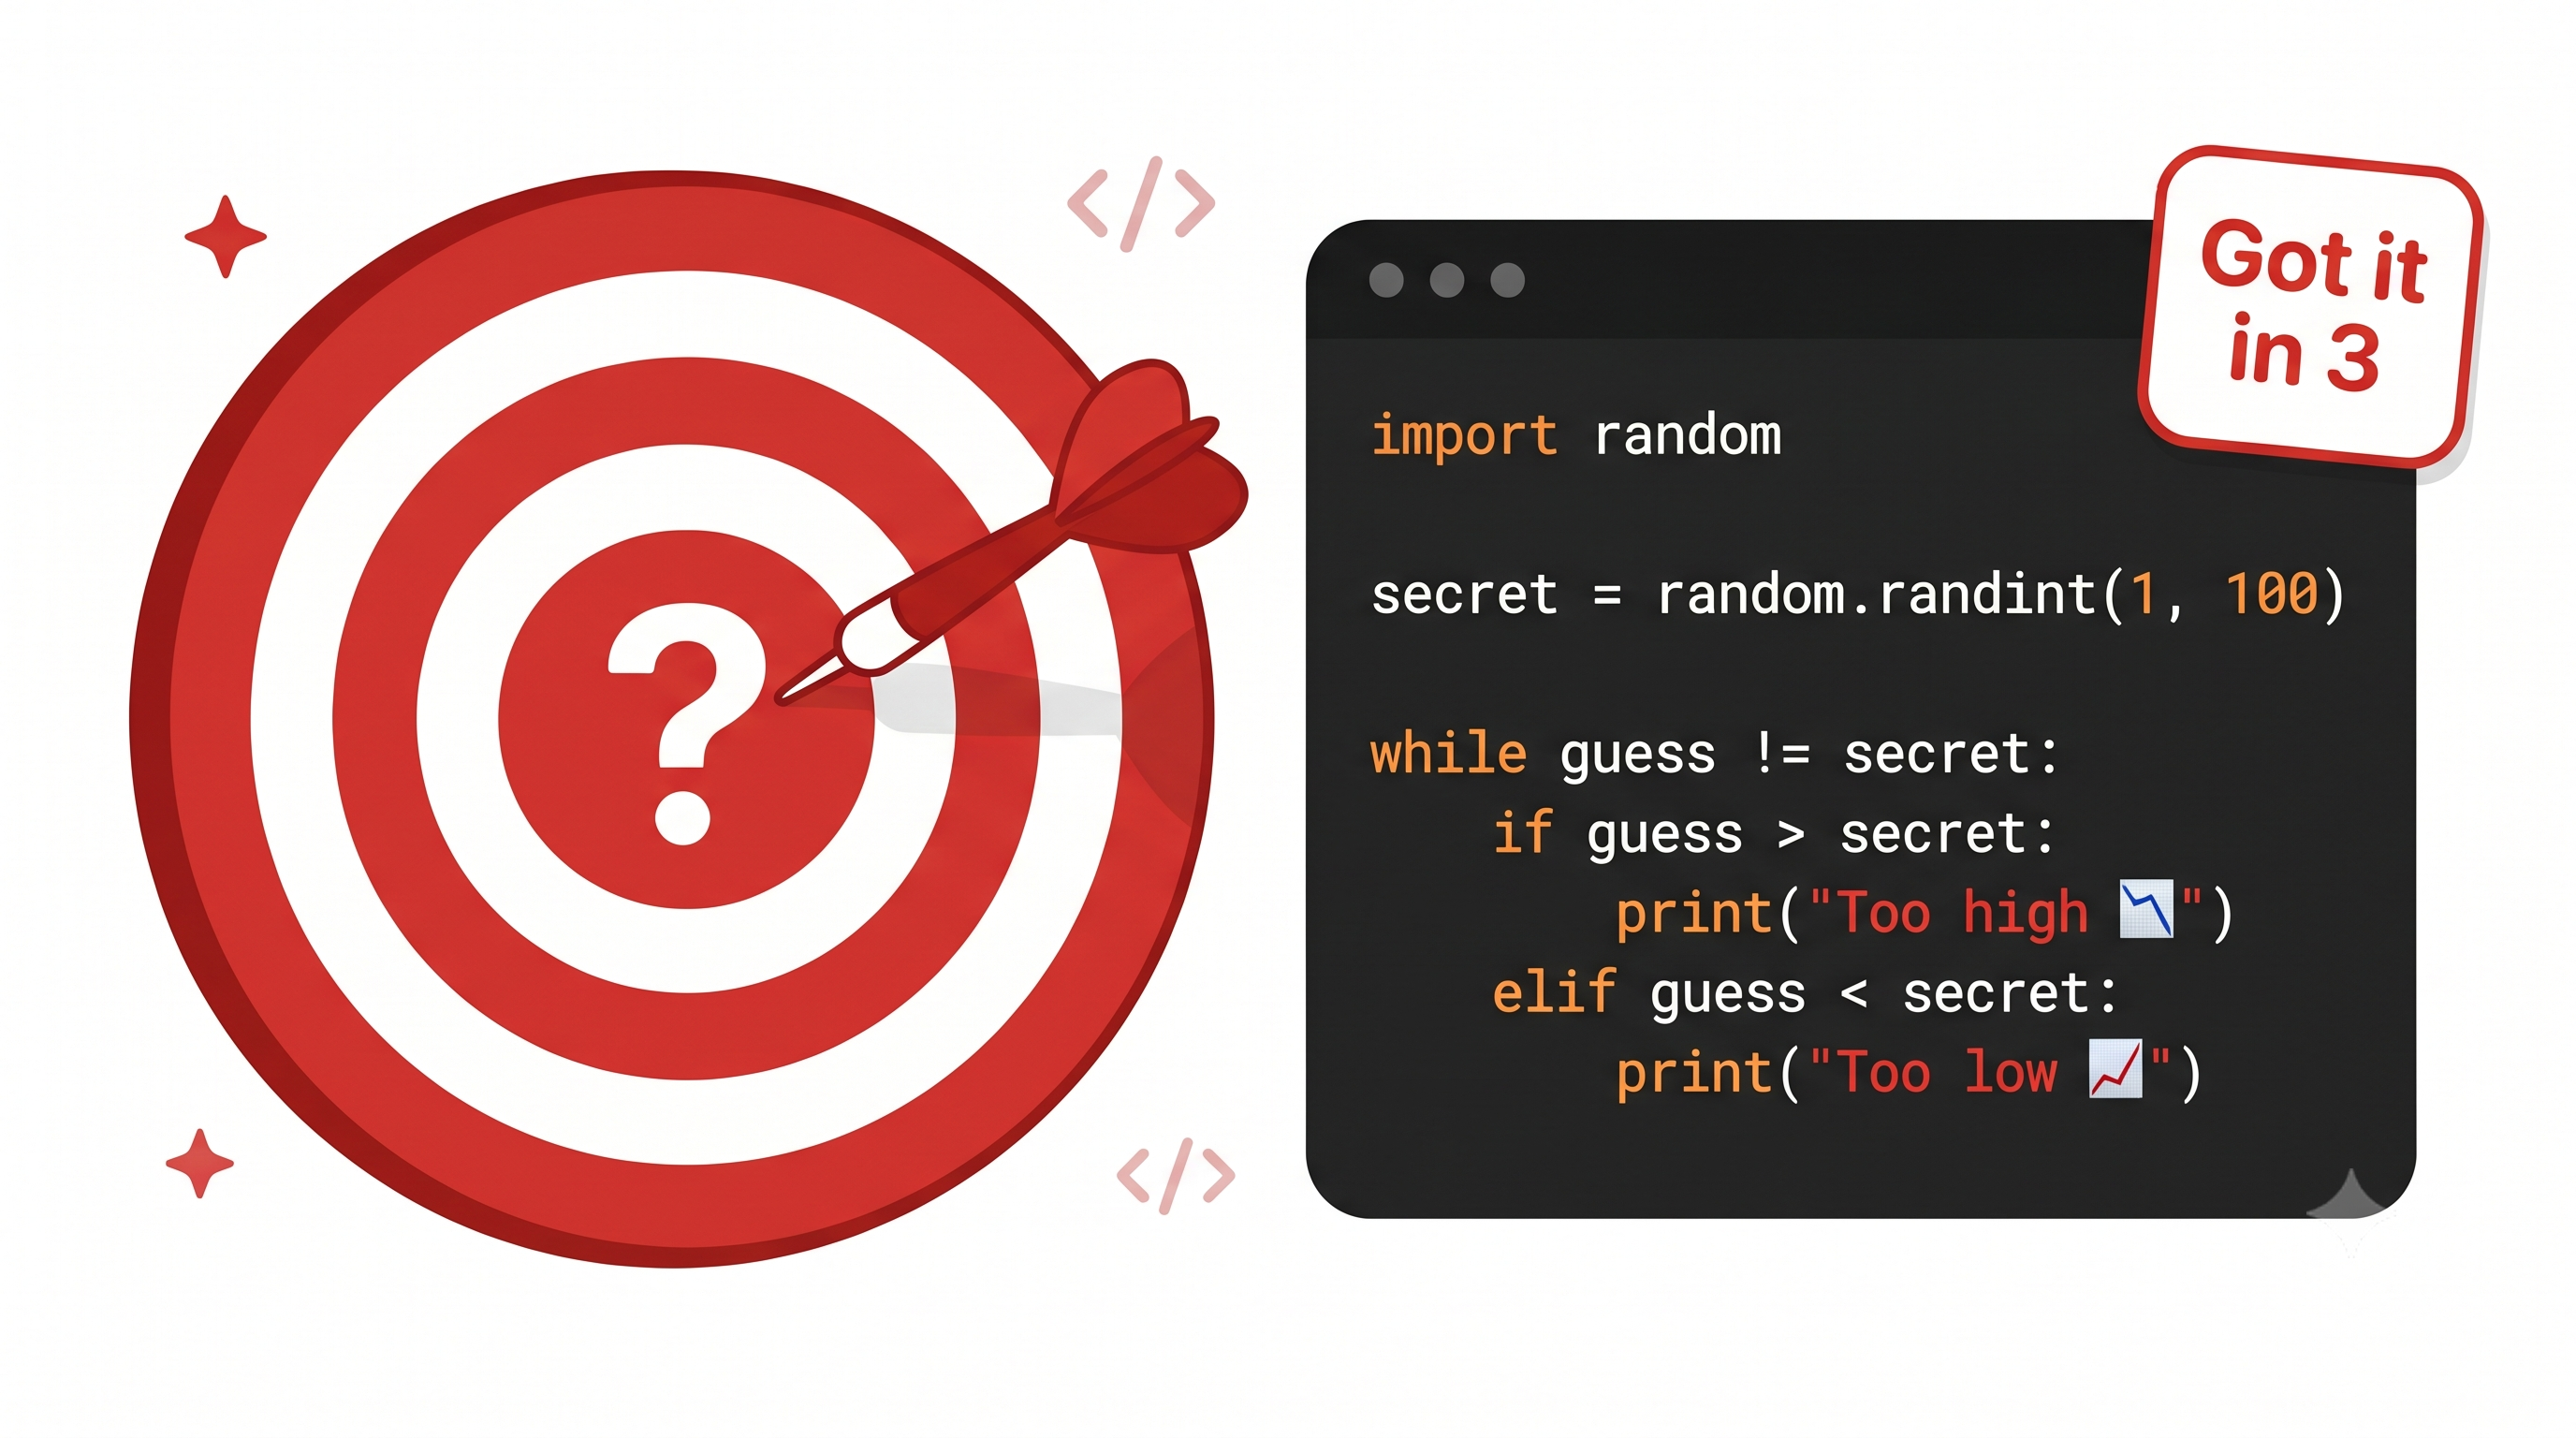
Build a real game that brings it all together. In this capstone Python project, the computer picks a secret number from 1–100 with random.randint(), and the player guesses until they get it right. Students use a while loop to repeat until correct, if-elif-else to give "Too high" / "Too low" / "Correct" hints, and a counter (count = count + 1) to track attempts. They watch a sample playthrough, learn the halve-the-range strategy, and add an outer "Play again?" replay loop — then make it their own with custom ranges, try limits, or hot/cold hints. Combines randomness, loops, conditionals, and input in one playable game. Class 6–8 · Python Programming.
- Teacher: First Admin
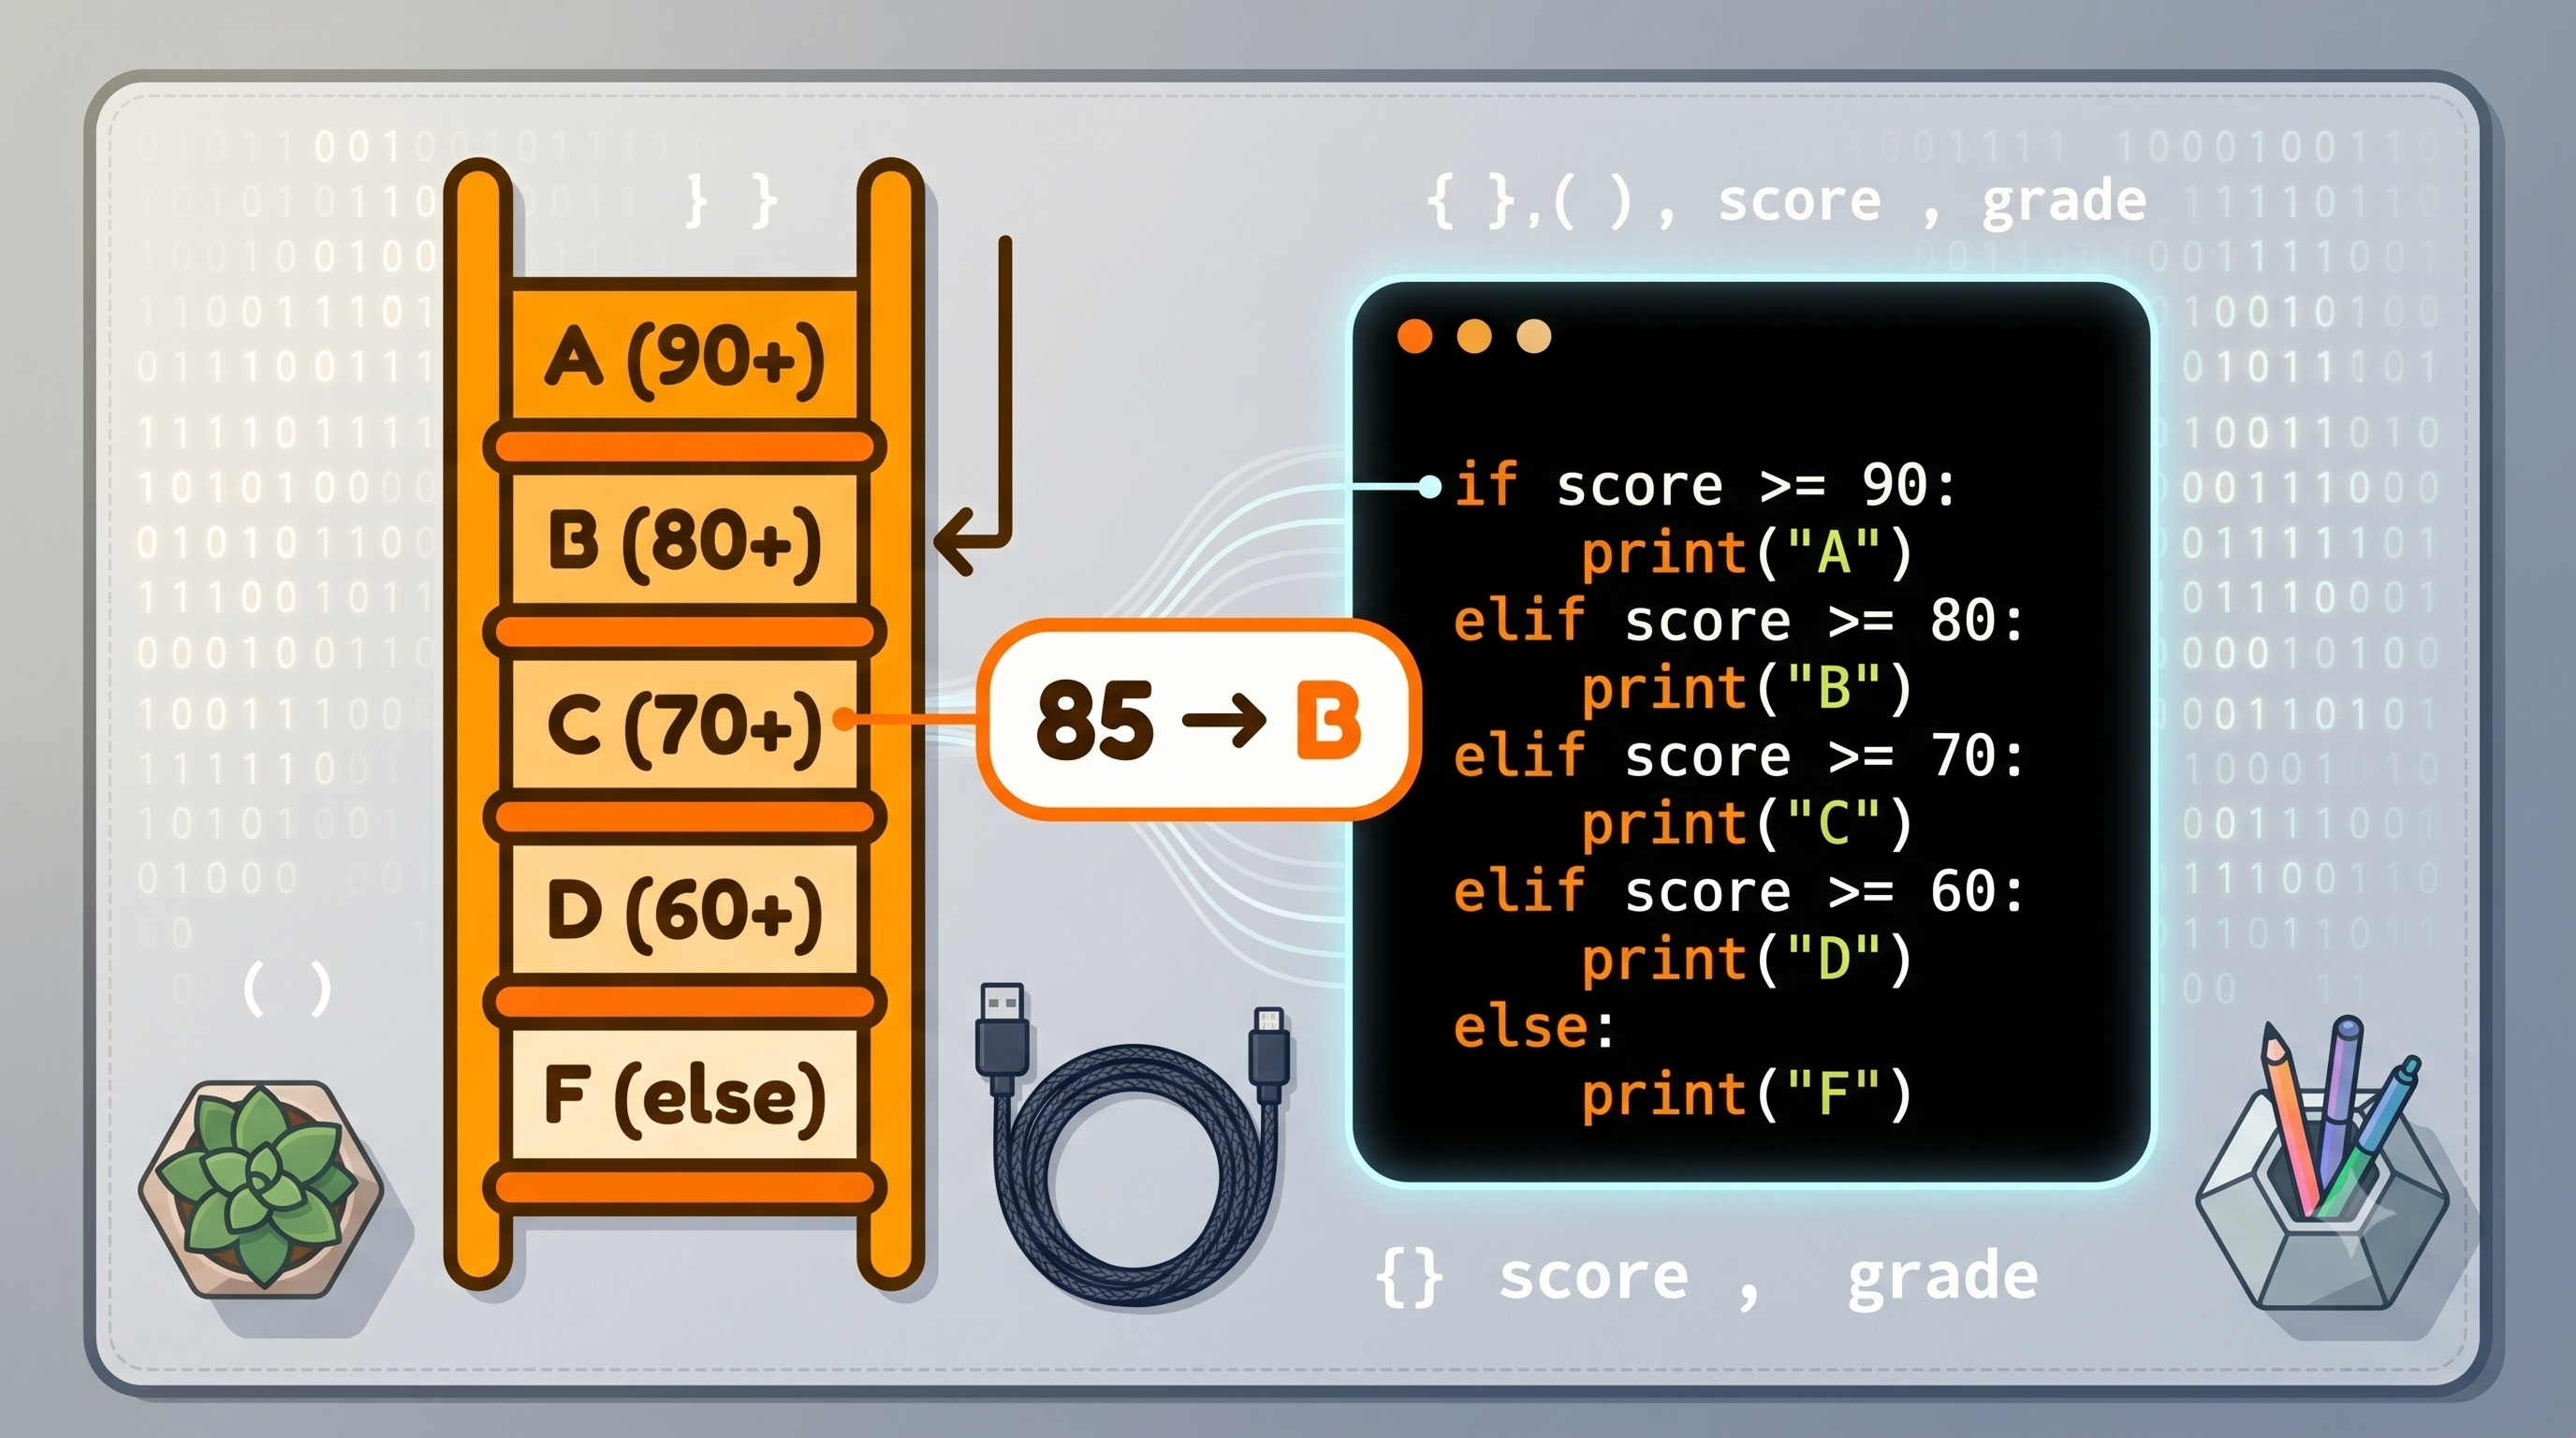
Choose between many outcomes. Where if-else gives only two paths, elif ("else if") lets a program check several conditions in a row — like a ladder. This lesson teaches the if → elif → elif → else chain, why order matters (put the strictest condition first), and how Python checks top to bottom and runs only the FIRST true block before skipping the rest, with else as the catch-all. Students build a Letter Grade program that turns a score into A, B, C, D, or F, trace different scores through the chain, and meet real-life elif decisions (traffic lights, race prizes, t-shirt sizes). With common-error fixes and a quiz. Class 6–8 · Python Programming.
- Teacher: First Admin
Give your program two paths. Building on the if statement, this lesson adds else — the "otherwise" path that runs whenever the condition is False, so exactly ONE of the two blocks always runs (never both, never neither). Students learn the shape of an if-else (colons, indentation, and an else with no condition), trace what happens for True and False inputs, and use the % remainder trick to build an Even-or-Odd checker (num % 2 == 0). They meet real-life if-else decisions (pass/fail, umbrella/sunglasses, buy/save) and practise spotting which block runs. With common-error fixes and a quiz. Class 6–8 · Python Programming.
- Teacher: First Admin
Make programs decide. This lesson introduces the if statement — the way Python runs some code ONLY IF a condition is True. Students learn the four parts that must be right (the if keyword, a True/False condition, the colon, and the indented block), see exactly what happens when the condition is True (the block runs) versus False (Python skips it), and discover how indentation marks which lines are inside the if. They build an "Is it positive?" program using num > 0, test it with positive numbers, zero, and negatives, and meet real-life ifs (pass marks, fever, enough money). With common-error fixes and a will-it-print quiz. Class 6–8 · Python Programming.
- Teacher: First Admin
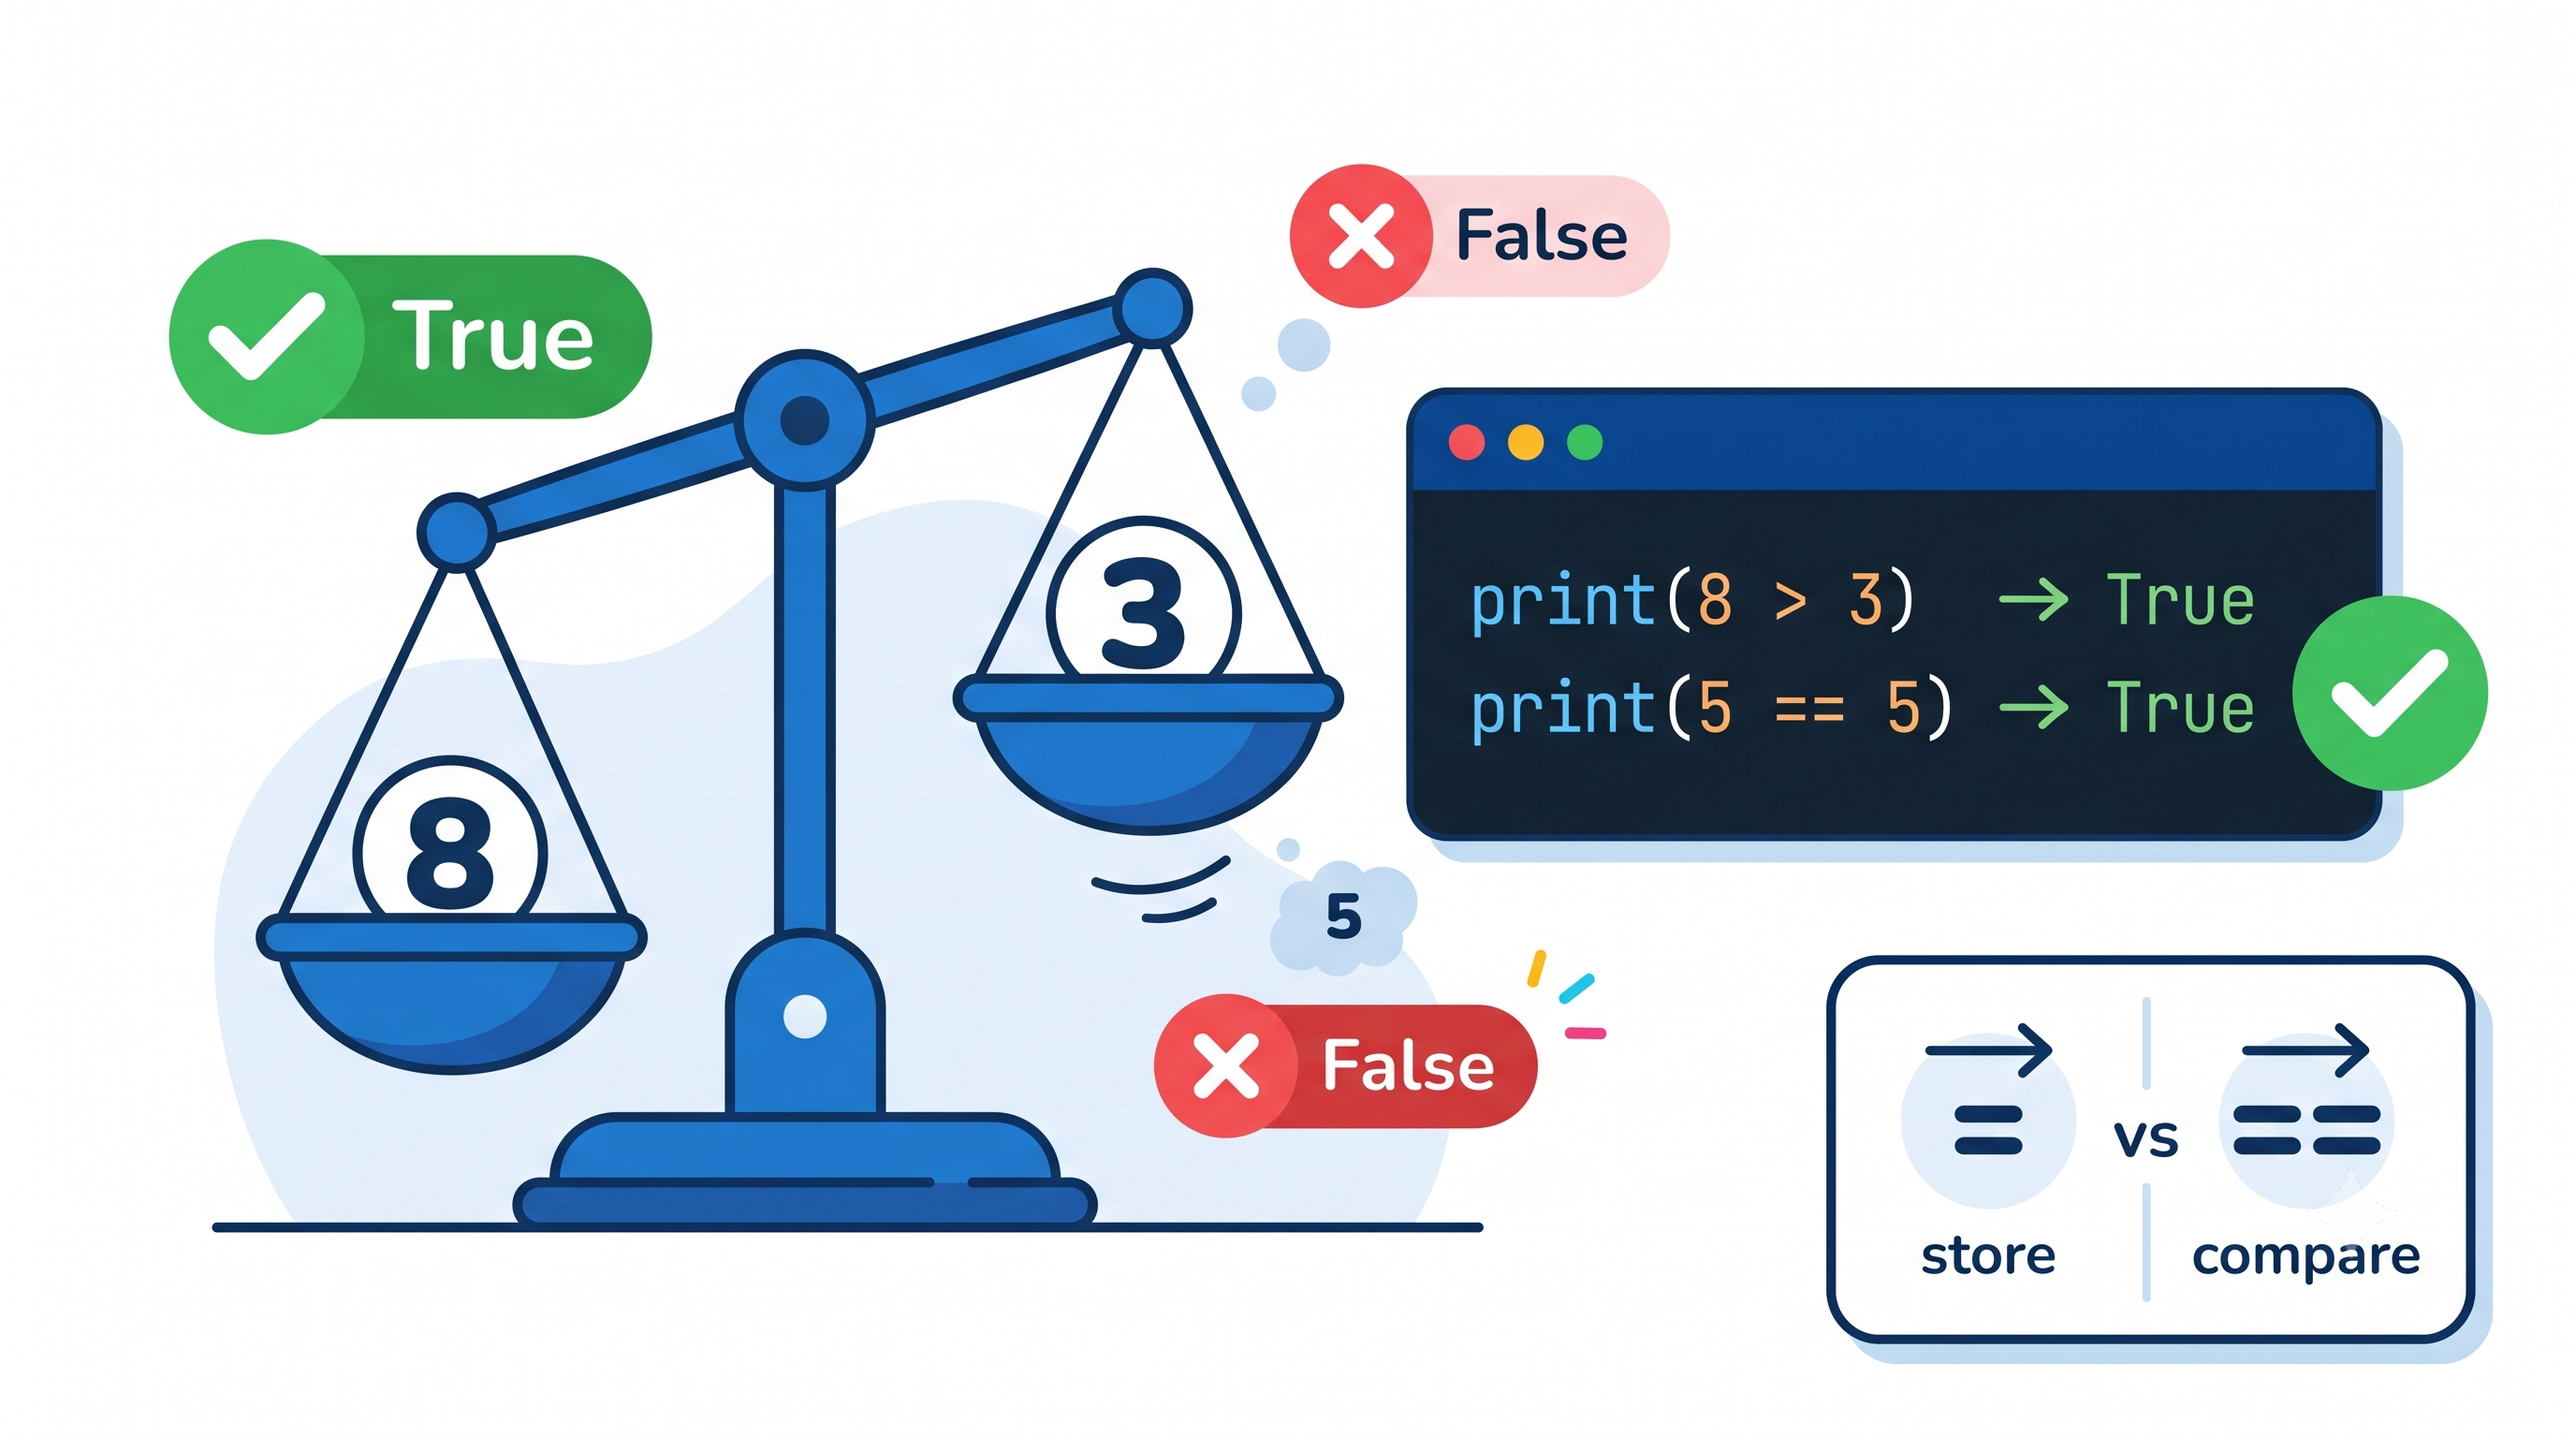
Teach Python to answer yes-or-no questions. This lesson introduces the six comparison operators — ==, !=, >, <, >=, <= — each of which compares two values and returns a Boolean: True or False. Students learn the crucial difference between = (store a value) and == (ask if equal), see that >= and <= count equality too, discover the open-mouth trick for > and <, and compare words as well as numbers (where capital letters matter). They print True/False quizzes, practise predict-then-run, and learn that comparisons are the very questions that power if-statements. With common-error fixes and practice questions. Class 6–8 · Python Programming.
- Teacher: First Admin
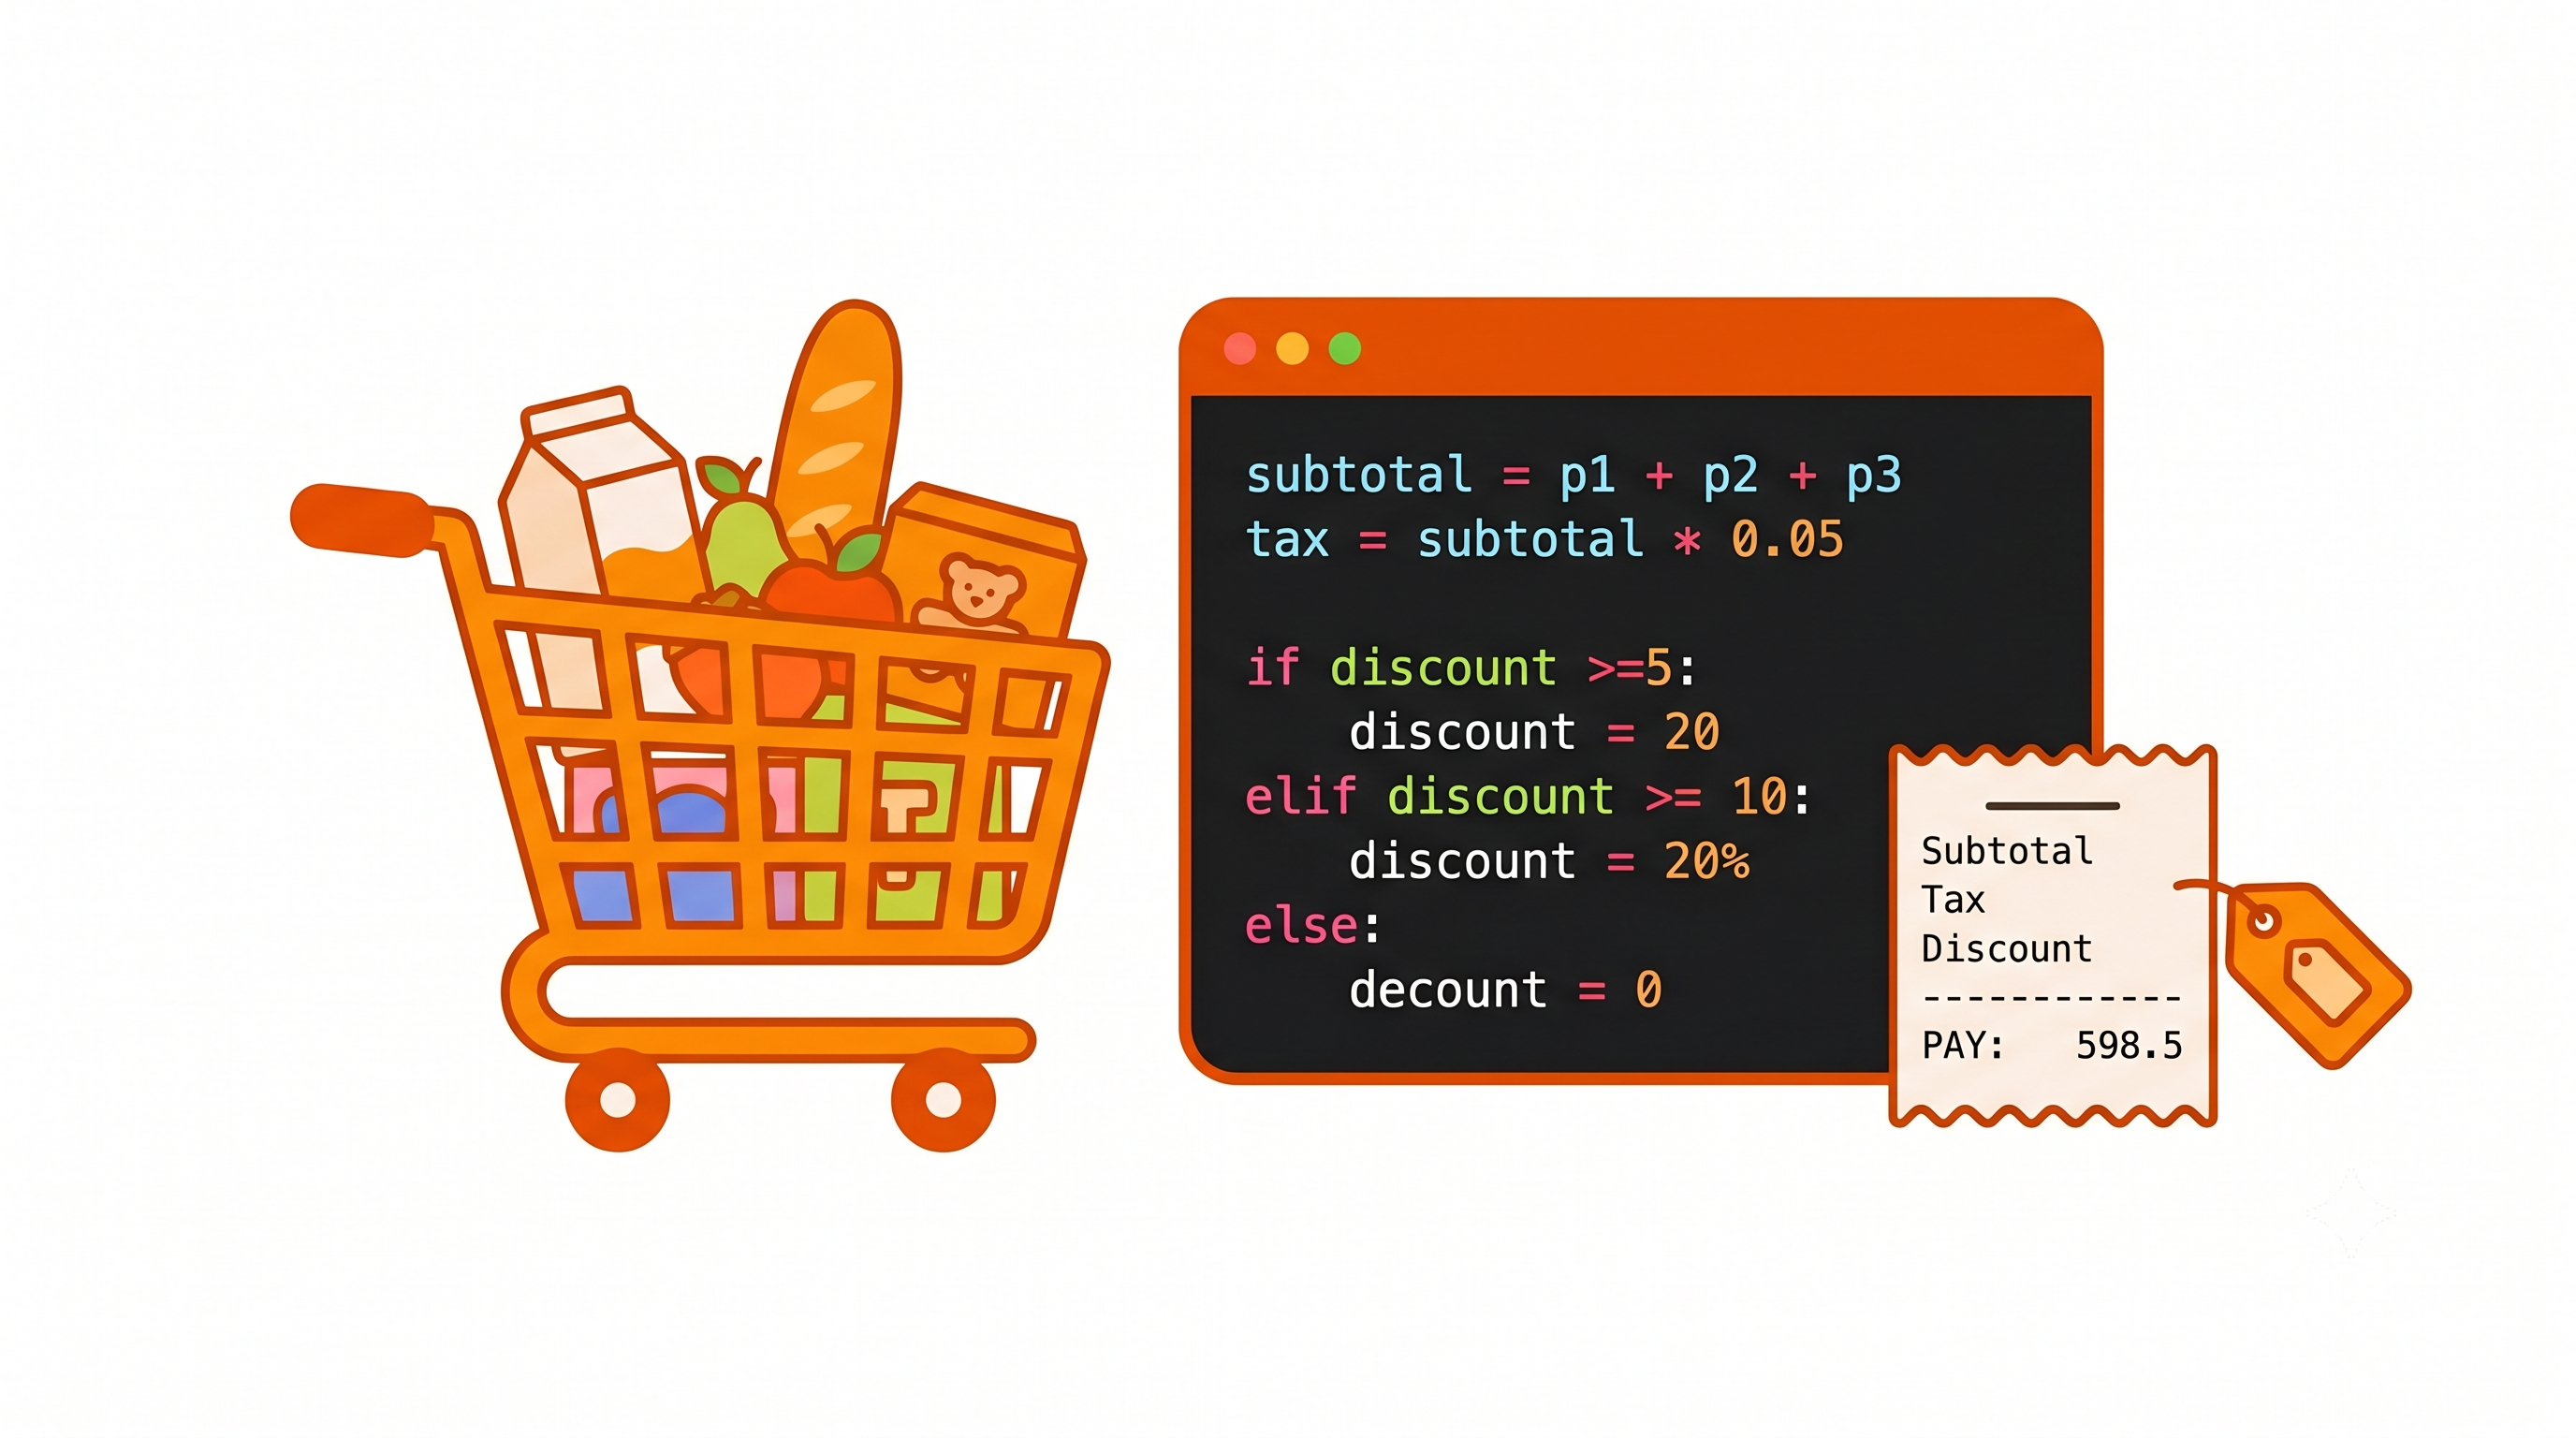
Build a real shopping app. This capstone Python project adds up a bill the way a real shop does — and combines everything learned so far. Students read three item prices with float(), add them into a subtotal, apply a 5% tax (learning that 5% means × 0.05), then use if / elif / else to give a tiered discount (₹1000+ → 10%, ₹500+ → 5%). They round the money with round(total, 2) and print a clean receipt with f-strings showing subtotal, tax, discount, and final pay. Covers the percentage-as-decimal trap, the if/if/if vs elif pitfall, and testing with different carts. Class 6–8 · Python Programming.
- Teacher: First Admin
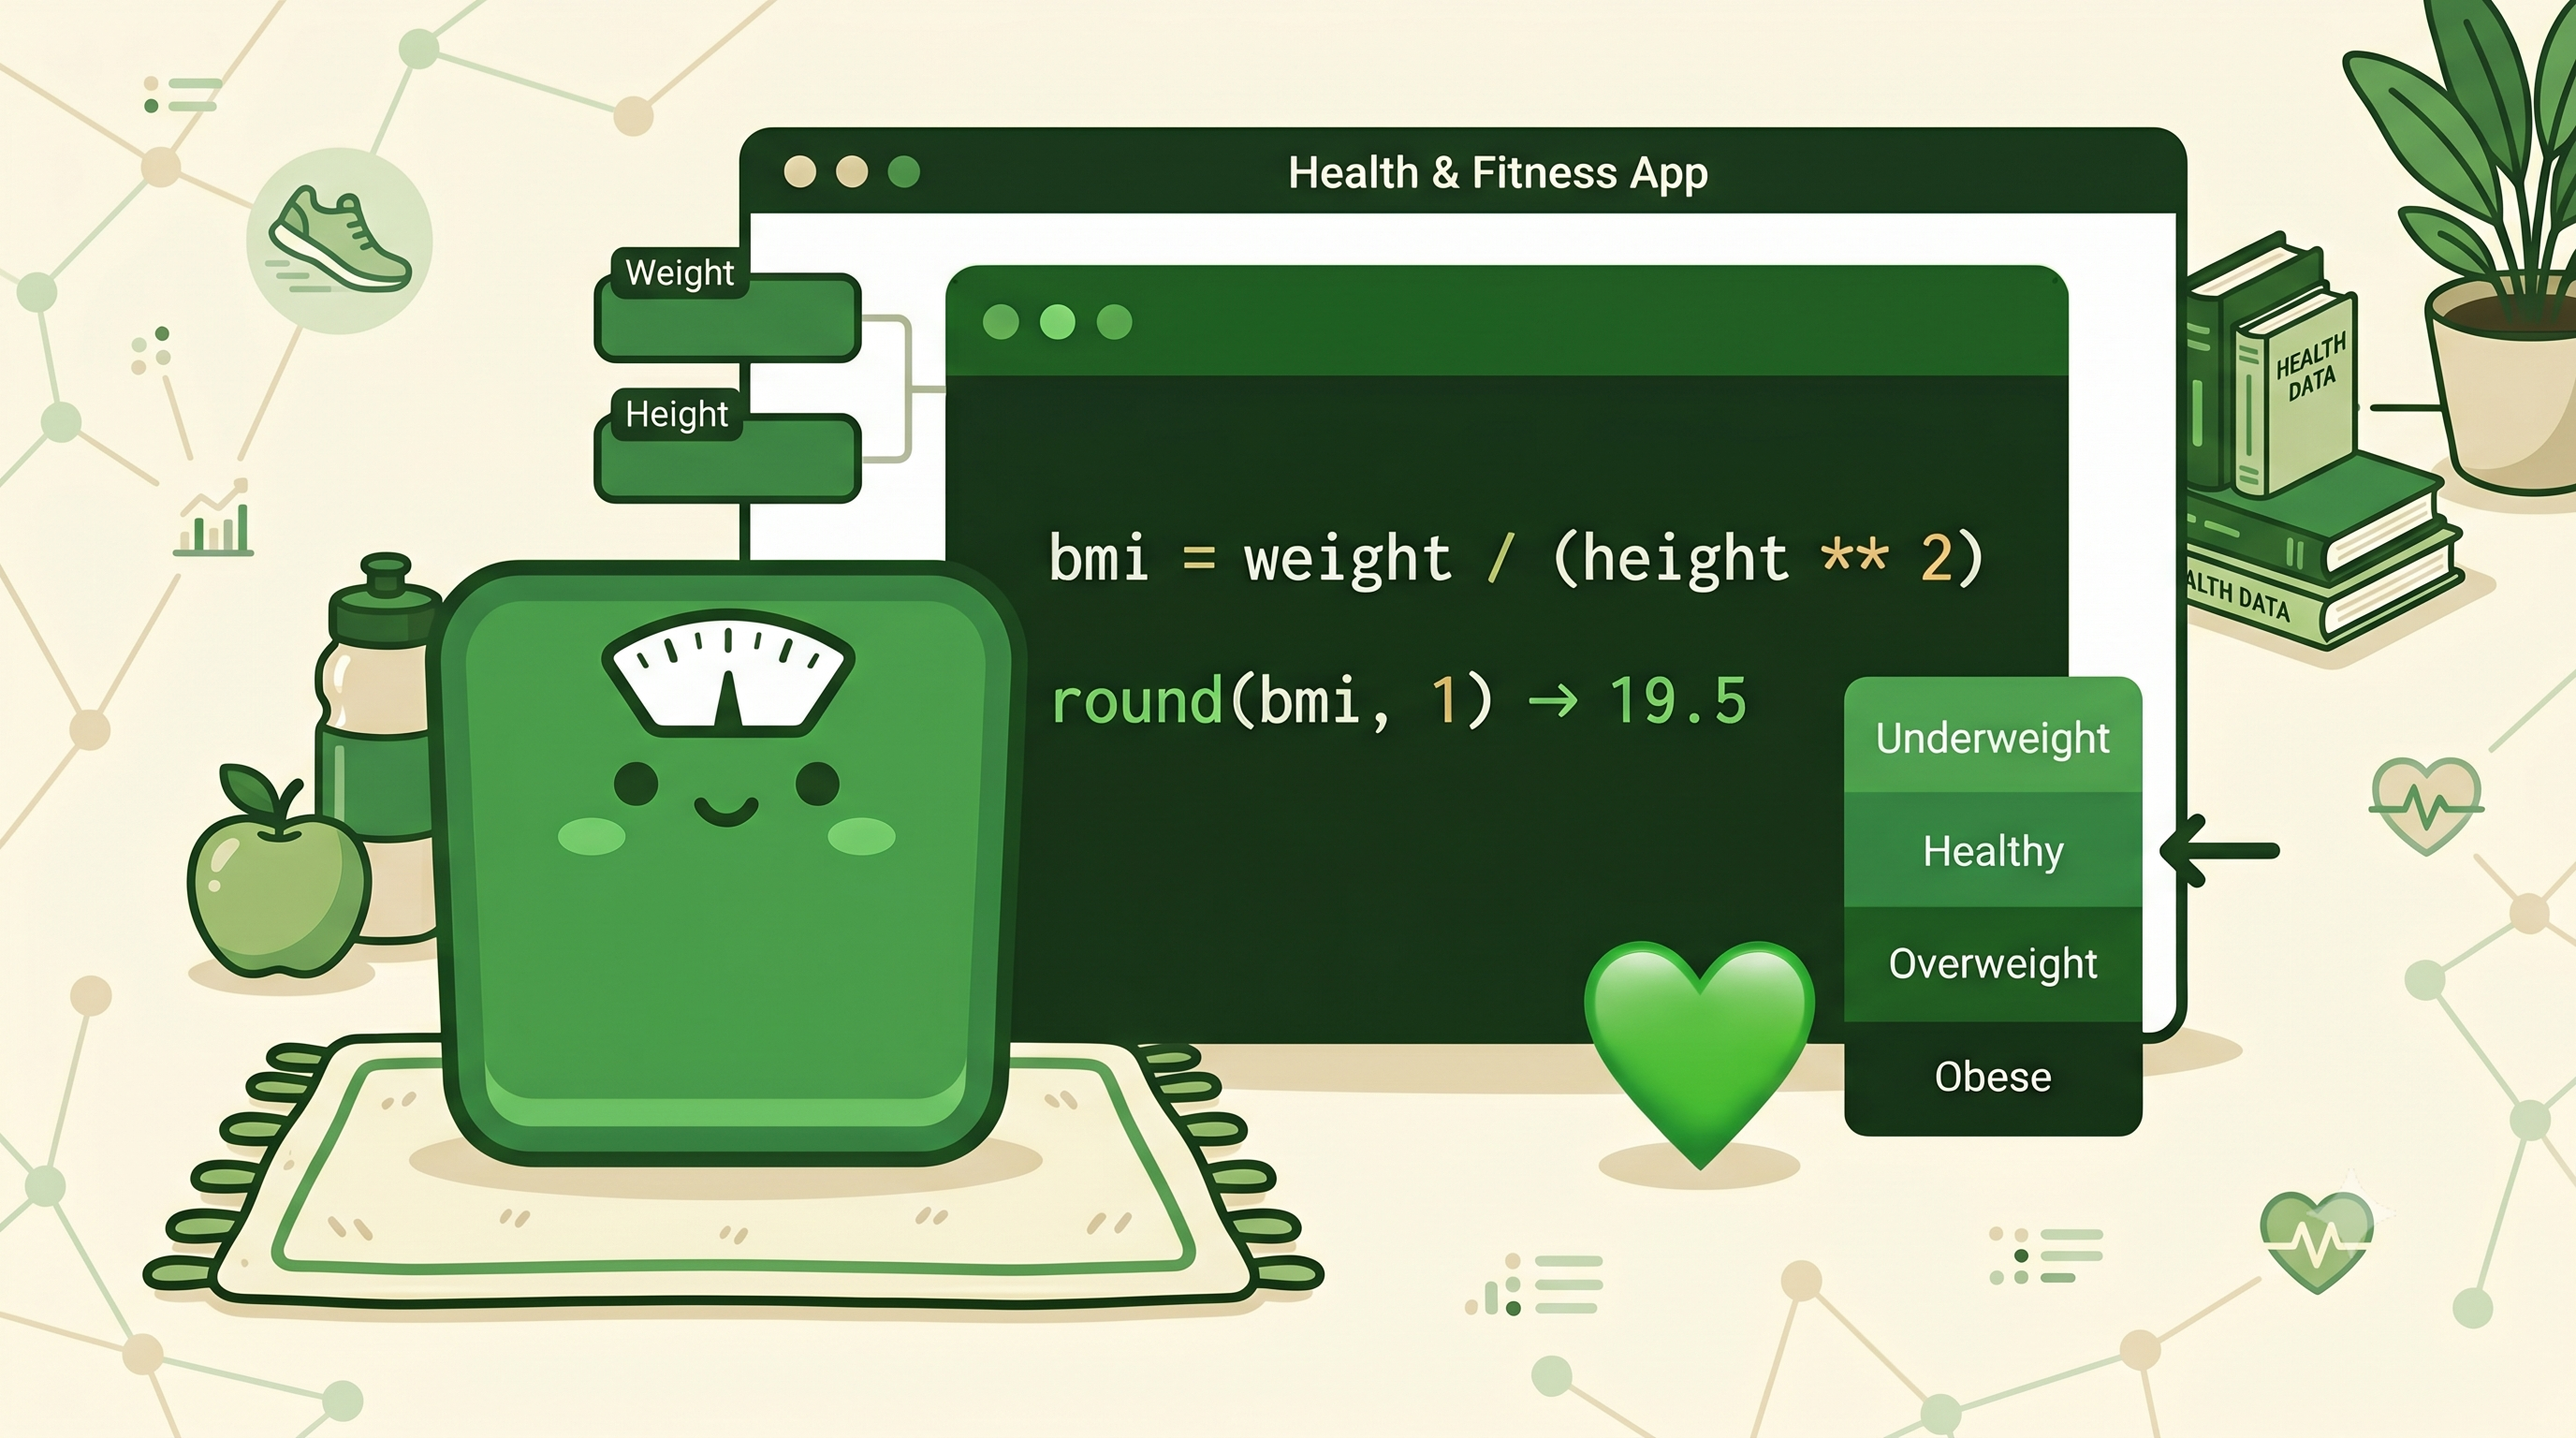
Build a calculator that makes a decision. This Python project applies the BMI formula — weight ÷ (height × height) — to compute a health number. Students learn the ** power operator to square the height, read weight and height with float() (since both have decimals), respect bracket order in weight / (height ** 2), and tidy the result with round(bmi, 1). Then if / elif / else picks the right health category (Underweight, Healthy, Overweight, Obese) so only one message prints. Covers the classic metres-not-centimetres trap, testing with different numbers, and a friendly BMI app — with the reminder that BMI is just one rough number and every body is different. Class 6–8 · Python Programming.
- Teacher: First Admin
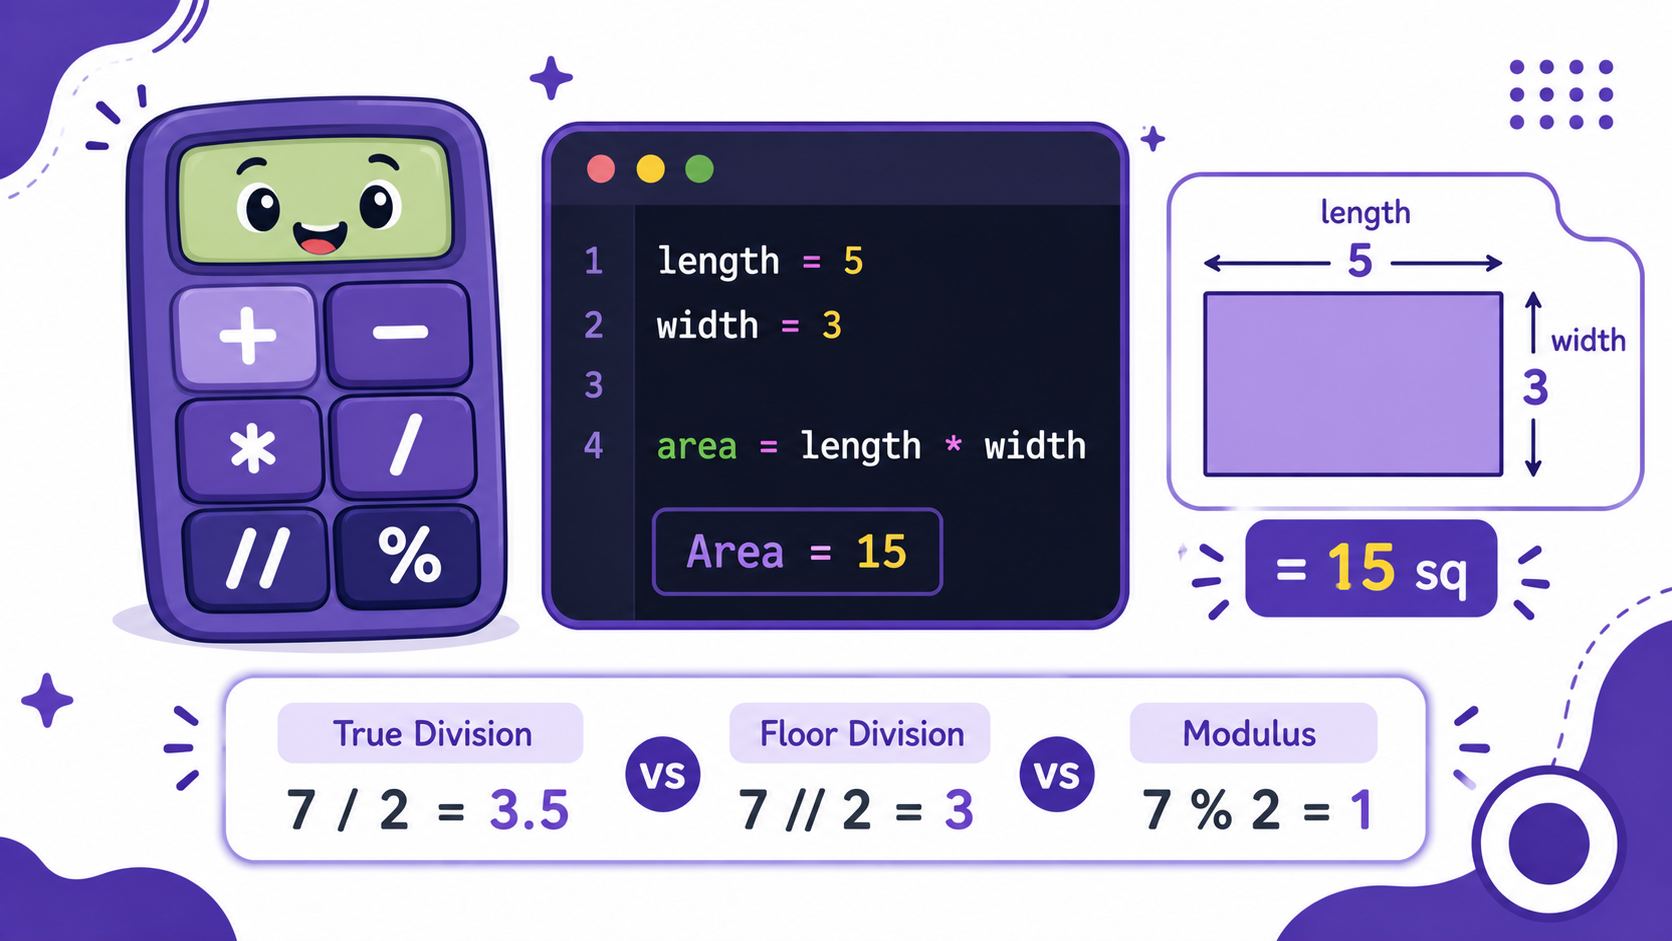
Turn Python into a calculator. This lesson covers the six math operators — +, −, *, /, //, % — and the surprises that trip up beginners: multiply needs a star * (not ×), plain / always gives a decimal (6 / 2 = 3.0), // keeps only the whole part, and % gives the remainder (handy for spotting even numbers). Students store results in variables, respect bracket order (BODMAS), and build an Area Calculator that reads a rectangle's length and width with int(input(...)) and prints both area (length * width) and perimeter (2 * (length + width)). With common-error fixes and practice questions. Class 6–8 · Python Programming.
- Teacher: First Admin
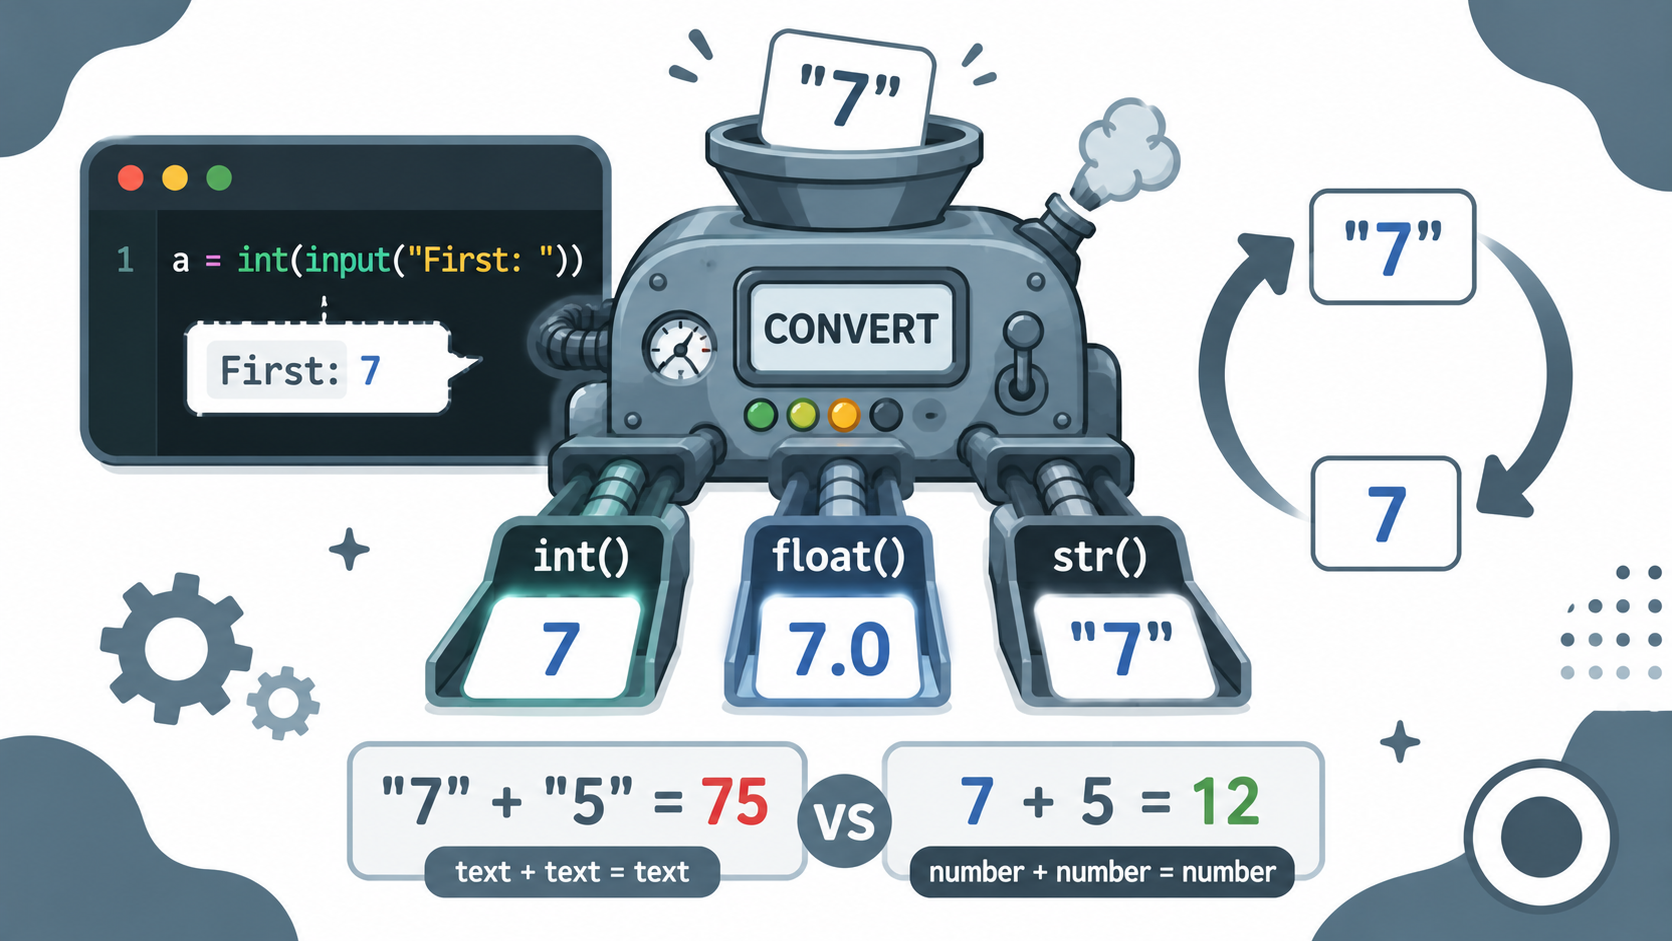
Make user input do maths. This Python lesson tackles type conversion — turning one data type into another. Since input() always returns text, "7" + "5" joins into "75" instead of adding to 12. Students learn the three converters: int() (text → whole number), float() (text → decimal, for prices and measurements), and str() (number → text for messages), master the key int(input(...)) move, see why int() raises a ValueError on "hello" or "3.5", and compare joining with str() against the easier f-string. Finishes with a Simple Calculator mini-project, common-error fixes, and practice questions. Class 6–8 · Python Programming.
- Teacher: First Admin
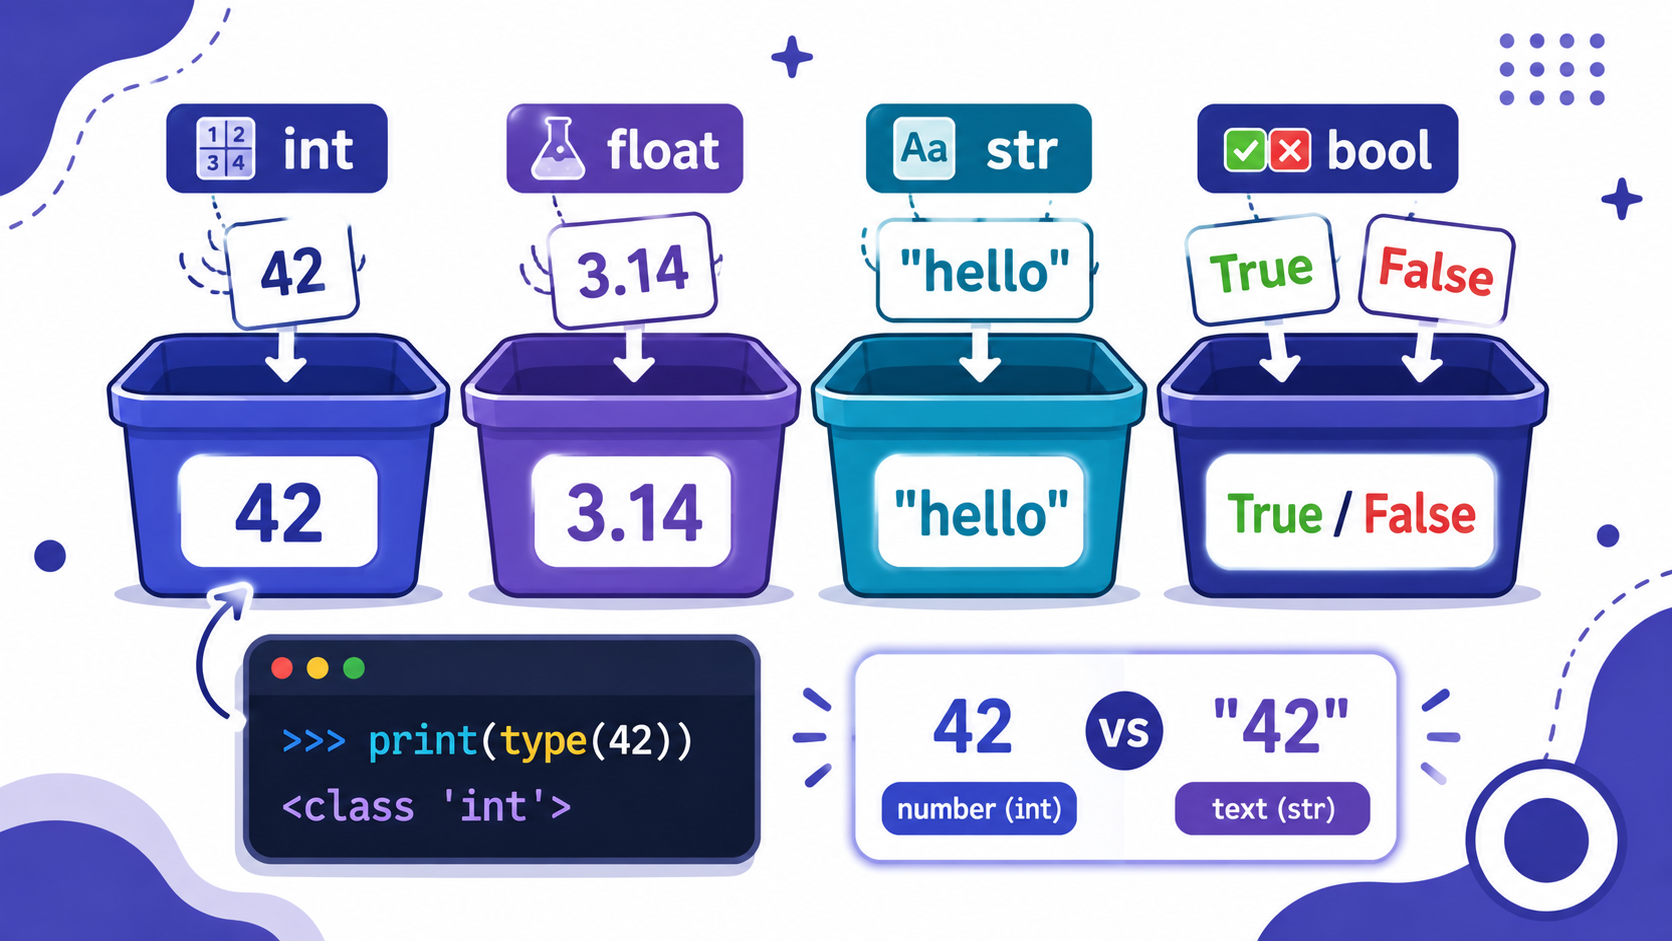
Every value in Python has a type. This lesson teaches the main data types — int (whole numbers), float (decimals), str (text in quotes), plus the bonus bool (True/False) — and why the type decides what you can do with a value (5 + 2 adds to 7, but "5" + "2" joins into "52"). Students use type() to check any value, spot the key trick that quotes always mean a string (so "42" is text, not the number 42), and convert between types with int(), float(), and str() — including the classic int(input(...)) fix for maths. With a sorting game, common-mistake fixes, and practice questions. Class 6–8 · Python Programming.
- Teacher: First Admin
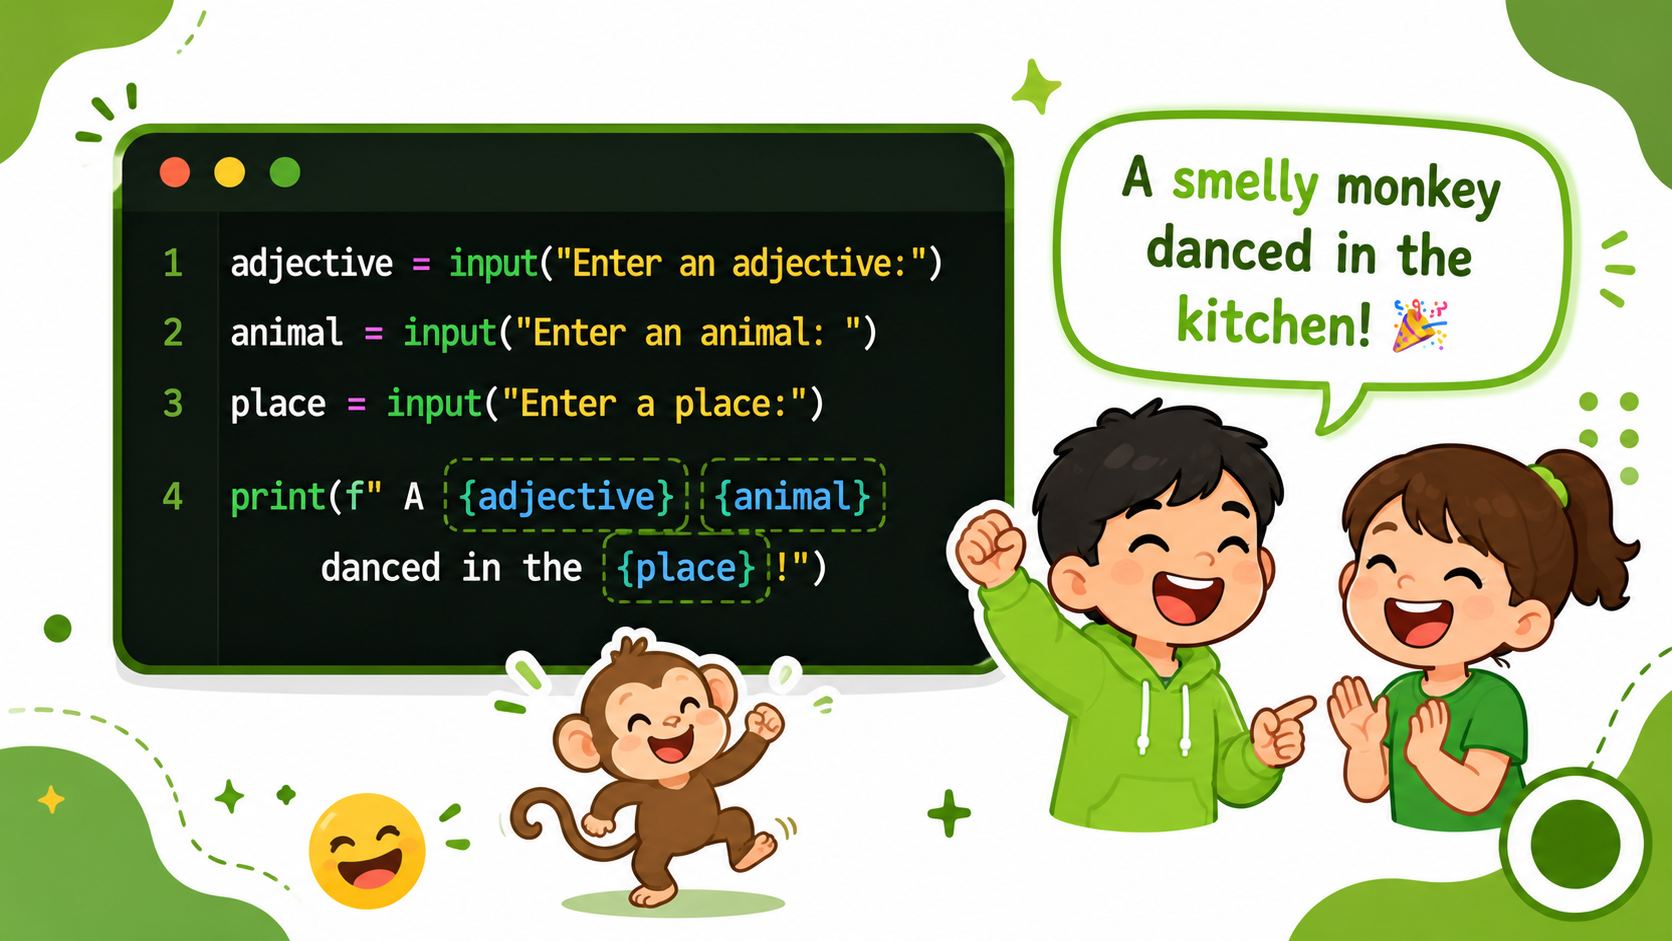
Build your first real game. This Python mini-project puts everything together — input(), variables, f-strings, and print() — to make a Mad Libs word game. Students collect three random words from a player, drop them into the { } blanks of a story with an f-string, and print a hilarious result like "A smelly monkey danced in the kitchen!". They then play it with a partner (the word-giver can't see the story), pick up tips for funnier stories, and level it up with more inputs and blanks. Just four lines of code, big laughs. Class 6–8 · Python Programming.
- Teacher: First Admin
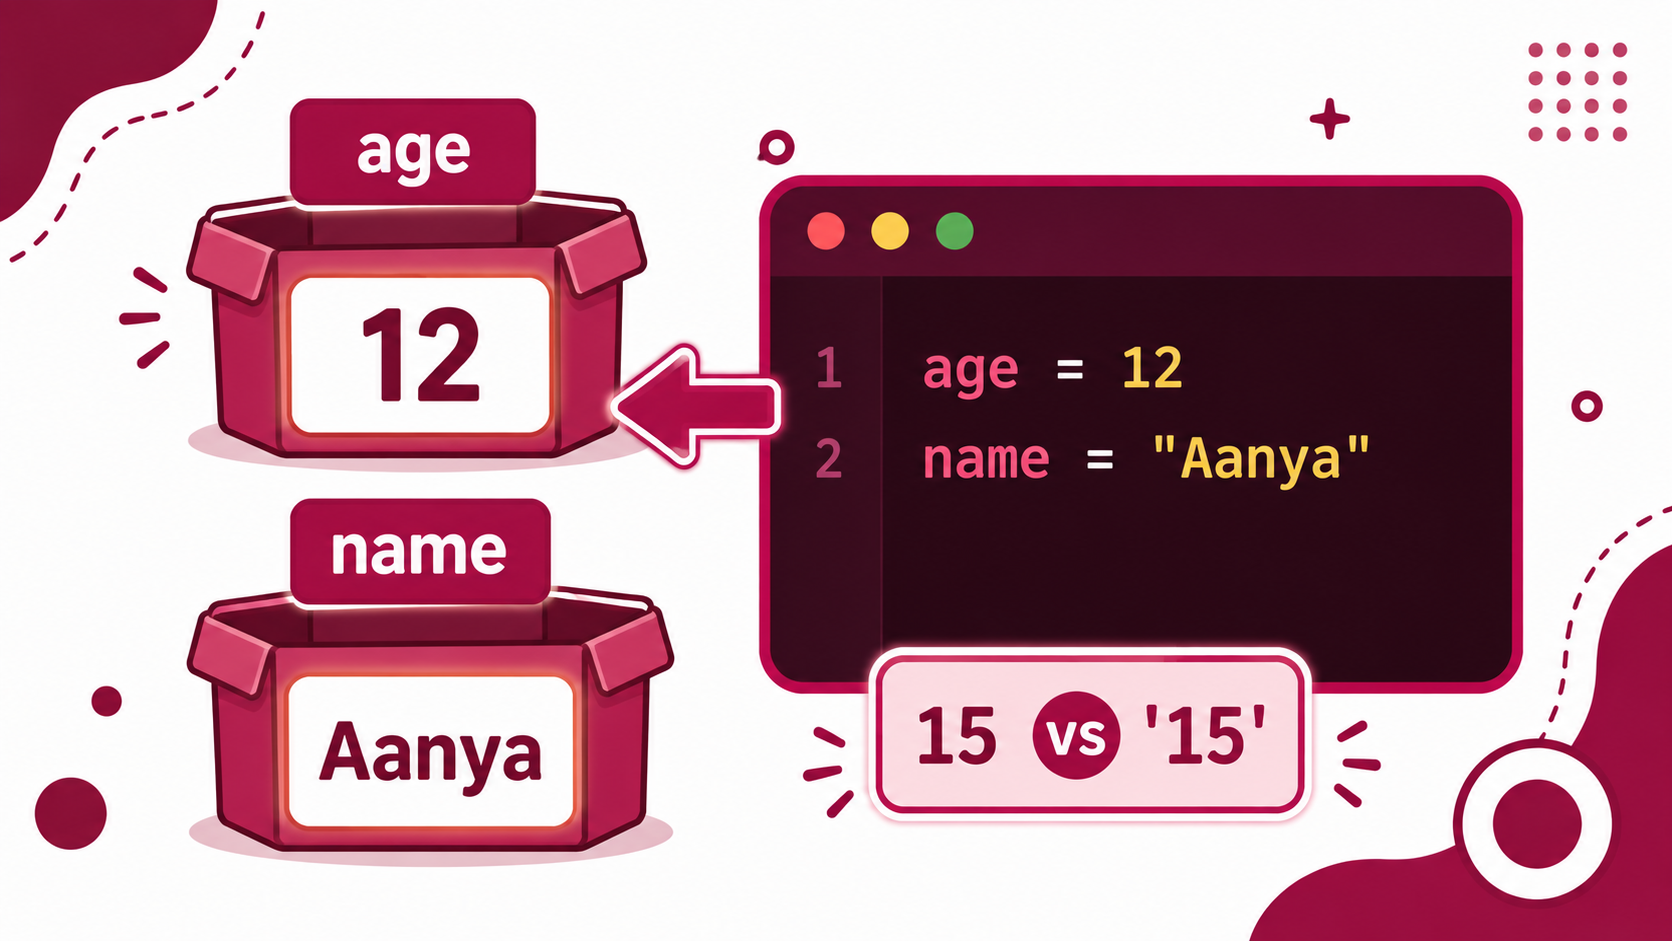
Give values a name. This Python lesson introduces variables — named boxes that store a value with = so the computer can remember it. Students learn the two main kinds of values: numbers (int and float, no quotes, for maths) and strings (text in quotes, joined with +), why "15" is not the number 15, and how type() reveals which is which. They then update variables (score = score + 5), do maths with number variables, and use f-strings like f"You are {age} years old" to drop variables into sentences — finishing with an About-Me Card mini-project, common errors, and practice questions. Class 6–8 · Python Programming.
- Teacher: First Admin
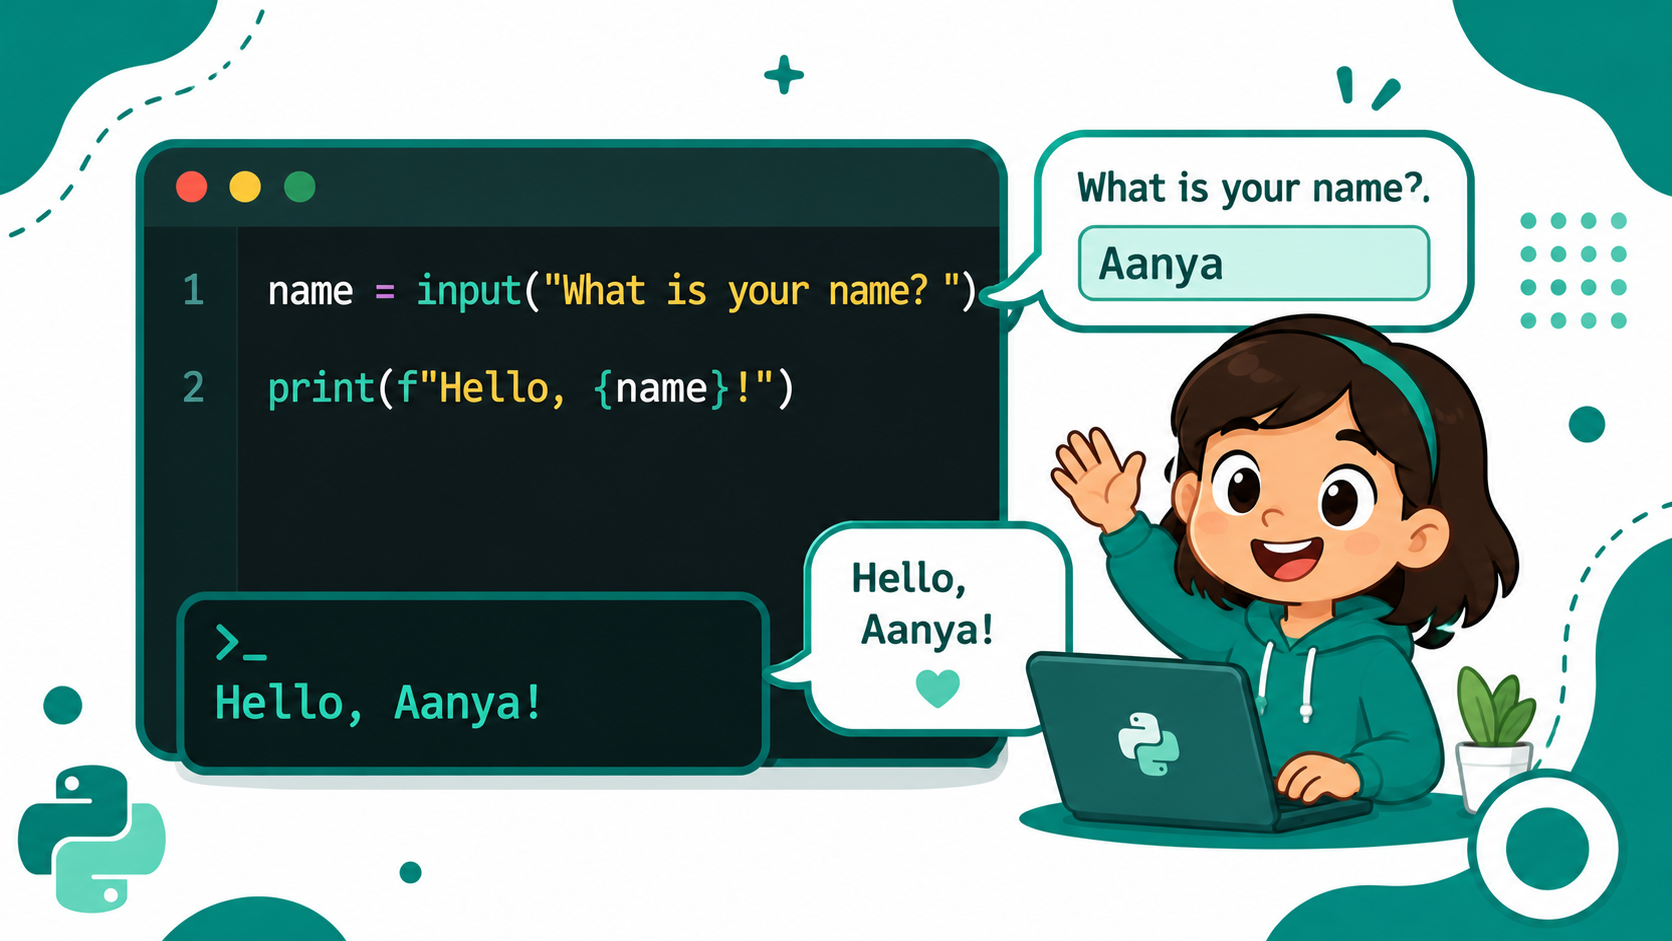
Make programs talk back. This Python lesson introduces the input() function — how a program can ask a question, wait for the user to type an answer, and store it in a variable. Students greet the user by name using + concatenation and the easier f-string (f"Hello, {name}!"), learn that input() always returns text, and use int(input(...)) to convert that text into a number for simple maths like "next year you turn {age + 1}". Includes a Friendly Greeter mini-project, common errors and fixes, and practice questions. Class 6–8 · Python Programming.
- Teacher: First Admin
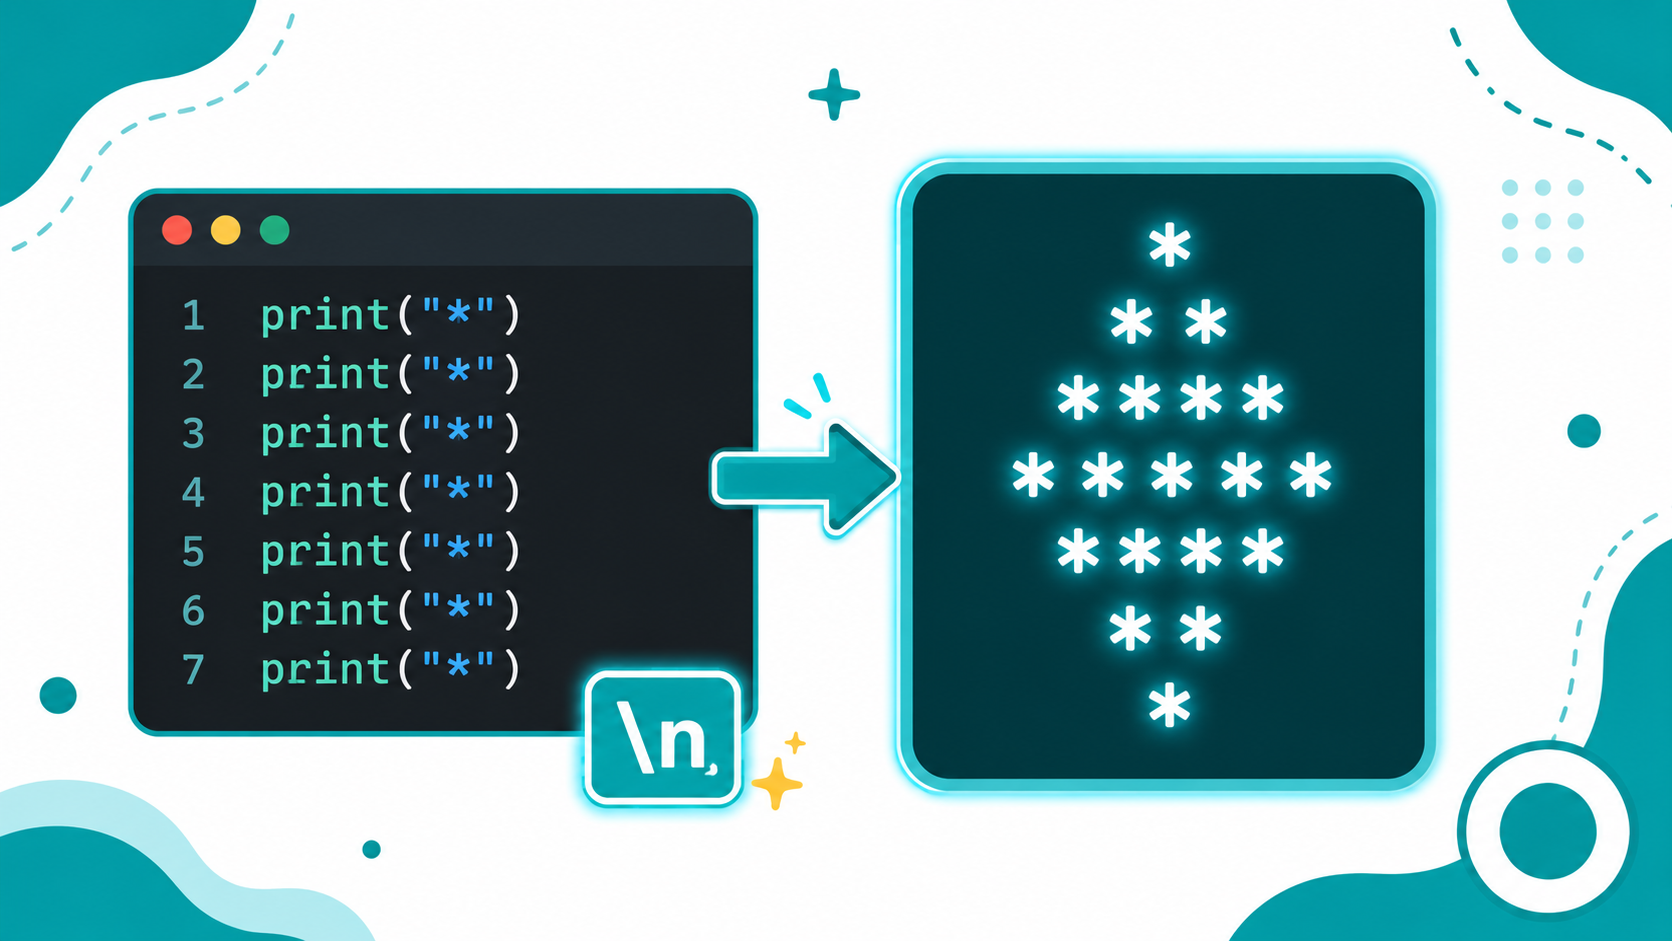
Take print() further. This Python lesson shows how to print across many lines — either with several print() commands or with the \n newline escape sequence inside one string — plus the handy escapes \t (tab), \" (quote), and \\ (backslash). Students then use spaces and stars to position characters, build a star triangle, and finally draw a centred 7-line diamond with code, learning to plan, count spaces and stars per line, and fix wonky shapes one line at a time. Class 6–8 · Python Programming.
- Teacher: First Admin
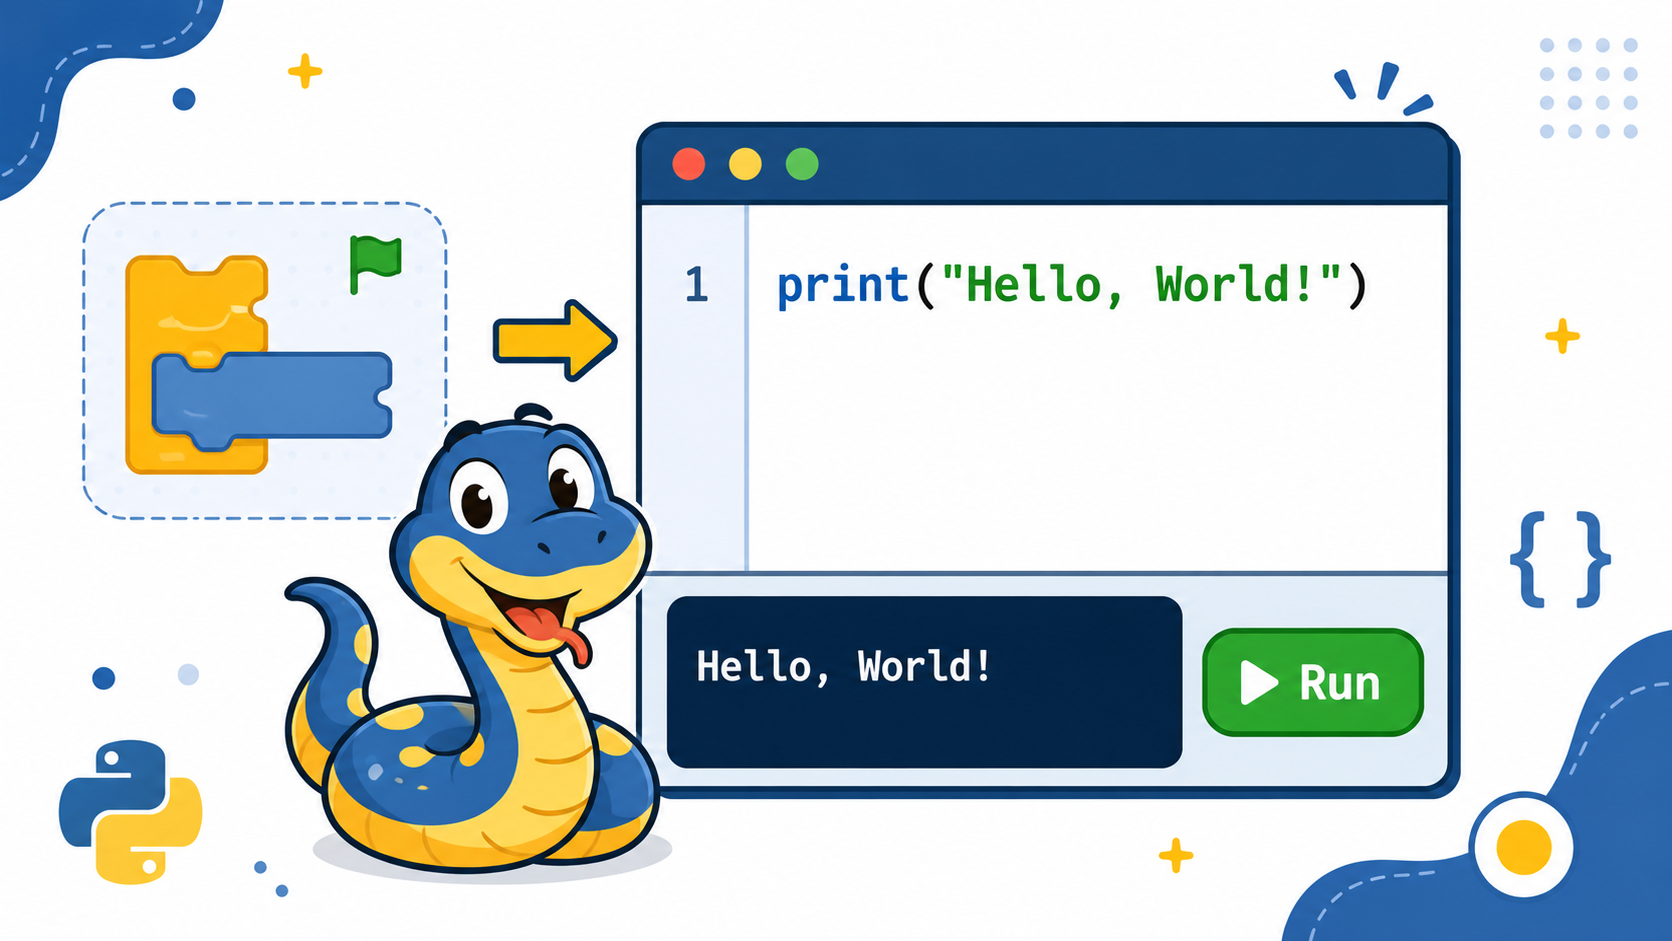
The leap from blocks to real code: meet Python, a popular text-based language used for games, AI, websites, and science. This lesson shows how Scratch ideas carry over to typed code, how to set up either Thonny (offline app) or Replit (online), and how the Editor and Shell work together. Students write the classic first program — print("Hello, World!") — learn the exact syntax rules (small letters, brackets, double quotes), see how Python tells strings from numbers, and practise spotting and fixing common errors. Class 6–8 · Python Programming.
- Teacher: First Admin
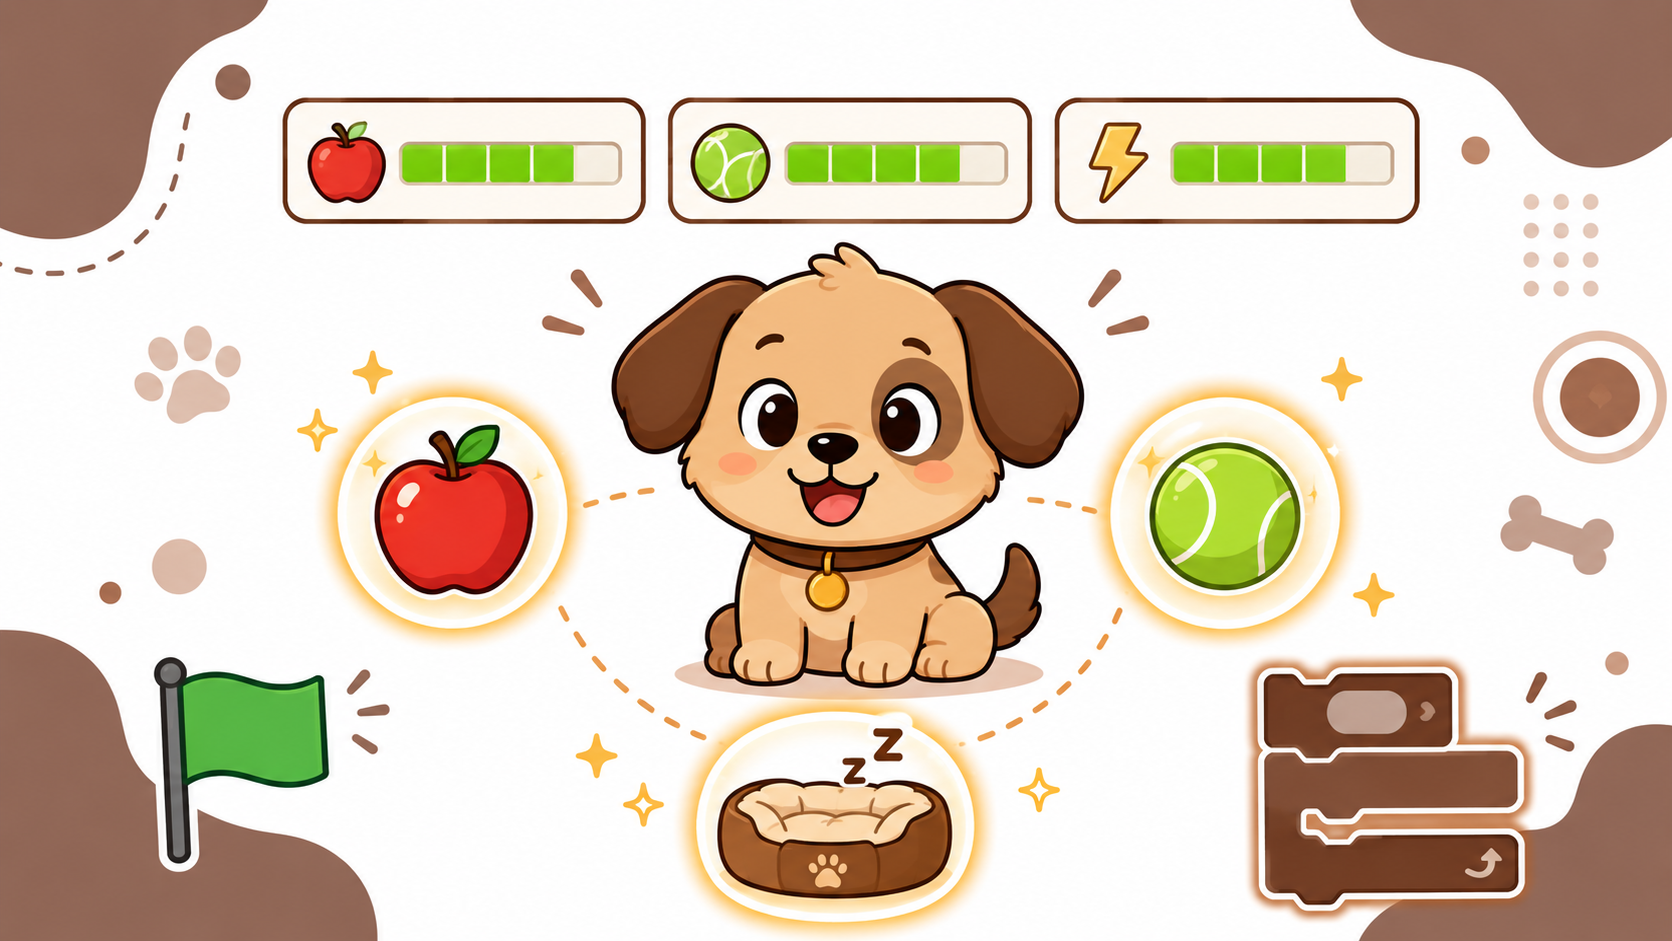
The capstone Scratch mini-project: build a Virtual Pet that you feed, play with, and put to sleep. The pet has three needs — food, fun, and energy — stored as variables that slowly drop over time, three clickable care buttons (apple, ball, bed) that raise them, a forever loop that keeps the pet "alive," and if-else logic that switches the pet's face between happy and sad. This project ties together everything learned — variables, events, loops, and conditionals — and ends with a guided class presentation: Show, Explain, Share. Class 6–8 · Scratch Programming.
- Teacher: First Admin
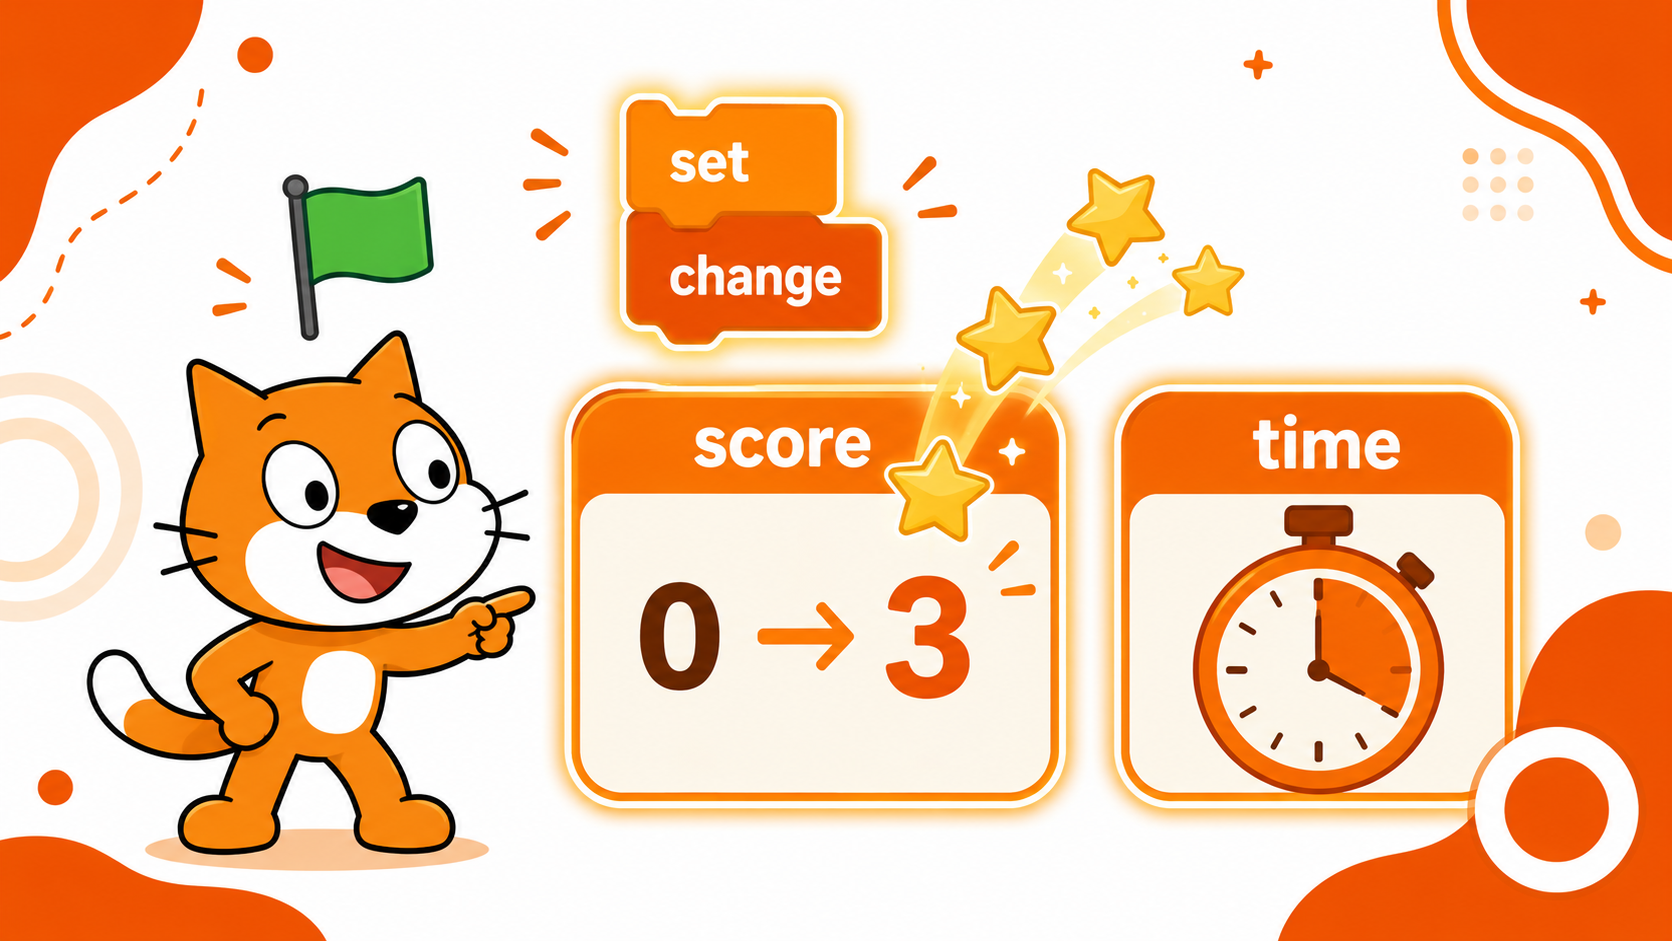
Learn how to give your Scratch games a memory using variables — labelled boxes that store changing values like score, lives, and time. This lesson covers making a variable, the set, change, show, and hide blocks, and the key difference between set (replace) and change by 1 / -1 (add or subtract). Students build a star-catching score system, a "lose a life" health counter, the built-in timer, a custom countdown, and combine them into a complete "Beat the Clock" mini-game. Class 6–8 · Scratch Programming.
- Teacher: First Admin
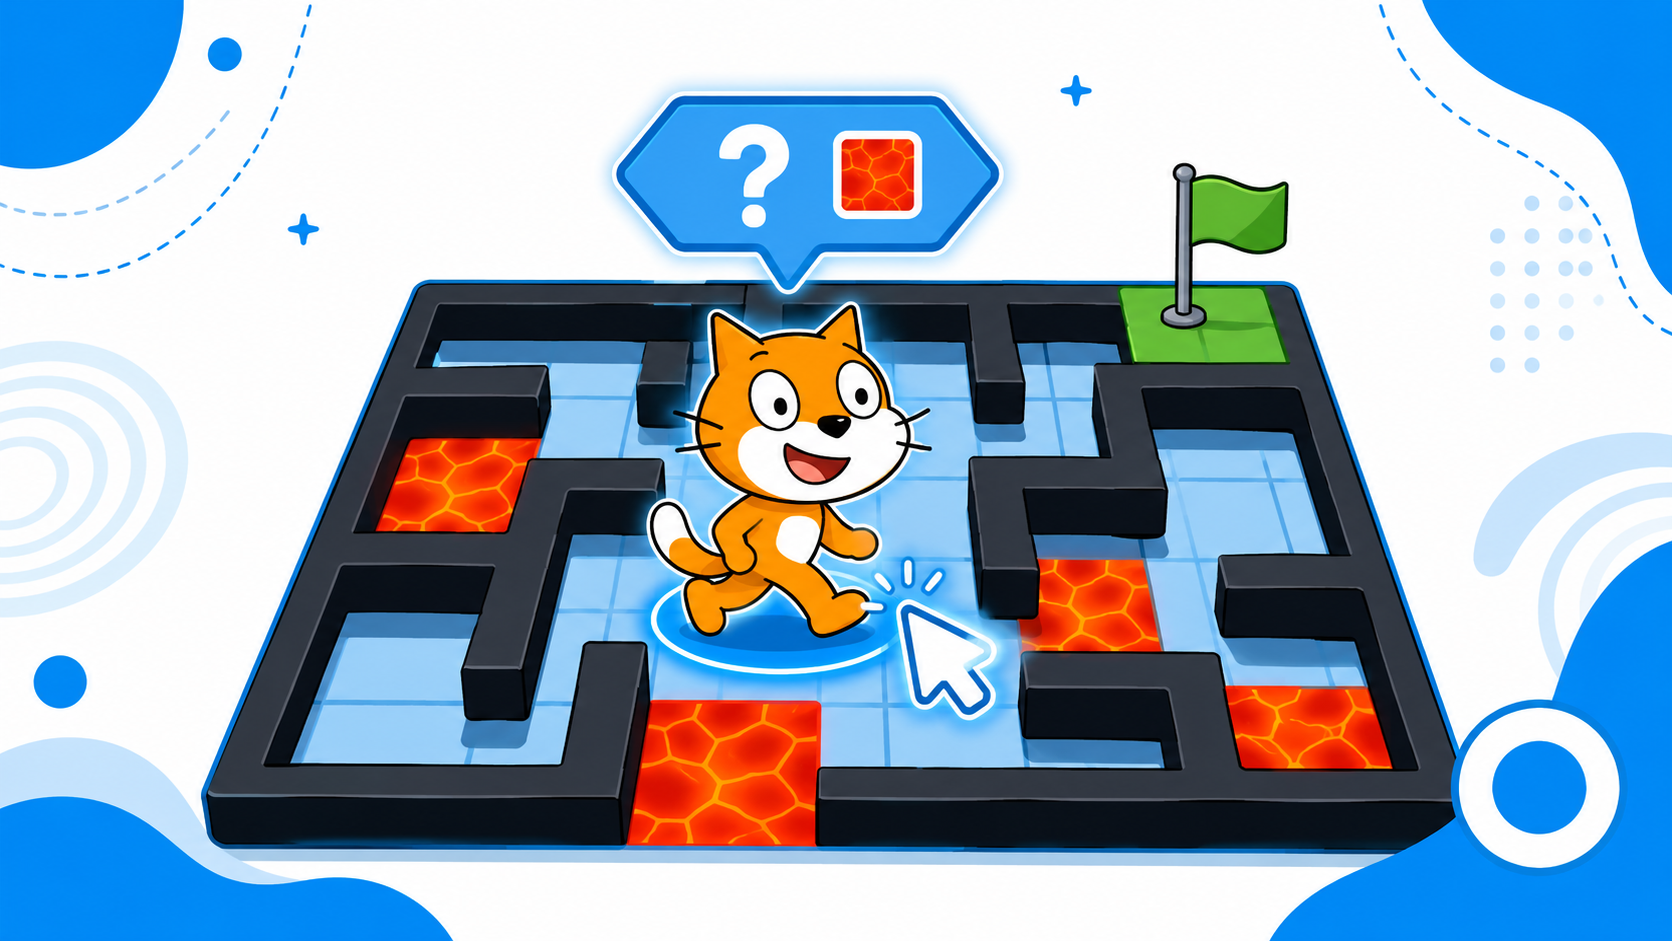
Learn how to give your Scratch sprite "senses." This lesson covers the blue hexagon Sensing blocks — touching color and touching mouse-pointer — and how to pair them with if-else so a sprite reacts on its own. Students use the eyedropper to detect exact colours, build a "Don't Touch the Lava" game, a maze with solid walls, and hover-glow effects, then combine senses with or/and to create a complete Lava Maze mini-game. Class 6–8 · Scratch Programming.
- Teacher: First Admin
Course Description
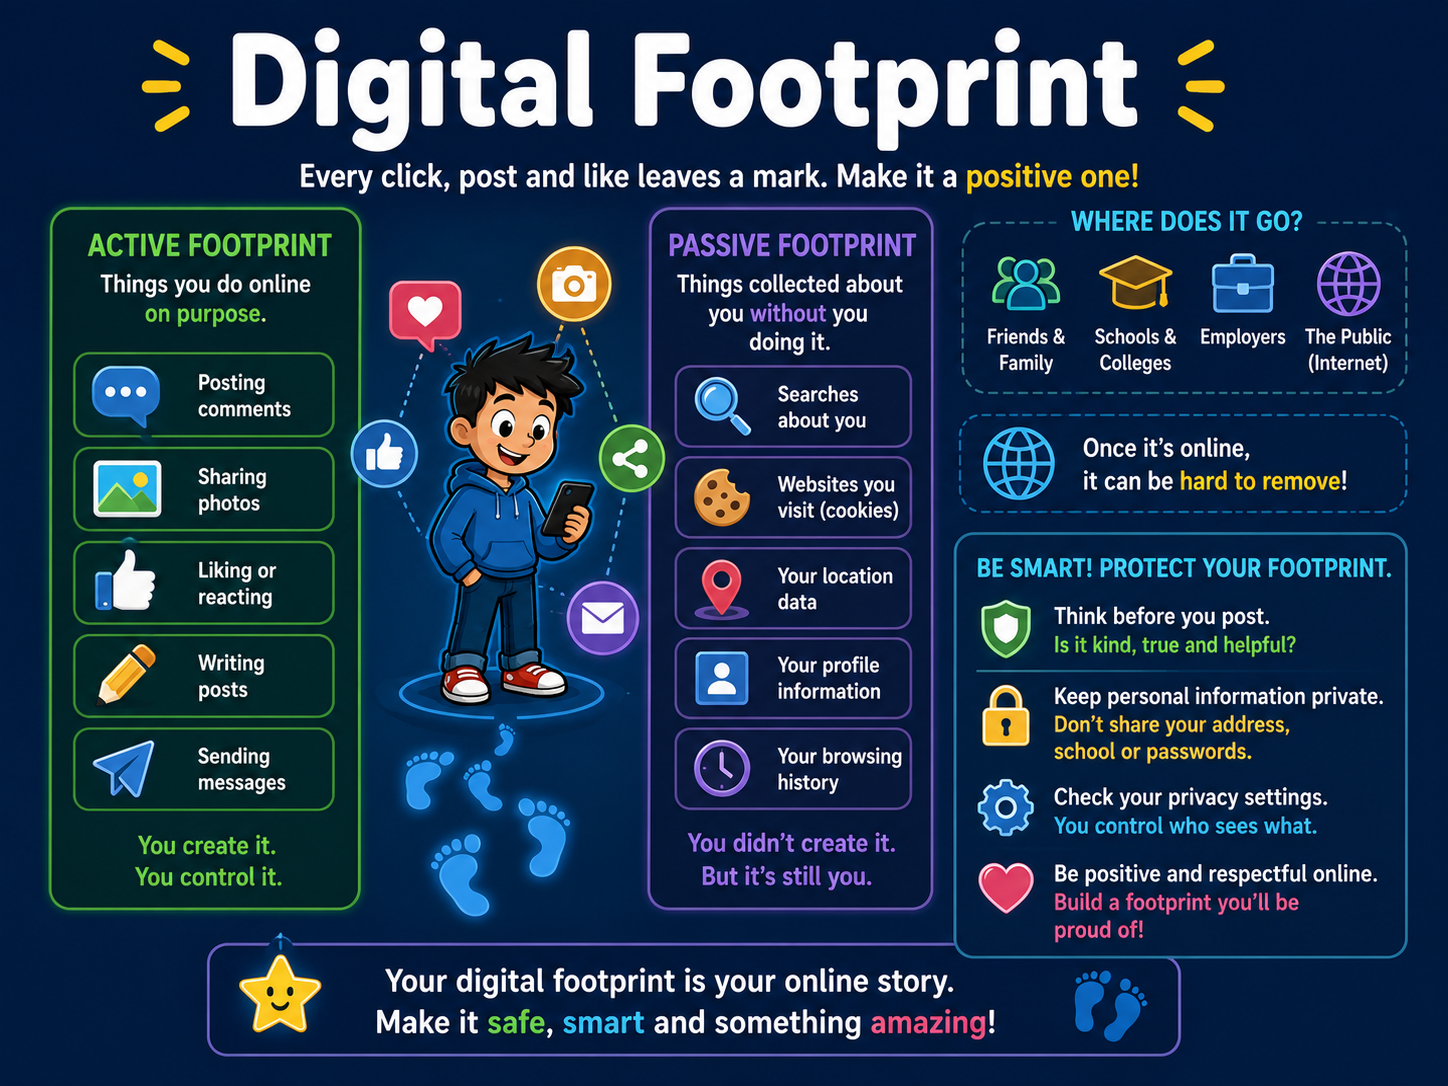
Digital Footprint & Cyberbullying is an essential digital citizenship course designed to help students understand how their online activities create a lasting digital footprint and how to stay safe, responsible, and respectful while using the internet.
The course introduces learners to the concept of digital footprints, public and private information, online privacy, and responsible social media behavior. Students will learn how every online action, including posts, comments, searches, and shared content, contributes to their digital identity.
The course also explores cyberbullying, its different forms, its impact on individuals, and practical steps to respond safely using the Stop, Block, Report approach. Through real-life examples, discussions, and activities, students will develop the skills needed to protect their privacy, support others online, and become responsible digital citizens.
What Students Will Learn
By completing this course, students will learn:
- What a digital footprint is and how it is created.
- Active and passive digital footprints.
- The importance of thinking before posting online.
- The THINK Rule for responsible online sharing.
- The difference between public and private information.
- Safe online privacy practices.
- The Golden Rule of Internet Privacy.
- What cyberbullying is and why it is harmful.
- Different types of cyberbullying.
- How to respond to cyberbullying using Stop, Block, Report.
- Trusted adults and support resources.
- How to help friends who experience cyberbullying.
- Responsible digital citizenship and online behavior.
Course Outcomes
After successfully completing this course, students will be able to:
Understand Digital Footprints
Explain how online activities leave permanent traces on the internet.
Protect Personal Information
Identify information that should remain private and avoid oversharing online.
Apply Safe Posting Practices
Use the THINK Rule before posting content online.
Recognize Cyberbullying
Identify different forms of cyberbullying and understand their impact.
Respond Safely to Online Problems
Use appropriate actions such as Stop, Block, and Report when facing cyberbullying.
Support Others Online
Help friends and classmates who may be experiencing cyberbullying.
Practice Digital Citizenship
Demonstrate respectful, safe, and responsible online behavior.
Expected Outcome
Upon completion of this course, students will understand how their actions online contribute to their digital footprint and how to protect their privacy. They will be able to recognize and respond appropriately to cyberbullying, make safer decisions while using the internet, and act as responsible digital citizens both online and offline.
- Teacher: First Admin
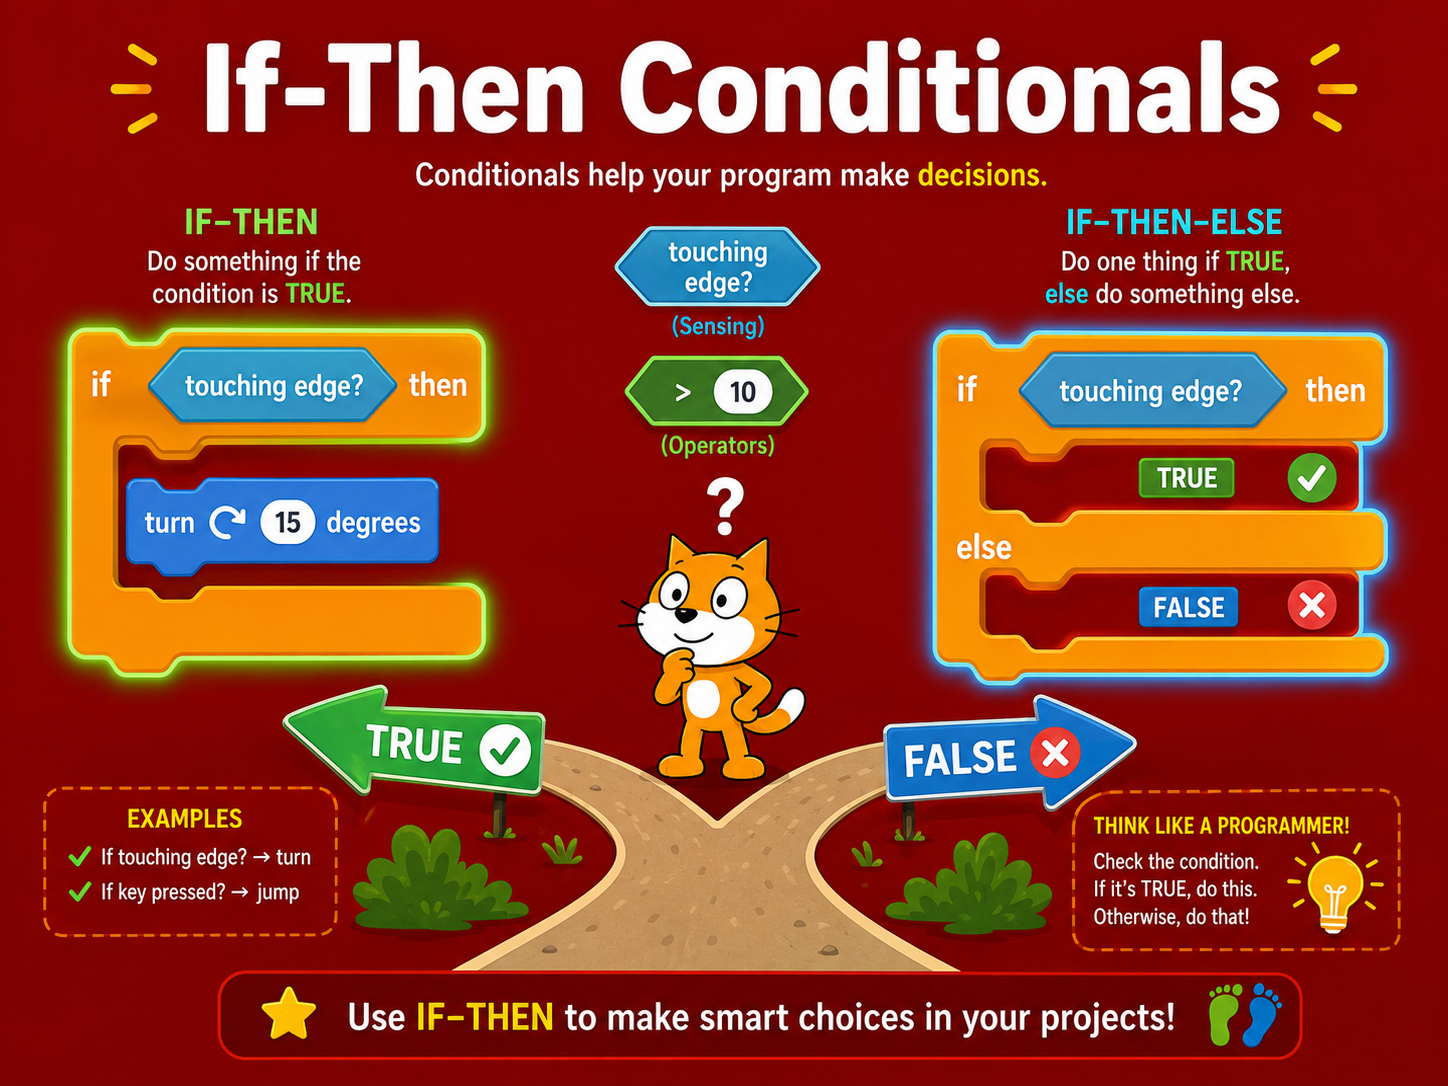
Conditionals let sprites make decisions — they check a yes/no condition and act only when the answer is TRUE. This course covers Scratch's two conditional blocks: if-then (runs inside blocks only when the condition is TRUE, skips when FALSE) and if-then-else (always runs one of two paths — TRUE blocks or else blocks). Students learn to use hexagon conditions from Sensing (touching, key pressed) and Operators (> < =), place 'if' inside 'forever' for continuous checking, stack multiple decisions, and build nested conditionals for smarter game logic.
- Teacher: First Admin
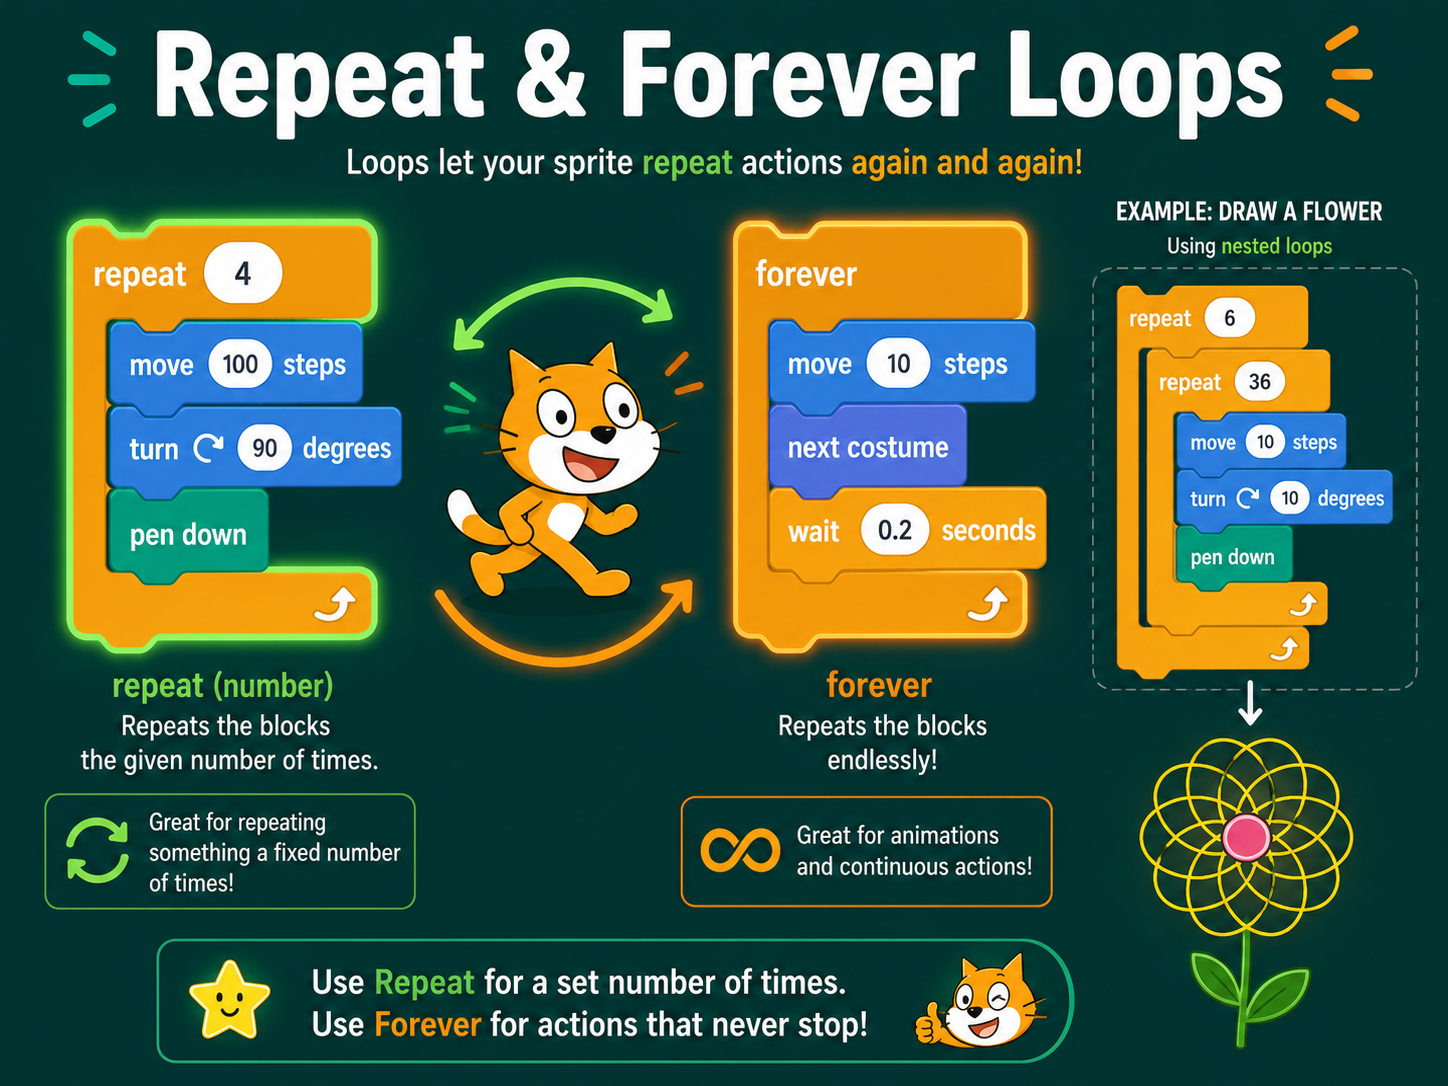
Loops let programmers make the computer repeat blocks of code without copying them again and again. This course covers Scratch's two loop blocks from the orange Control section: repeat (runs a fixed number of times then stops — perfect for drawing shapes and counting tasks) and forever (runs endlessly until the red Stop button — perfect for animations and games). Students also learn the wait block to control speed, build nested loops for flower patterns, and avoid common loop mistakes.
- Teacher: First Admin
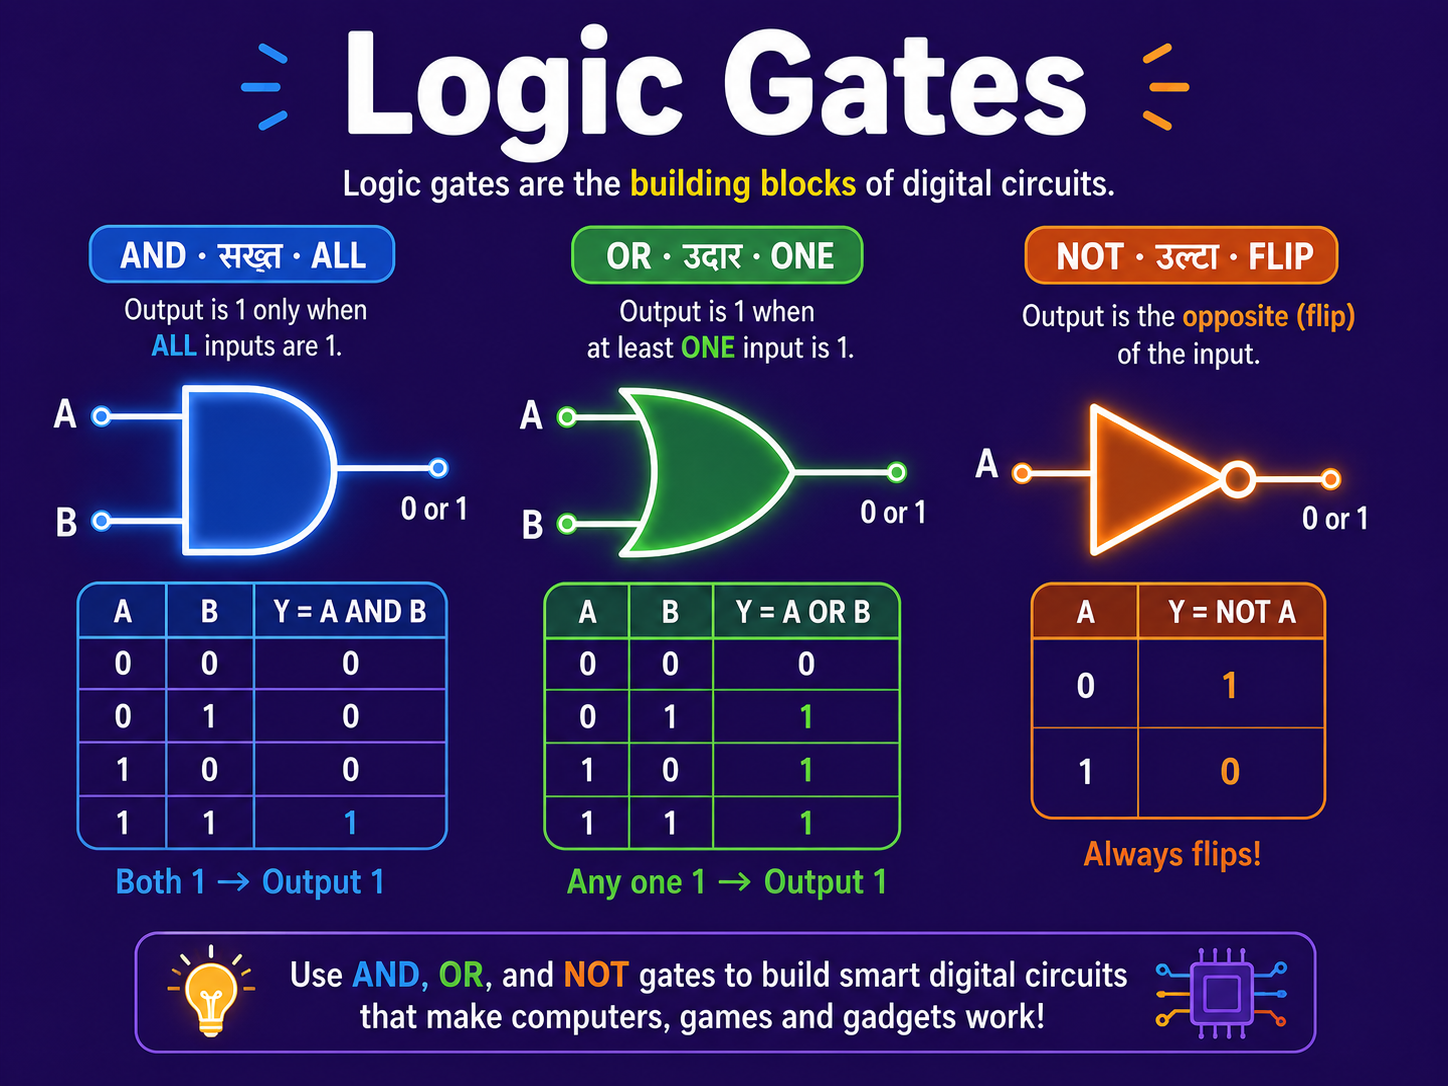
Logic gates are the tiny decision-makers inside every computer — they take 0/1 inputs and produce a single 0/1 output using a fixed rule. This course covers the three fundamental gates: AND (output 1 only when ALL inputs are 1, series circuit), OR (output 1 when ANY input is 1, parallel circuit), and NOT (flips the single input, inverter). Students learn each gate's symbol, truth table, and circuit diagram, compare all three side by side, and apply them to real-world examples like ATMs, doorbells, and automatic night-lamps.
- Teacher: First Admin
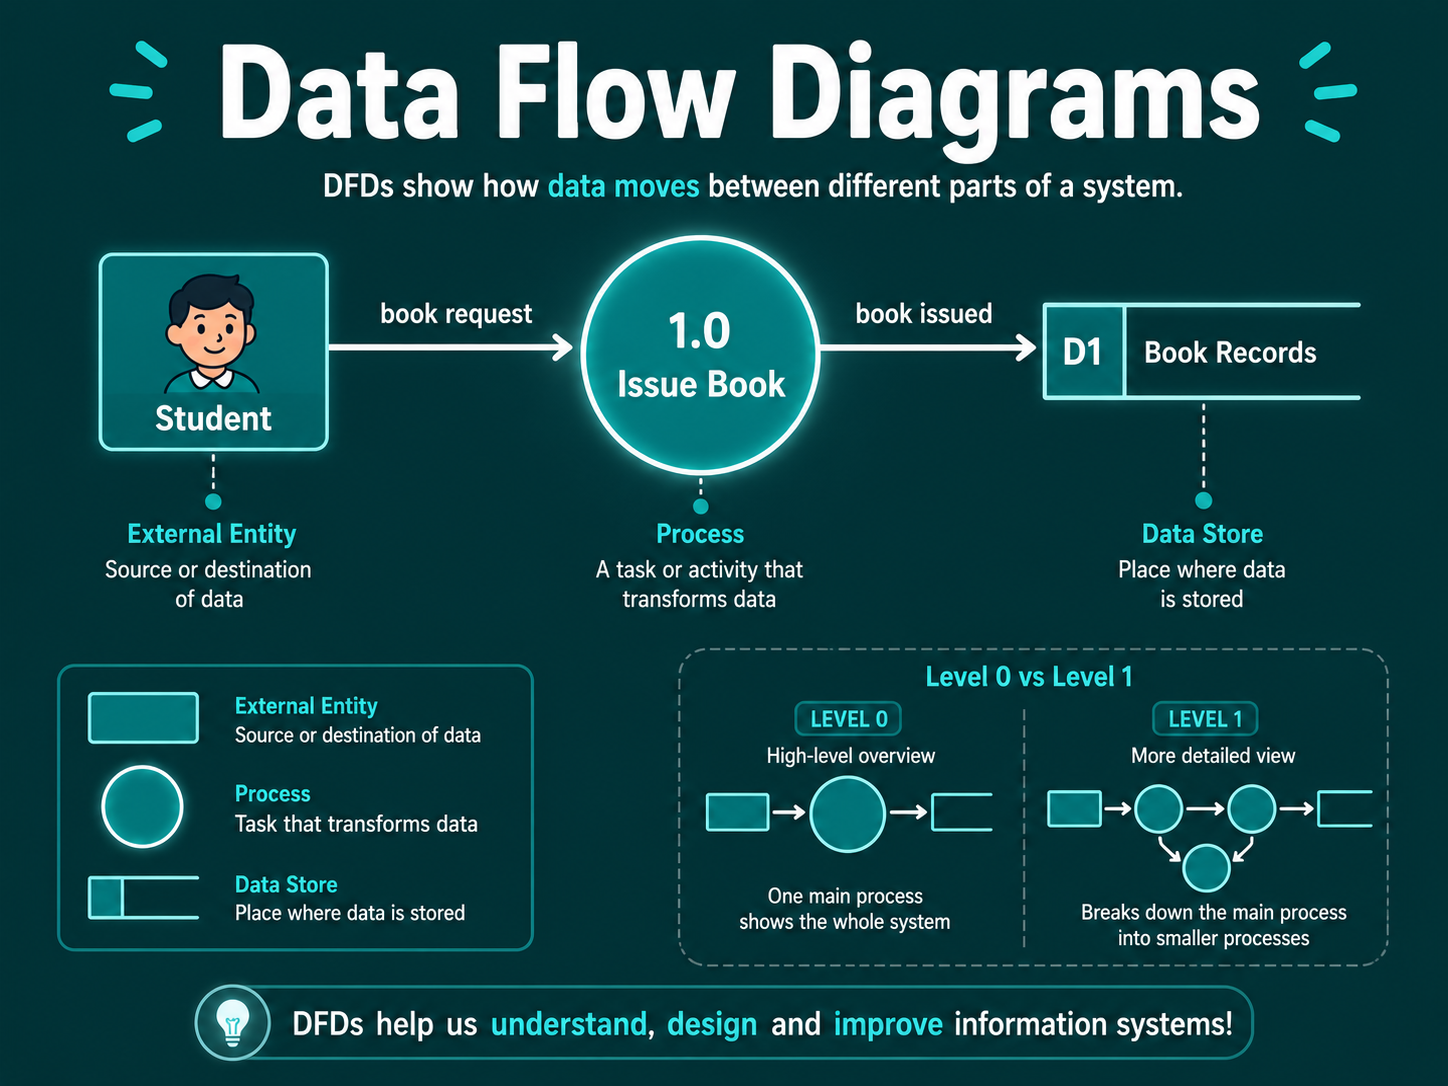
A Data Flow Diagram (DFD) is a visual map of how data travels through a system. This course covers the 4 DFD symbols — Process (circle), External Entity (rectangle), Data Store (open box), and Data Flow (named arrow) — along with two levels: Level 0 Context Diagram (whole system as one process) and Level 1 (detailed sub-processes with stores). Students draw DFDs for real systems including a library, online shopping, and school results, and learn to distinguish DFDs from flowcharts.
- Teacher: First Admin
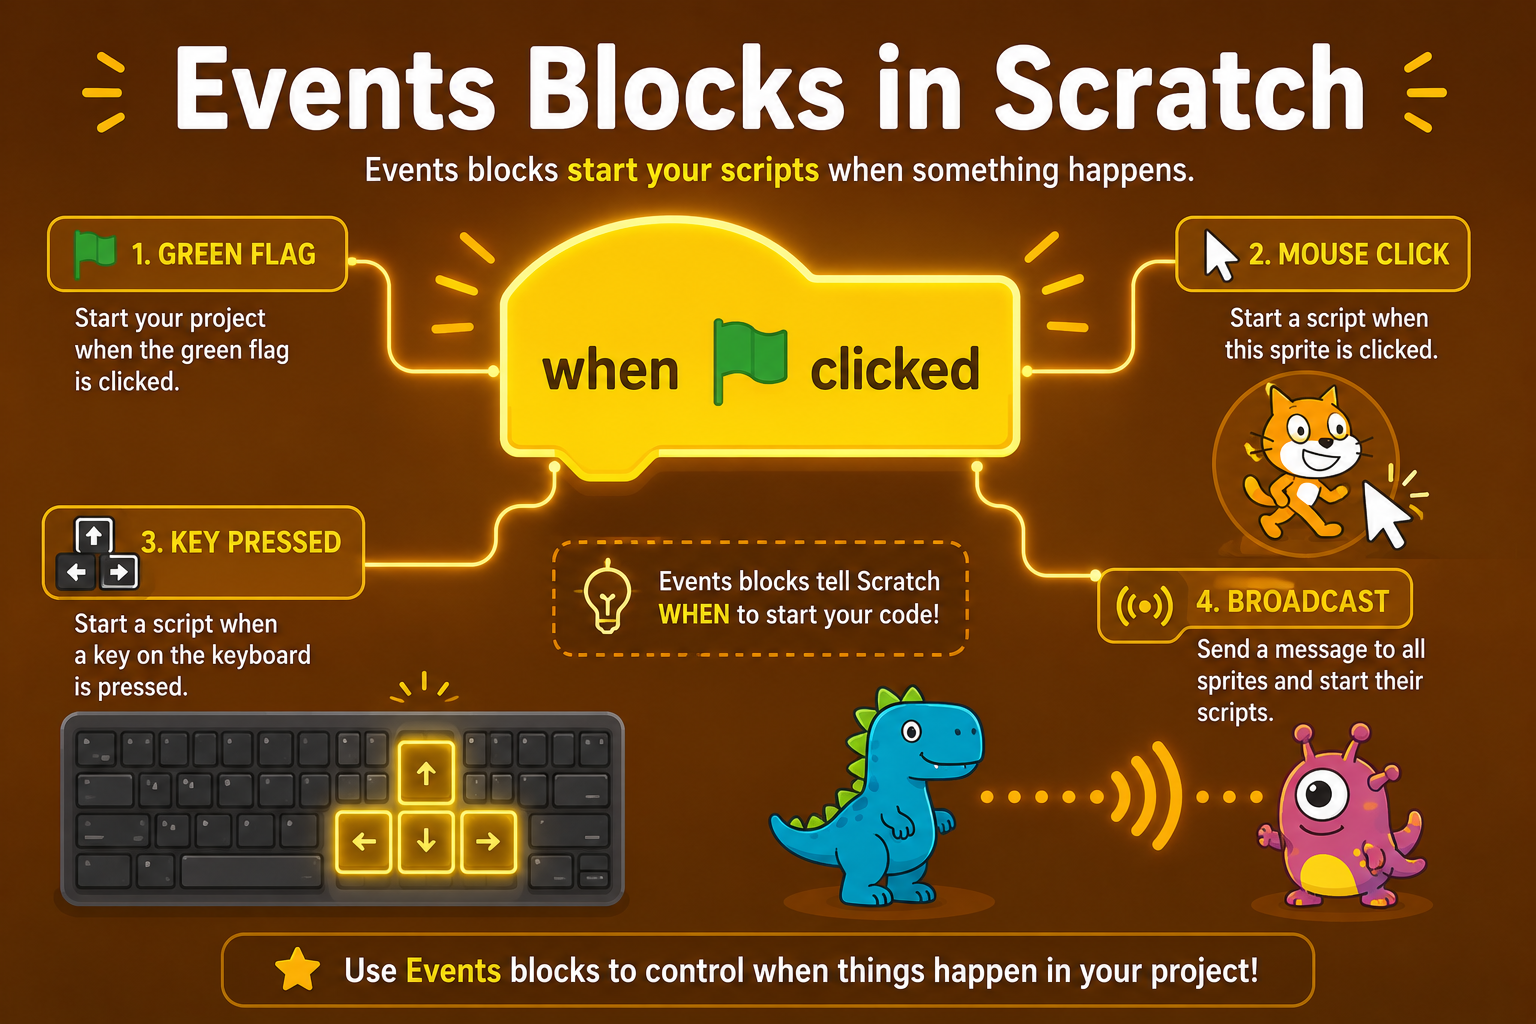
Every Scratch program needs a trigger — that's what Events blocks do. This class covers all 6 Events block types: green flag (PLAY button), key press (game controls), sprite click (interactive buttons), backdrop switch (scene changes), broadcast/receive (sprite-to-sprite messaging), and loudness. Students build three complete programs — an arrow key game, a clickable quiz, and a two-sprite broadcast story.
- Teacher: First Admin
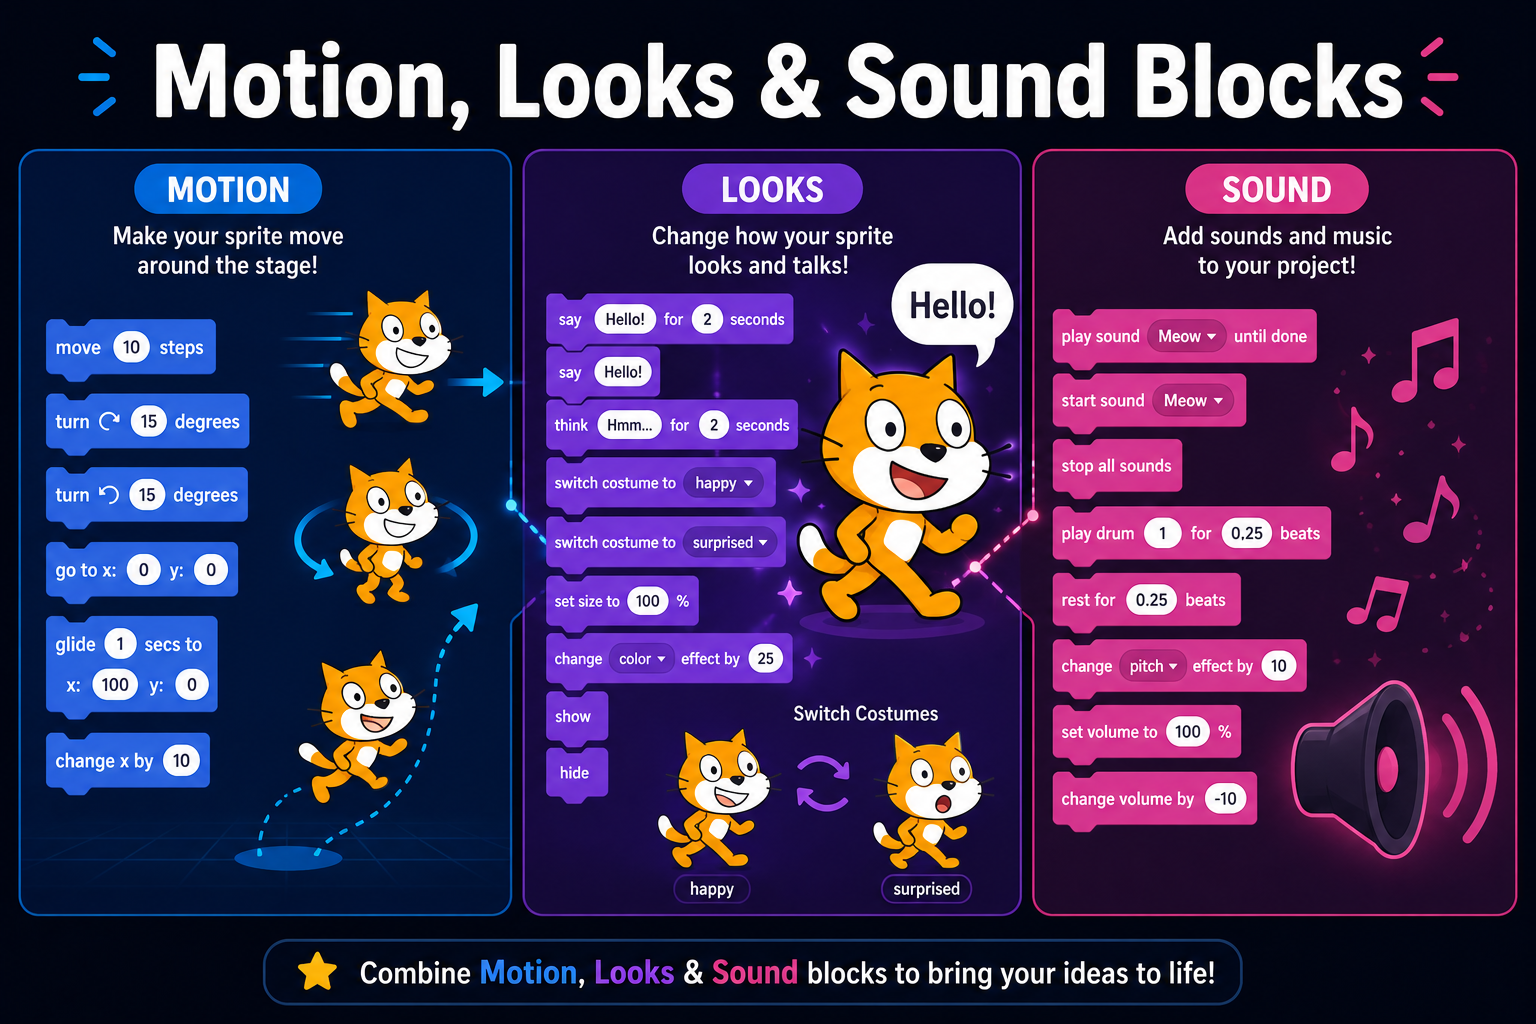
Dive deep into Scratch's three core block categories. Motion blocks (blue) move and position sprites using X/Y coordinates on the stage. Looks blocks (purple) change costumes, display speech bubbles, and animate sprites. Sound blocks (pink) add music, effects, and voice. Class ends with students building three complete programs combining all three block types — including a dancing cat, a growing sprite, and a space jump game.
- Teacher: First Admin
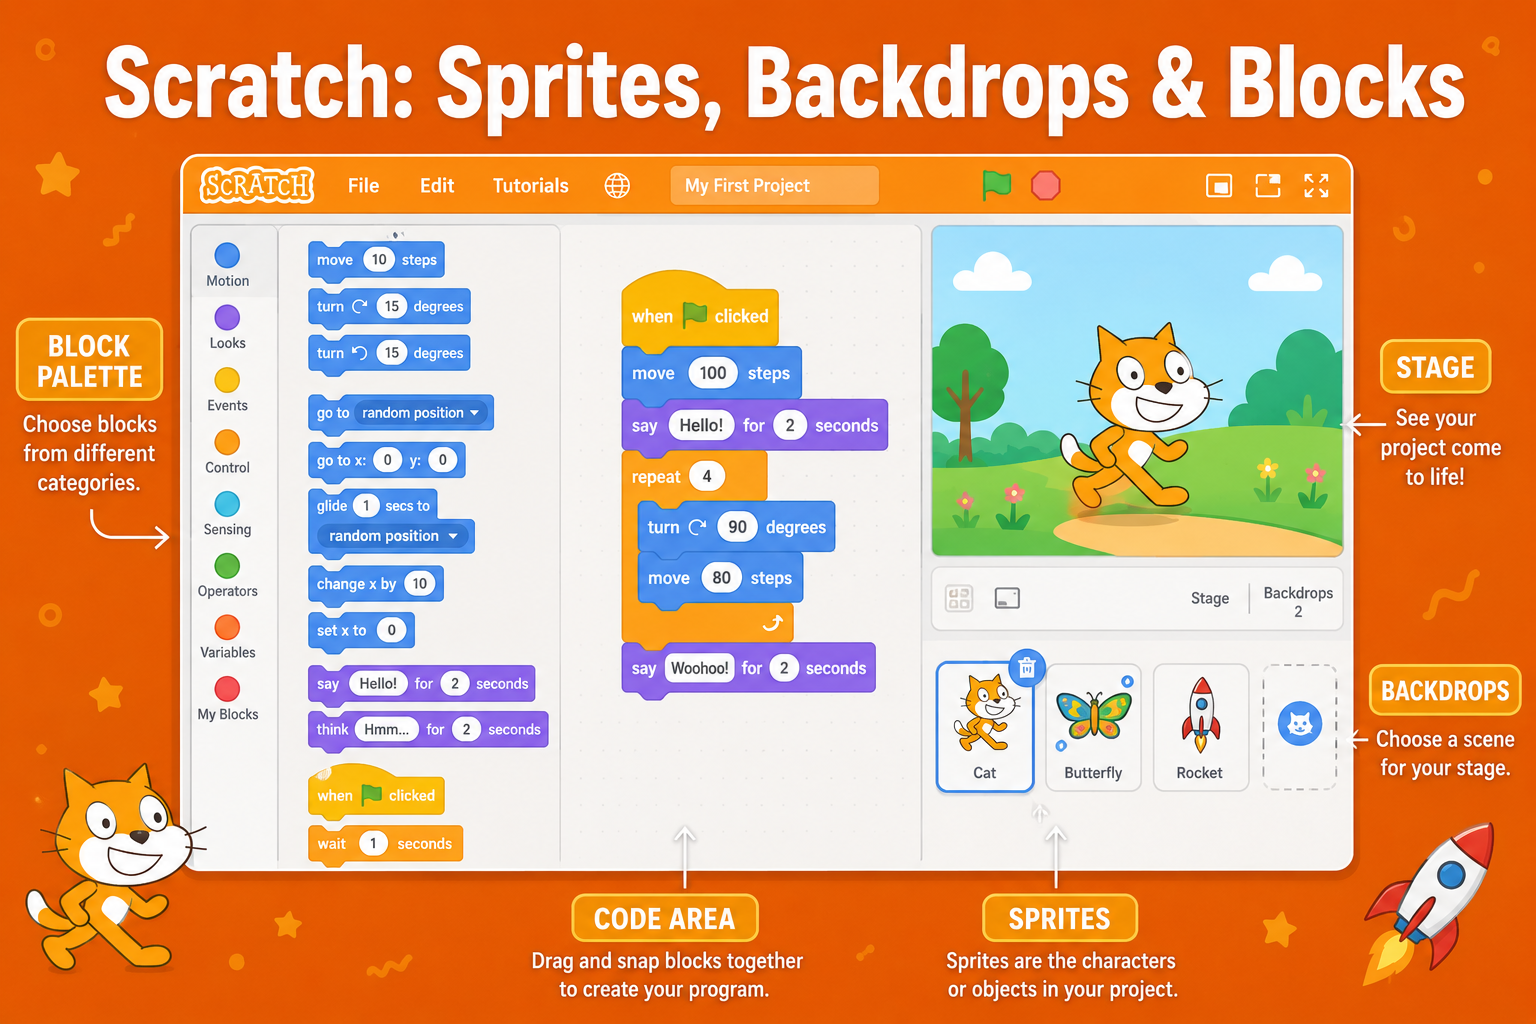
Introduction to Scratch — MIT's free visual coding platform. Students explore the 4-part interface (Stage, Sprite List, Block Palette, Code Area), learn to add and customise sprites and backdrops, and discover all 6 block categories. Class ends with students building and running their first Scratch project at scratch.mit.edu — no typing required.
- Teacher: First Admin
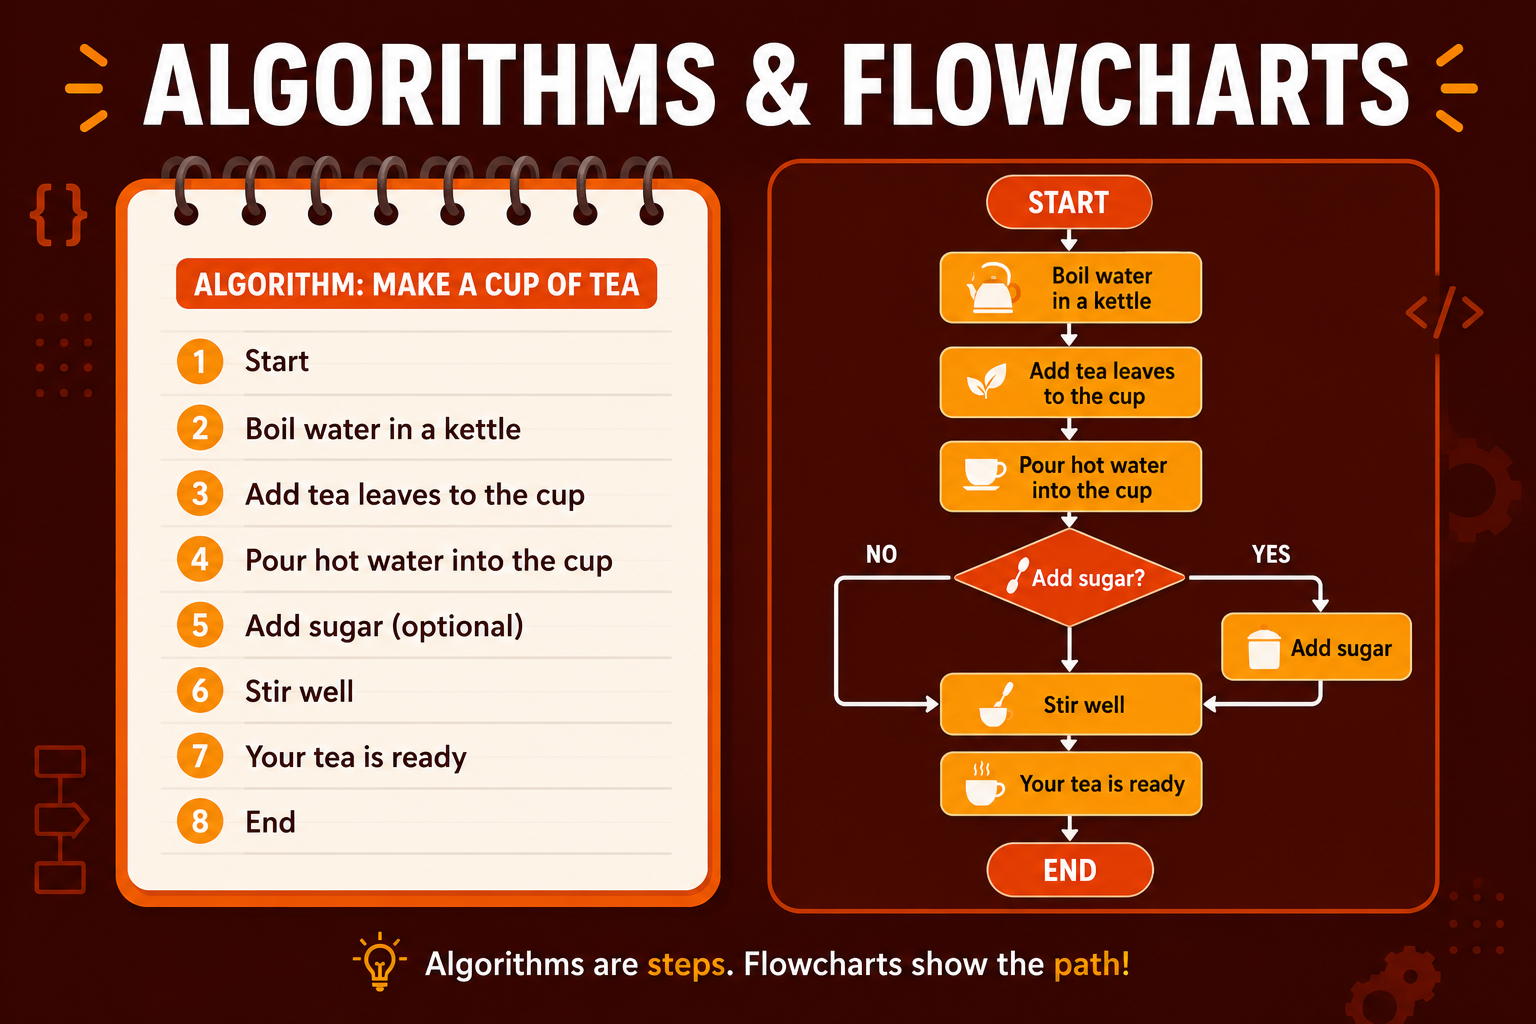
Learn to think like a programmer — before writing a single line of code. This class covers algorithms (step-by-step problem-solving instructions), their 6 key properties, and real-life examples from ATM machines to morning routines. Students then learn to visualise algorithms as flowcharts using 6 standard symbols and 5 drawing rules, with hands-on practice converting algorithms into diagrams.
- Teacher: First Admin
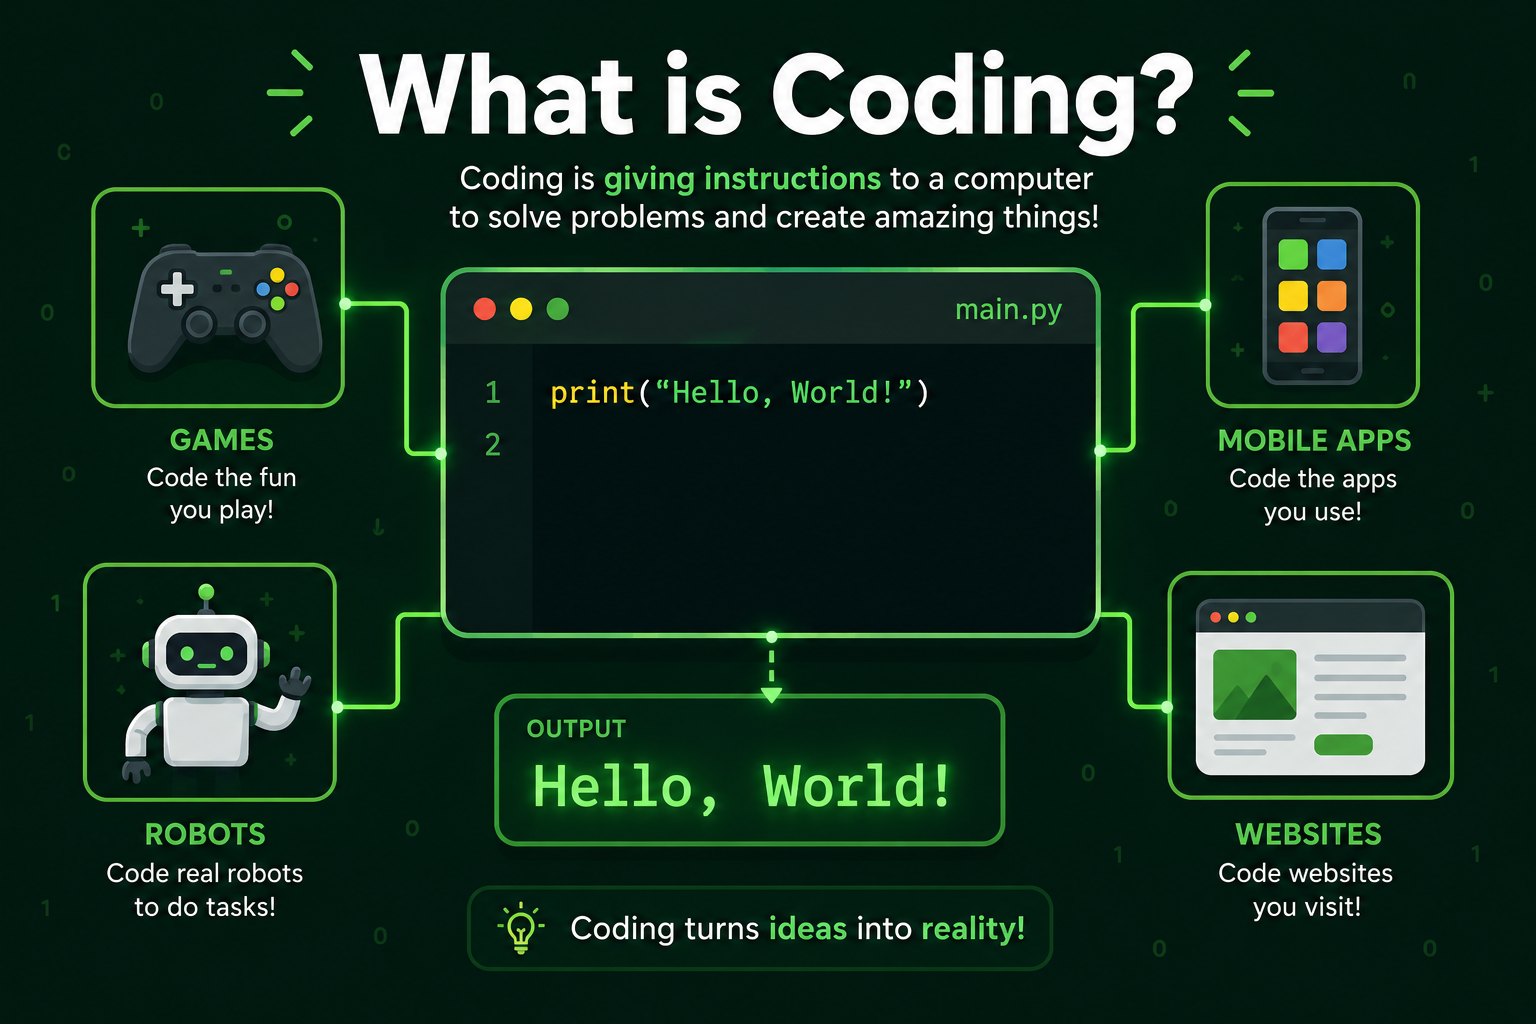
Introduction to coding for students. Learn what coding is, why computers need programming languages, and how programs work using the Input → Process → Output model. Covers Python, Scratch, Java, and HTML with real-life examples from games, apps, and everyday devices. Includes a live Hello World activity in Python and Scratch.
- Teacher: First Admin
- Teacher: First Admin
- Teacher: First Admin
- Teacher: First Admin
- Teacher: First Admin
- Teacher: First Admin
- Teacher: First Admin
- Teacher: First Admin
- Teacher: First Admin
Course Description
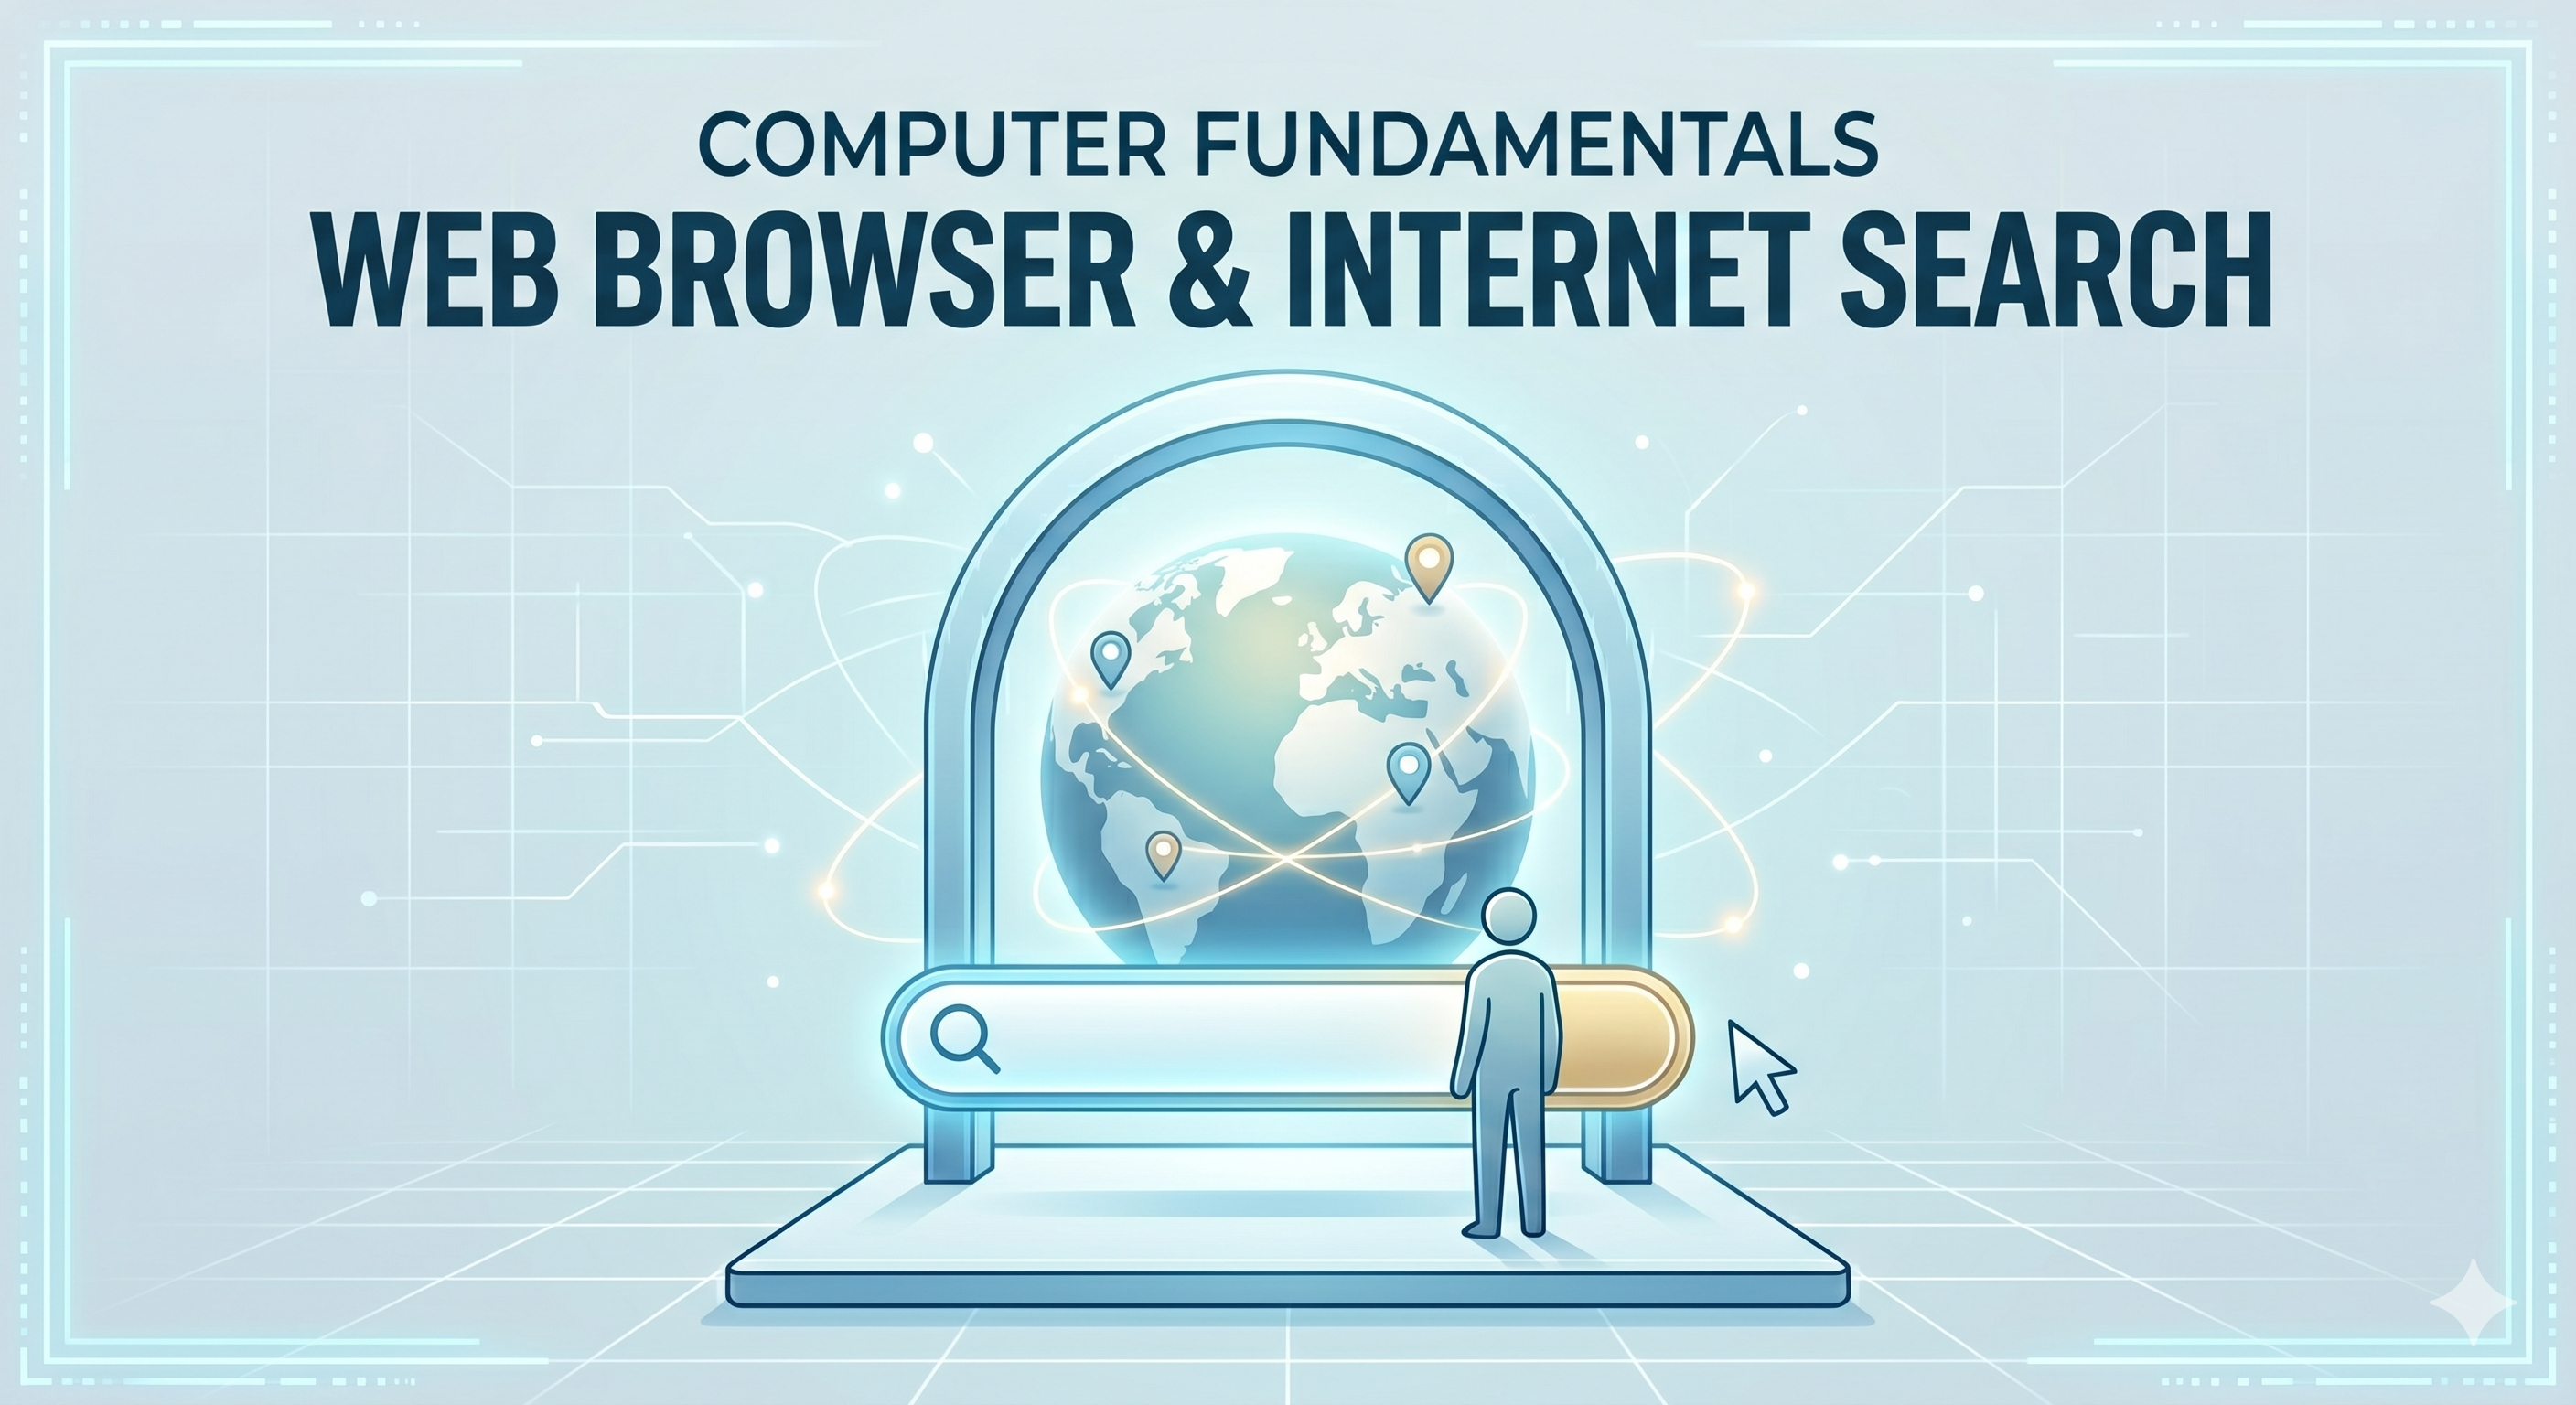
Web Browsers & Internet Search is an introductory digital literacy course designed to help students understand how the internet works, how web browsers provide access to online information, and how search engines help users find relevant content quickly and safely.
The course introduces learners to internet fundamentals, web browsers, websites, URLs, search engines, and smart search techniques. Students will learn how to navigate websites, use browser tools, evaluate online information, and apply safe internet practices while protecting their privacy and personal data.
Special emphasis is placed on web safety, strong passwords, recognizing online threats, identifying trustworthy websites, and responsible internet usage. Through practical activities and real-world examples, students will develop the skills needed to confidently explore, learn, and communicate online.
What Students Will Learn
By completing this course, students will learn:
- The concept and history of the Internet.
- How the Internet connects computers and devices worldwide.
- What web browsers are and how they work.
- Popular web browsers such as Chrome, Firefox, Edge, Safari, Opera, and Brave.
- Different parts of a browser window and their functions.
- Understanding websites, web pages, and URLs.
- Different types of websites and their purposes.
- Search engines and how they work.
- Smart searching techniques and search operators.
- Safe downloading, bookmarking, and browser management.
- Private browsing and browsing history management.
- Online threats such as malware, phishing, scams, cyberbullying, and fake news.
- Password security and privacy protection.
- Safe internet practices and responsible online behavior.
- Identifying trustworthy websites and secure connections.
Course Outcomes
After successfully completing this course, students will be able to:
Understand the Internet
Explain how the internet works and how information is shared across connected devices.
Use Web Browsers Effectively
Navigate websites, manage tabs, bookmarks, downloads, and browser settings confidently.
Understand URLs and Websites
Identify website addresses, domain types, and secure connections.
Perform Smart Internet Searches
Use search engines efficiently to find accurate and relevant information.
Evaluate Online Information
Differentiate between reliable and unreliable online sources.
Apply Web Safety Practices
Recognize online threats and take appropriate precautions while browsing.
Protect Personal Information
Use strong passwords, privacy settings, and safe online communication practices.
Practice Responsible Digital Citizenship
Follow internet etiquette and make safe decisions while interacting online.
Develop Research Skills
Use search engines and educational websites to support learning and academic work.
Expected Outcome
Upon completion of the course, students will possess the knowledge and skills required to navigate the internet safely and effectively. They will be able to use web browsers, search engines, and websites confidently, evaluate online information critically, protect their privacy, and follow safe internet practices. These skills form an essential foundation for digital literacy, online learning, and responsible participation in the digital world.
- Teacher: First Admin
Computer Storage, Hardware & Windows OS
Course Description
Computer Storage, Hardware & Windows OS is an introductory course designed to help students understand how computers store information, how the internal components of a computer work together, and how to effectively use the Windows operating system.
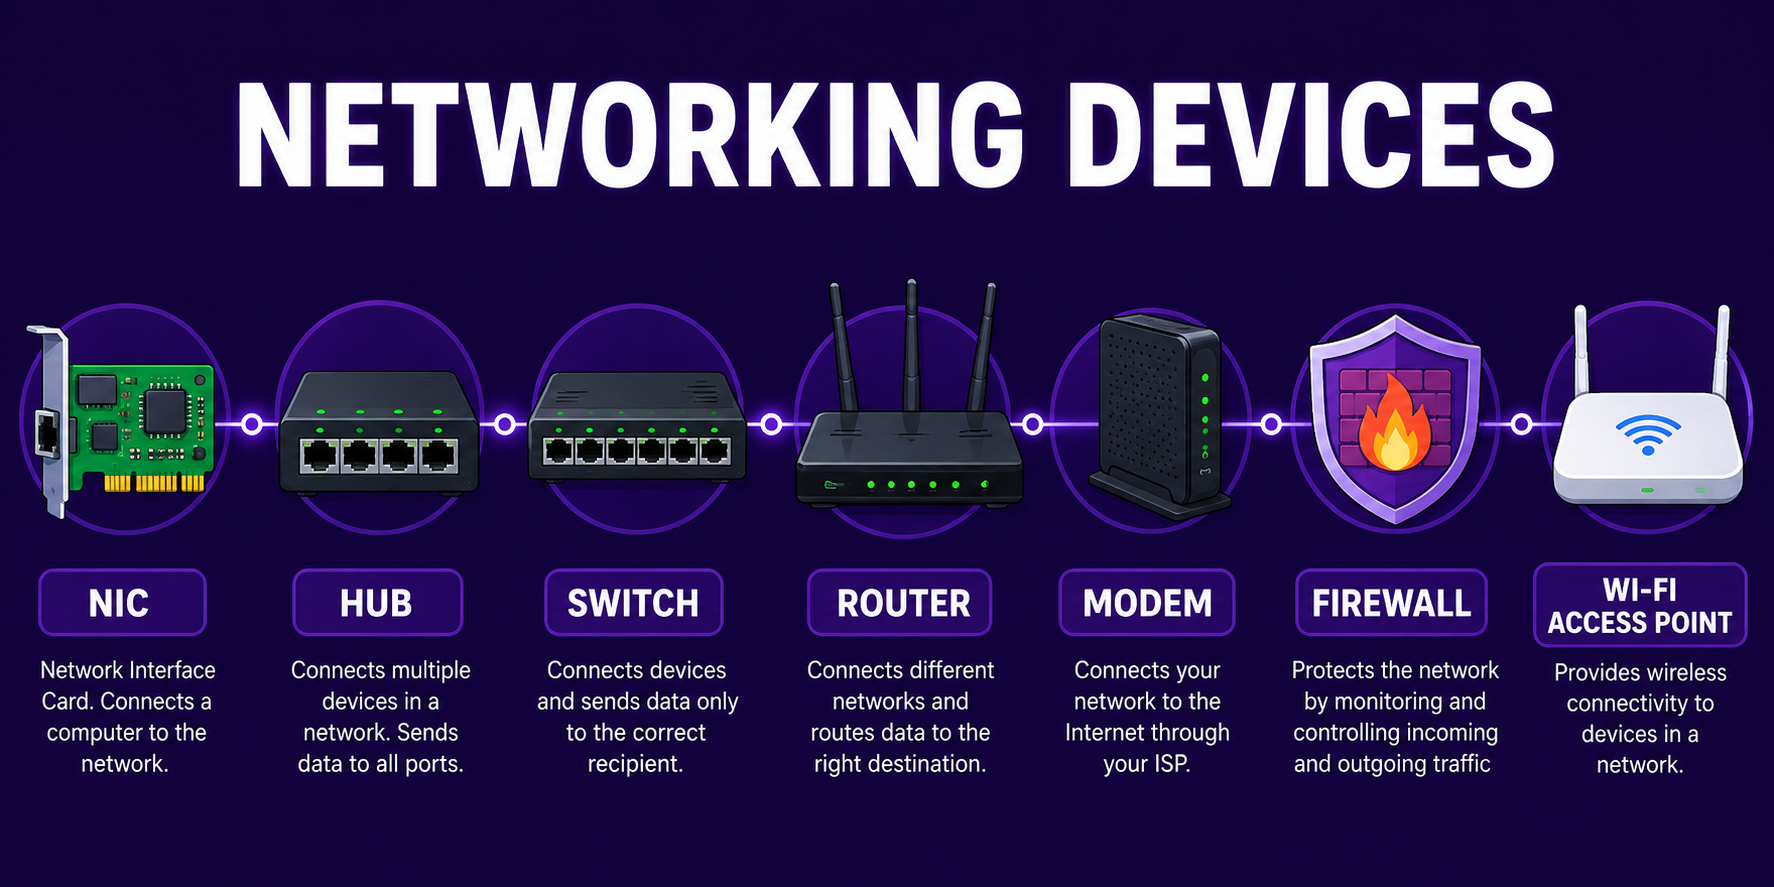
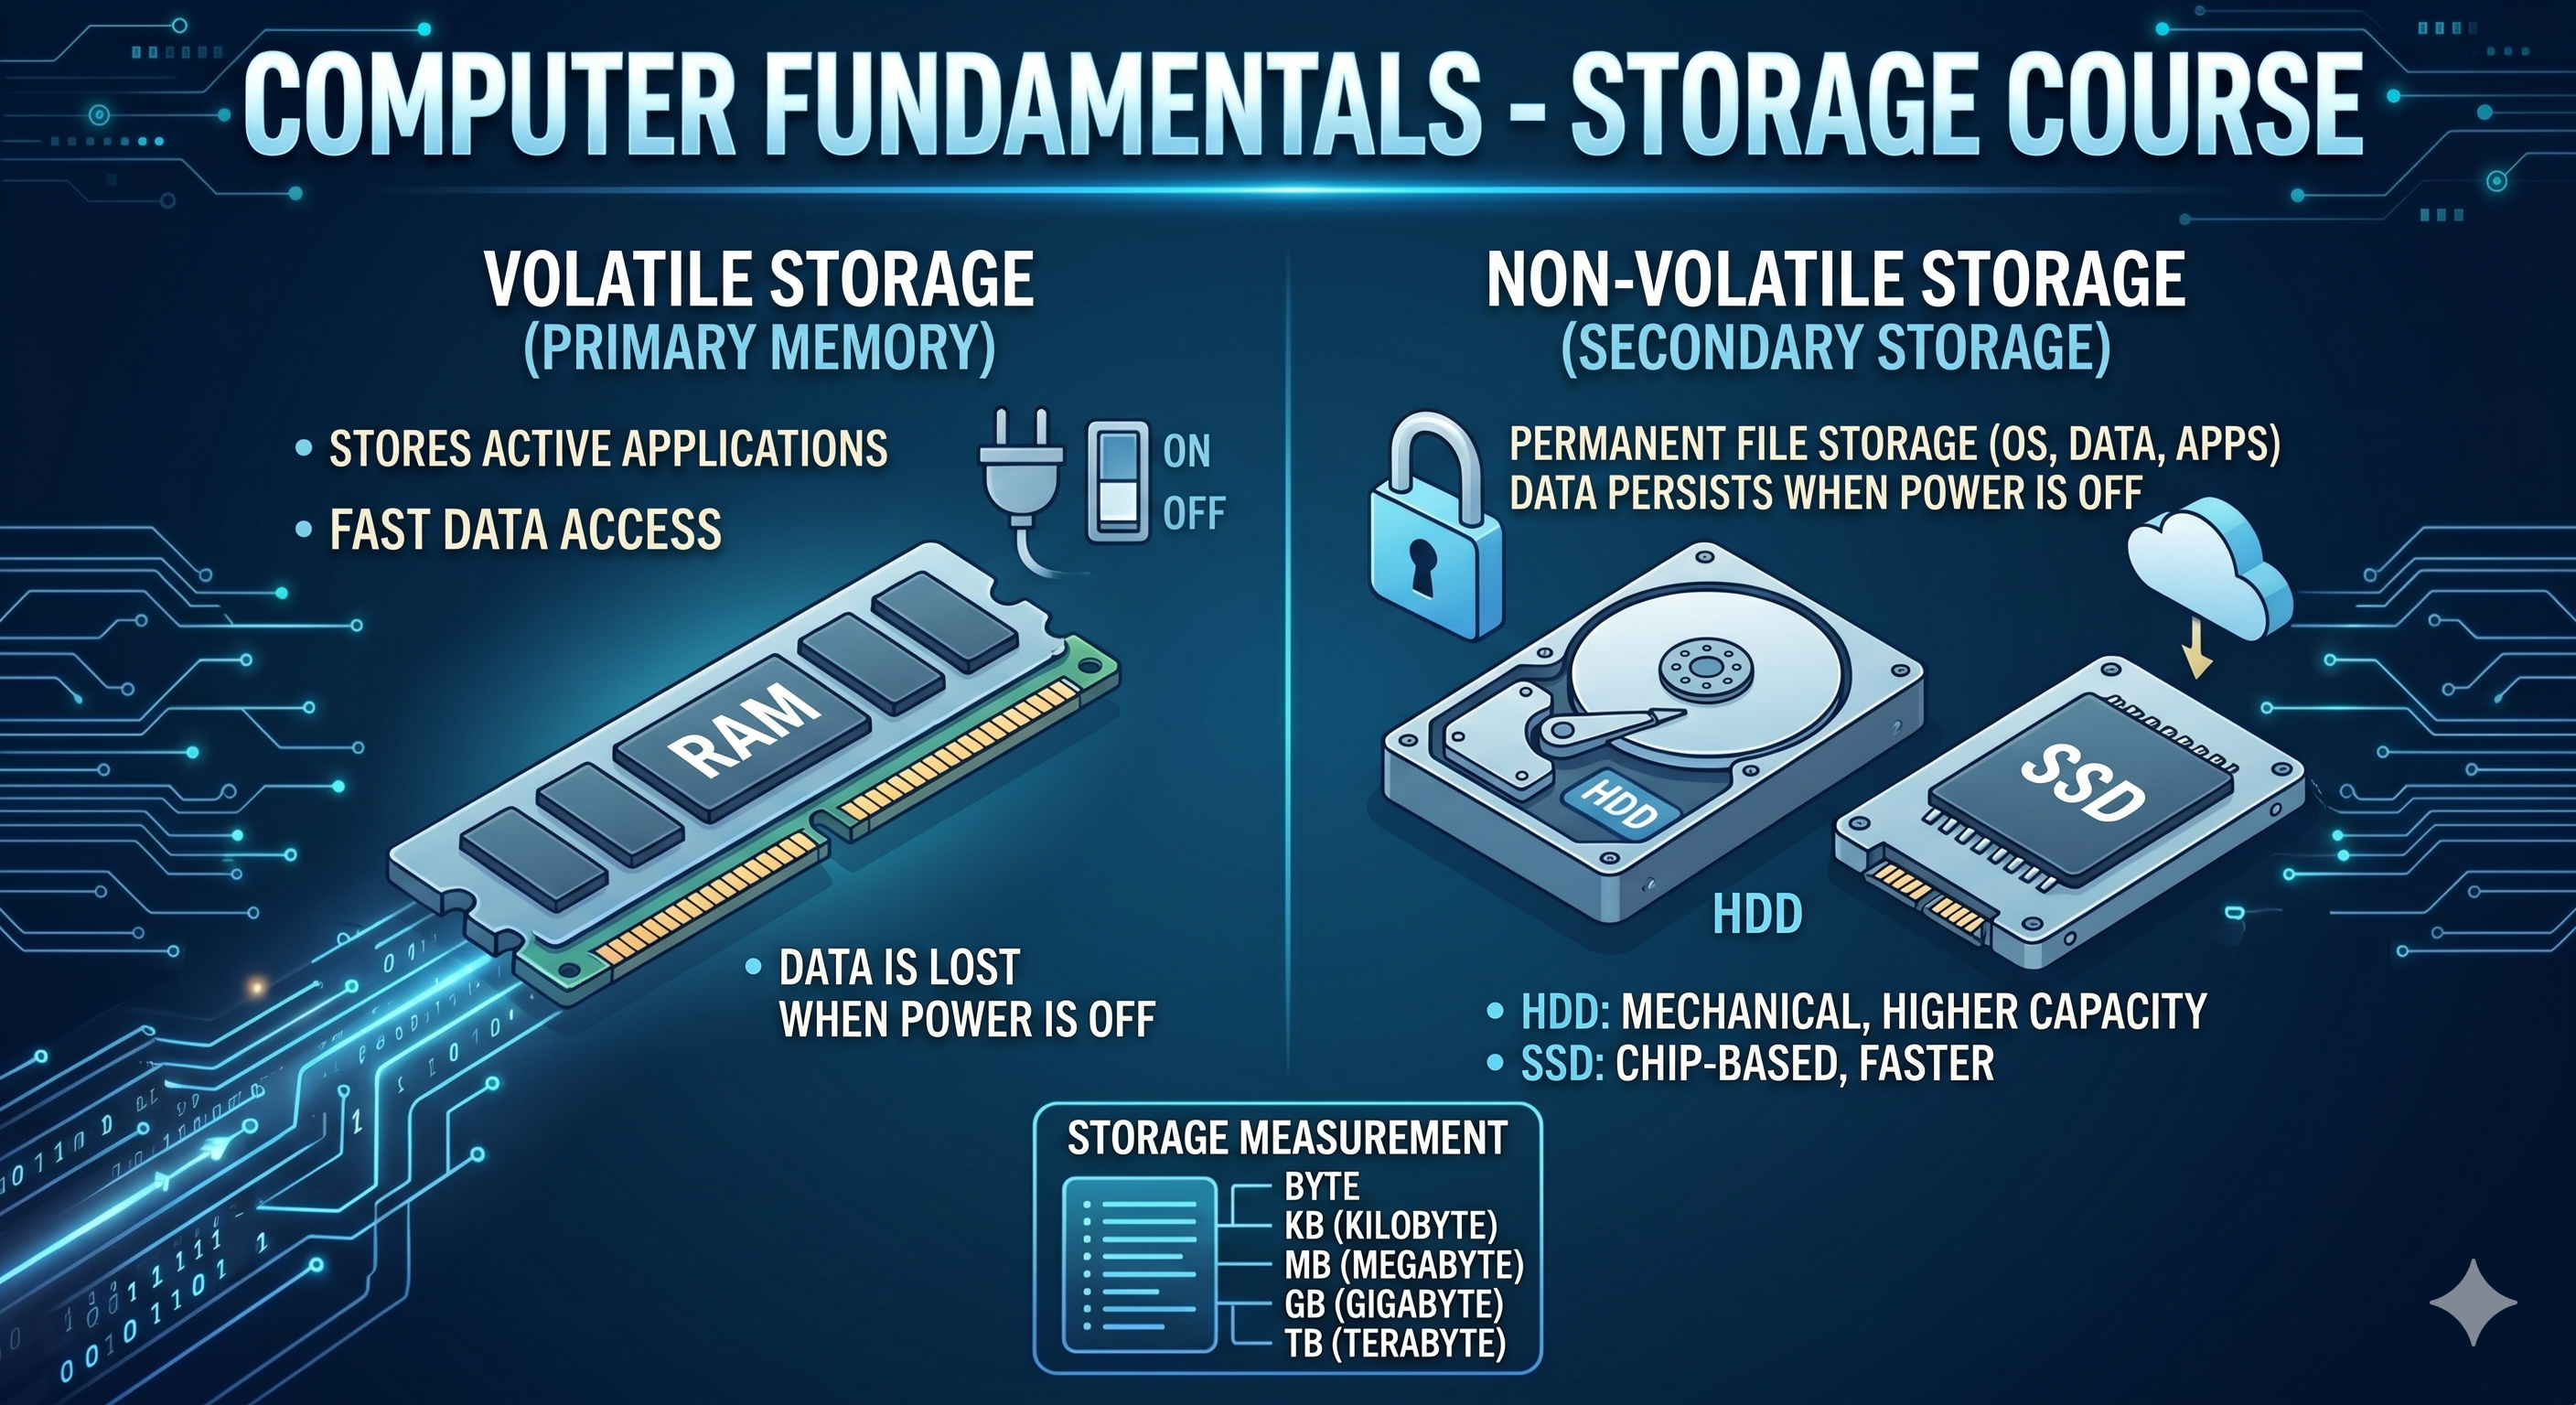
The course introduces learners to storage concepts, memory units, computer hardware components such as the CPU, RAM, ROM, HDD, and SSD, as well as modern storage technologies including cloud storage and portable devices. Students will also learn the fundamentals of the Windows operating system, file and folder management, file explorer navigation, desktop components, and common computer shortcuts.
Through practical activities and hands-on exercises, students will develop essential computer operation skills, enabling them to organize files, manage storage, navigate Windows confidently, and troubleshoot common computer issues.
What Students Will Learn
By completing this course, students will learn:
-
The concept and importance of computer storage.
-
Different storage units such as Bit, Byte, KB, MB, GB, and TB.
-
Internal computer components and their functions.
-
Motherboard, CPU, RAM, ROM, and Cache Memory basics.
-
HDD and SSD technologies and their differences.
-
Optical, portable, and cloud storage devices.
-
How data is stored in computers using binary representation.
-
Operating System fundamentals and the role of Windows.
-
Desktop components, taskbar, start menu, and system tray.
-
File and folder concepts and organization techniques.
-
File Explorer navigation and file management.
-
Copy, Cut, Paste, Move, Rename, and Delete operations.
-
Different file types and extensions.
-
Recycle Bin usage and file recovery.
-
Storage drives and cloud storage concepts.
-
Useful Windows shortcuts and productivity techniques.
-
Control Panel and Windows Settings.
-
Basic troubleshooting and file management best practices.
Course Outcomes
After successfully completing this course, students will be able to:
Understand Computer Storage
Explain how computers store data and identify different storage devices and technologies.
Identify Hardware Components
Recognize major computer hardware components and describe their functions.
Compare Storage Technologies
Differentiate between RAM, ROM, HDD, SSD, cloud storage, and portable storage devices.
Navigate the Windows Operating System
Use Windows desktop features, settings, and navigation tools effectively.
Manage Files and Folders
Create, organize, copy, move, rename, and delete files and folders efficiently.
Use File Explorer and Storage Tools
Access and manage computer storage using File Explorer and related utilities.
Apply Windows Shortcuts
Use common keyboard shortcuts to improve productivity and efficiency.
Troubleshoot Basic Computer Issues
Resolve simple file, storage, and system-related problems independently.
Practice Good File Management
Organize and maintain digital files using proper naming, storage, and backup practices.
Expected Outcome
Upon completion of the course, students will possess a solid understanding of computer storage systems, hardware components, and Windows operating system fundamentals. They will be able to manage files and folders confidently, use computer storage efficiently, navigate Windows environments effectively, and apply essential digital skills required for academic and everyday computer use.
- Teacher: First Admin
Keyboard & Typing Fundamentals
Course Description
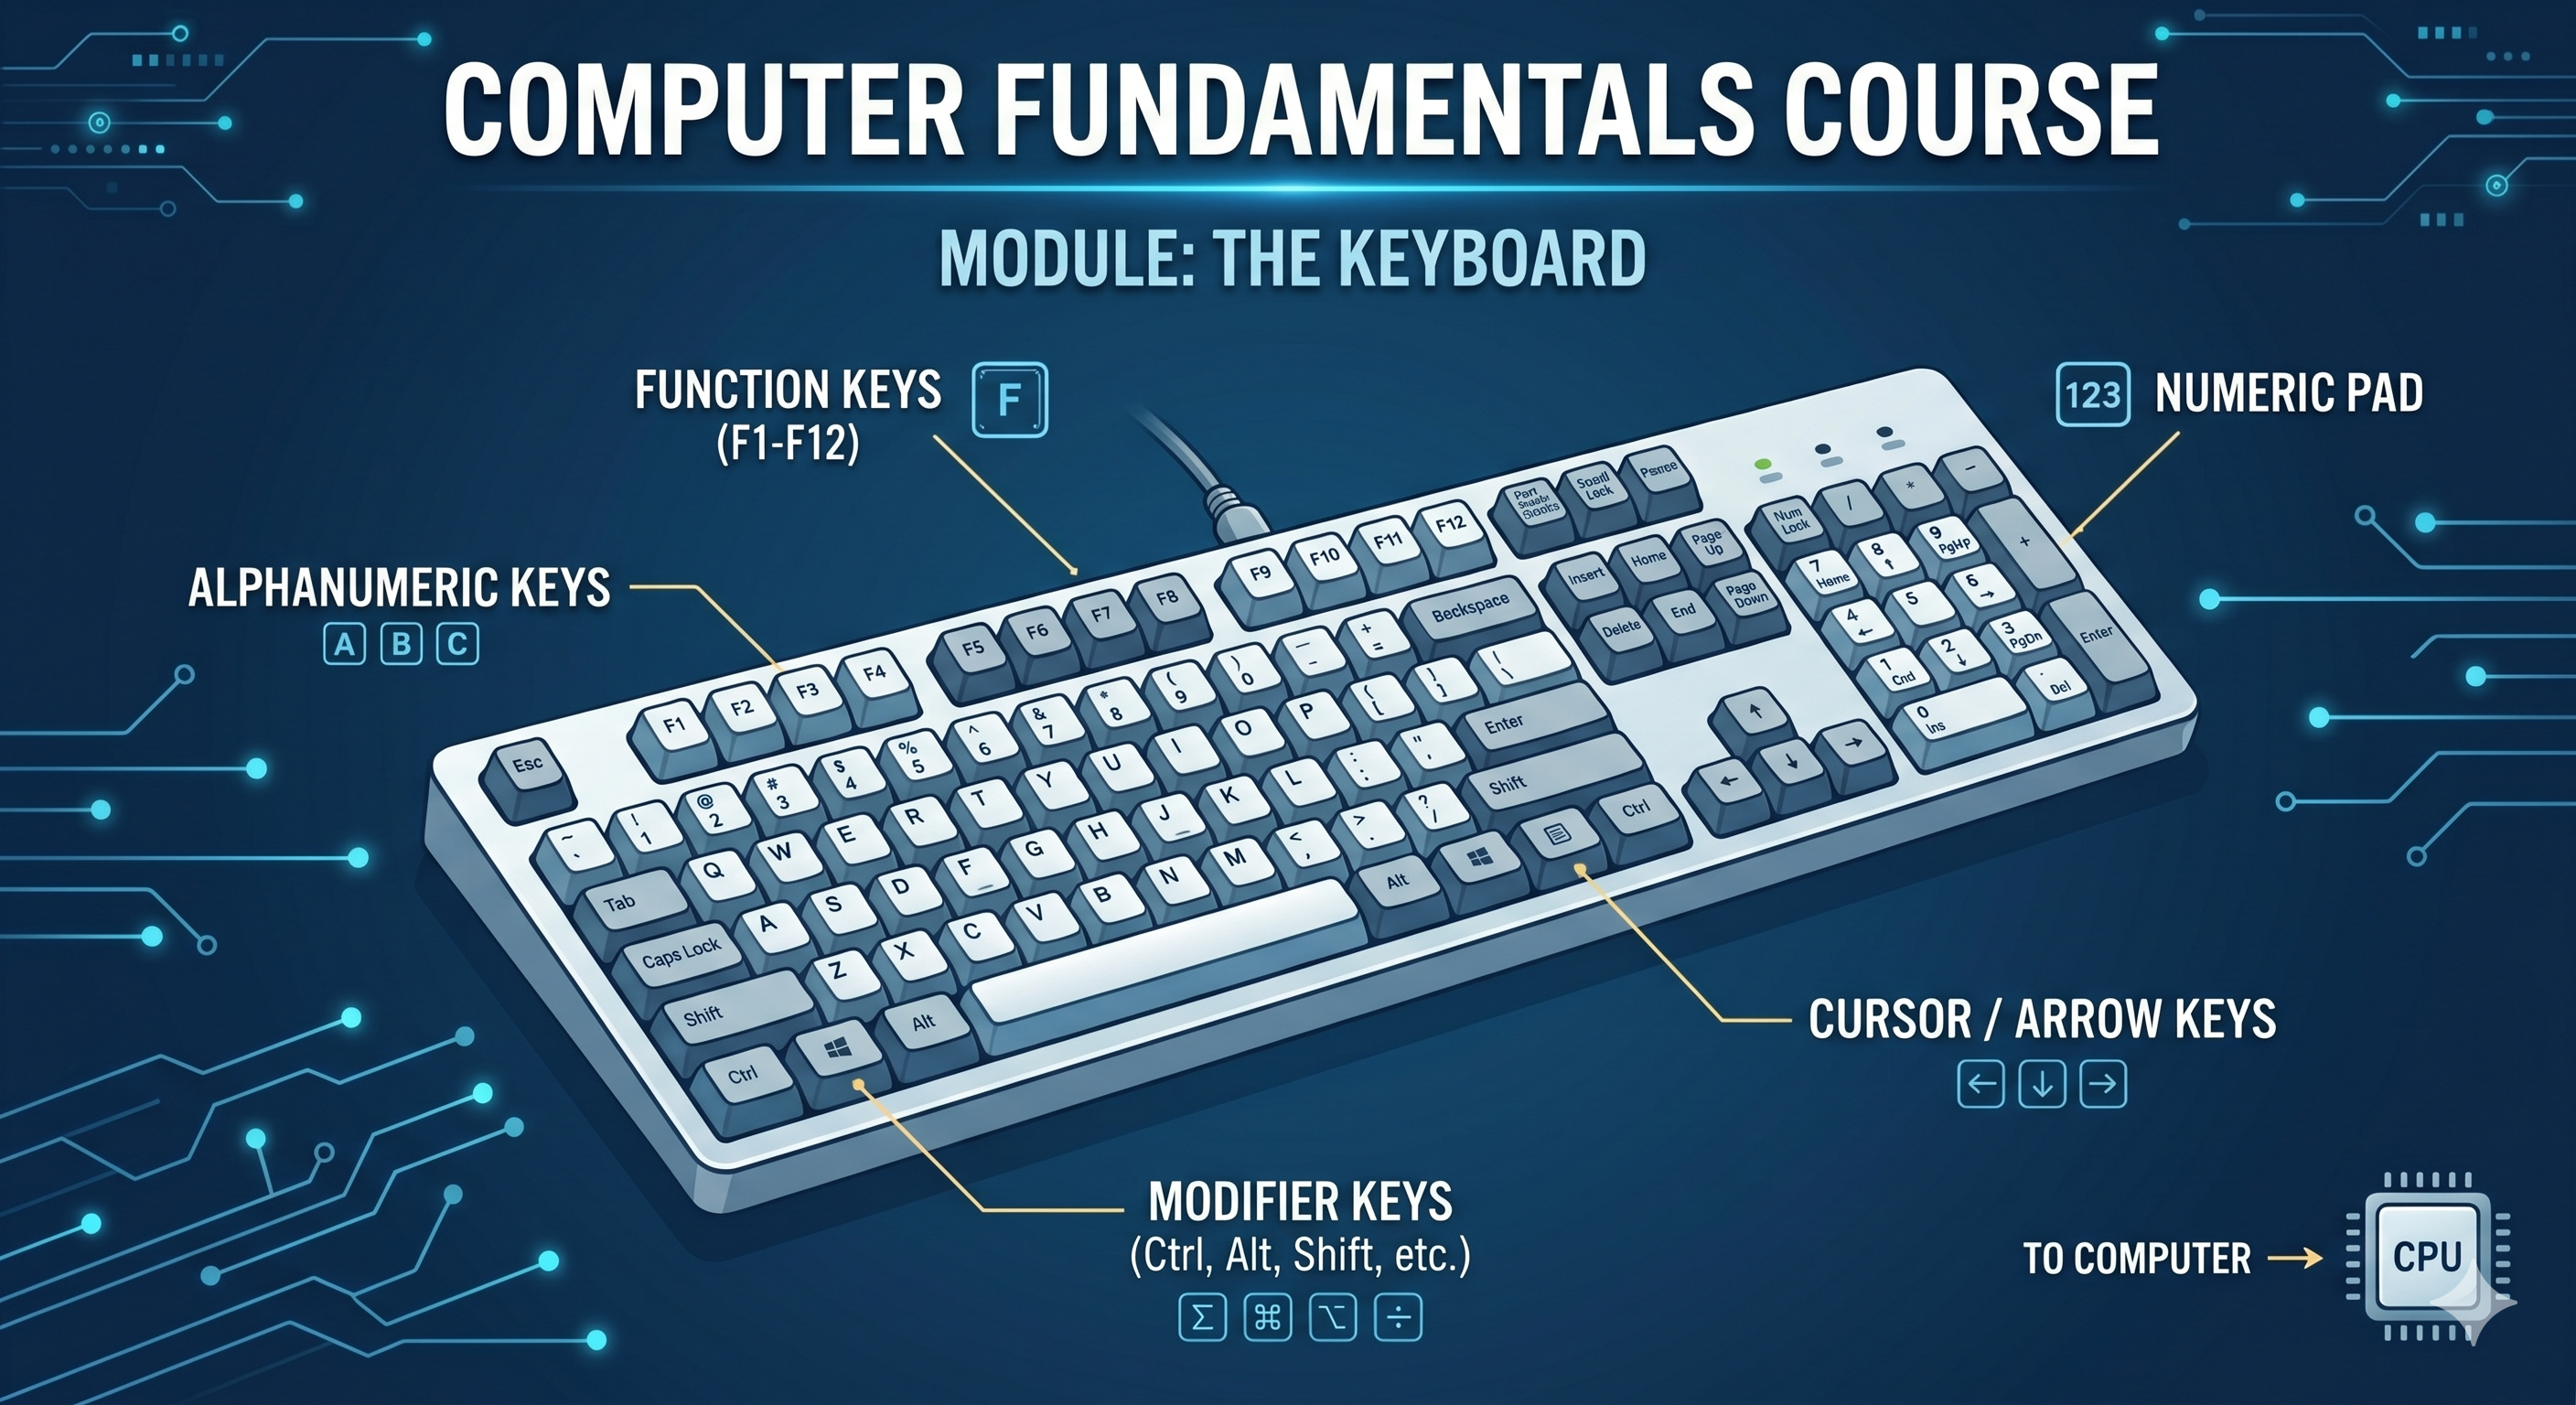
Keyboard & Typing Fundamentals is a practical skill-development course designed to help students build confidence and efficiency in using a computer keyboard. The course introduces learners to the complete keyboard layout, key functions, touch typing techniques, finger placement, keyboard shortcuts, and proper computer ergonomics.
Students will learn how to use the keyboard effectively without looking at the keys, improve typing accuracy and speed, and develop healthy computer usage habits. The course combines theory and hands-on practice to strengthen digital literacy skills required for education, examinations, communication, and future careers.
Special emphasis is placed on touch typing, home row positioning, keyboard shortcuts, Hindi typing methods, and safe posture practices that improve productivity and reduce physical strain while using computers.
What Students Will Learn
By completing this course, students will learn:
-
The history and evolution of keyboards and the QWERTY layout.
-
Identification of keyboard sections, rows, and key zones.
-
Alphabet, number, symbol, and special keys and their functions.
-
Function keys (F1–F12) and their practical applications.
-
Common keyboard shortcuts used in daily computer tasks.
-
Correct sitting posture and ergonomic practices while typing.
-
Home Row positioning (ASDF JKL;) and finger placement techniques.
-
Finger-to-key assignments for efficient keyboard usage.
-
Touch typing concepts and typing without looking at the keyboard.
-
Methods to improve typing speed and accuracy.
-
Common typing mistakes and techniques to avoid them.
-
Hindi typing using InScript and Phonetic (Transliteration) methods.
-
Use of online typing practice tools and typing assessment platforms.
-
Typing drills, speed tests, and keyboard-based activities.
Course Outcomes
After successfully completing this course, students will be able to:
Understand Keyboard Layout
Identify various keyboard sections, key groups, and their functions.
Apply Proper Typing Techniques
Use correct finger placement, hand positioning, and typing posture.
Demonstrate Touch Typing Skills
Type efficiently without continuously looking at the keyboard.
Improve Typing Speed and Accuracy
Increase words-per-minute (WPM) performance while maintaining accuracy.
Utilize Keyboard Shortcuts
Use common shortcut commands to improve productivity and efficiency.
Use Function and Special Keys Effectively
Apply special key functions in different software applications and operating systems.
Type in Multiple Languages
Understand and use basic Hindi typing methods alongside English typing.
Practice Healthy Computer Usage
Maintain proper posture and ergonomic habits to reduce eye strain, fatigue, and discomfort.
Develop Digital Productivity Skills
Perform computer-based tasks more efficiently using keyboard-focused techniques.
Expected Outcome
Upon completion of the course, students will possess strong keyboarding and touch-typing skills, enabling them to use computers confidently and efficiently. They will be able to navigate keyboards accurately, apply essential shortcuts, type in English and basic Hindi, and maintain proper posture while working on digital devices. These skills will support academic success, digital literacy, computer-based examinations, and future professional development.
- Teacher: First Admin
Course Description: Computer Fundamentals
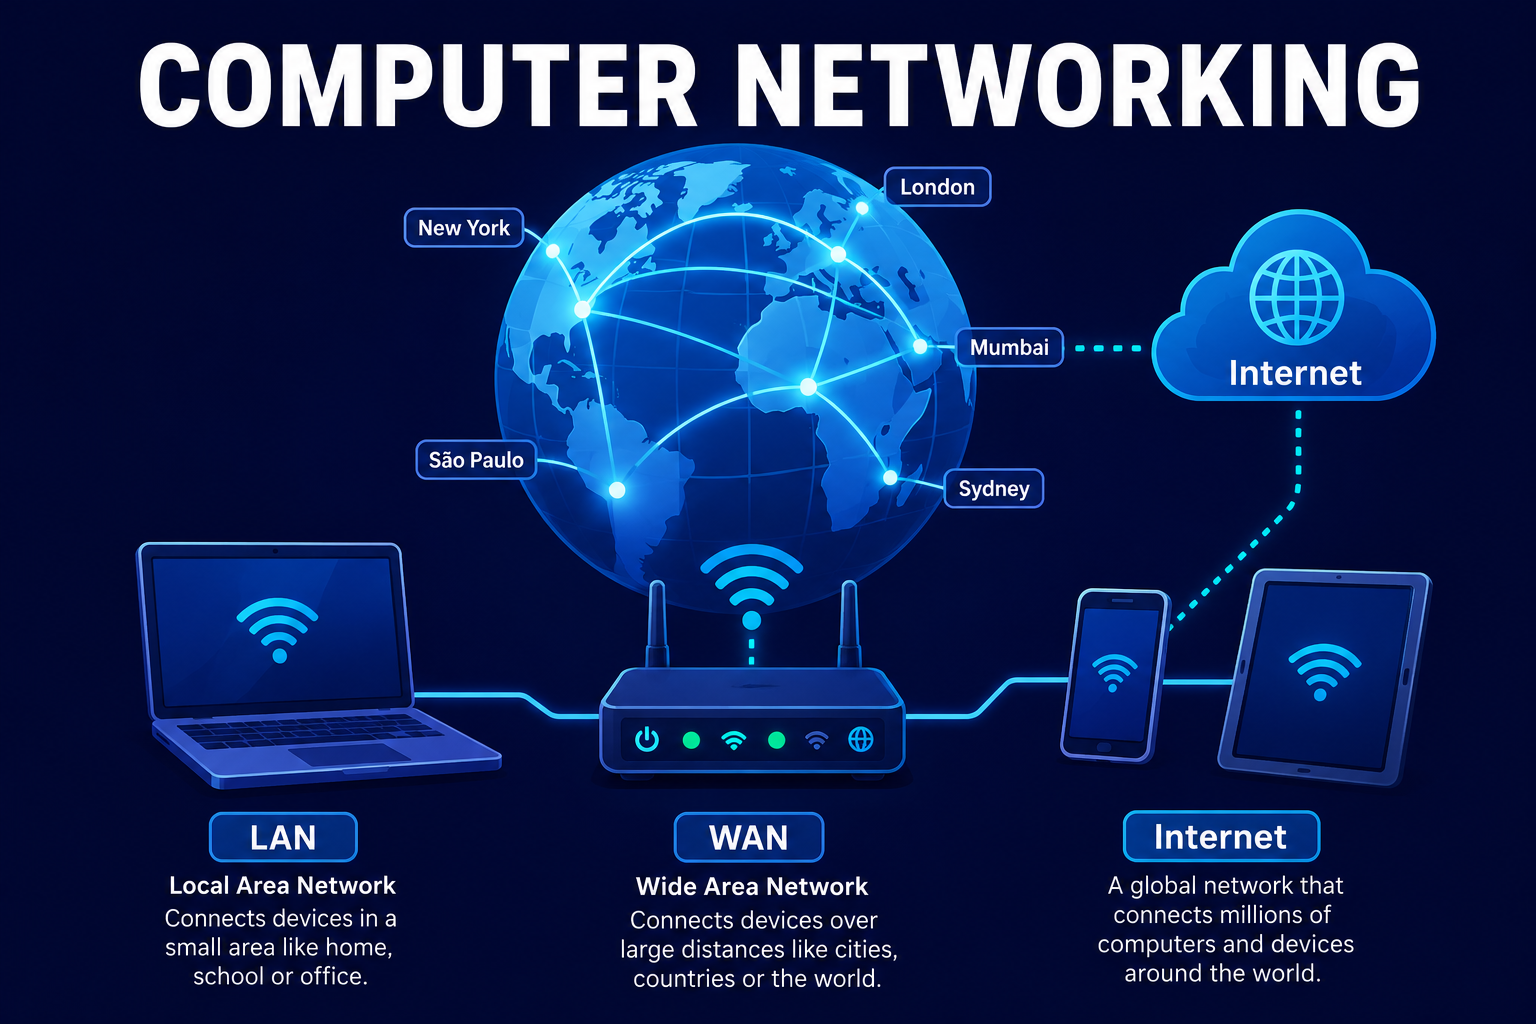
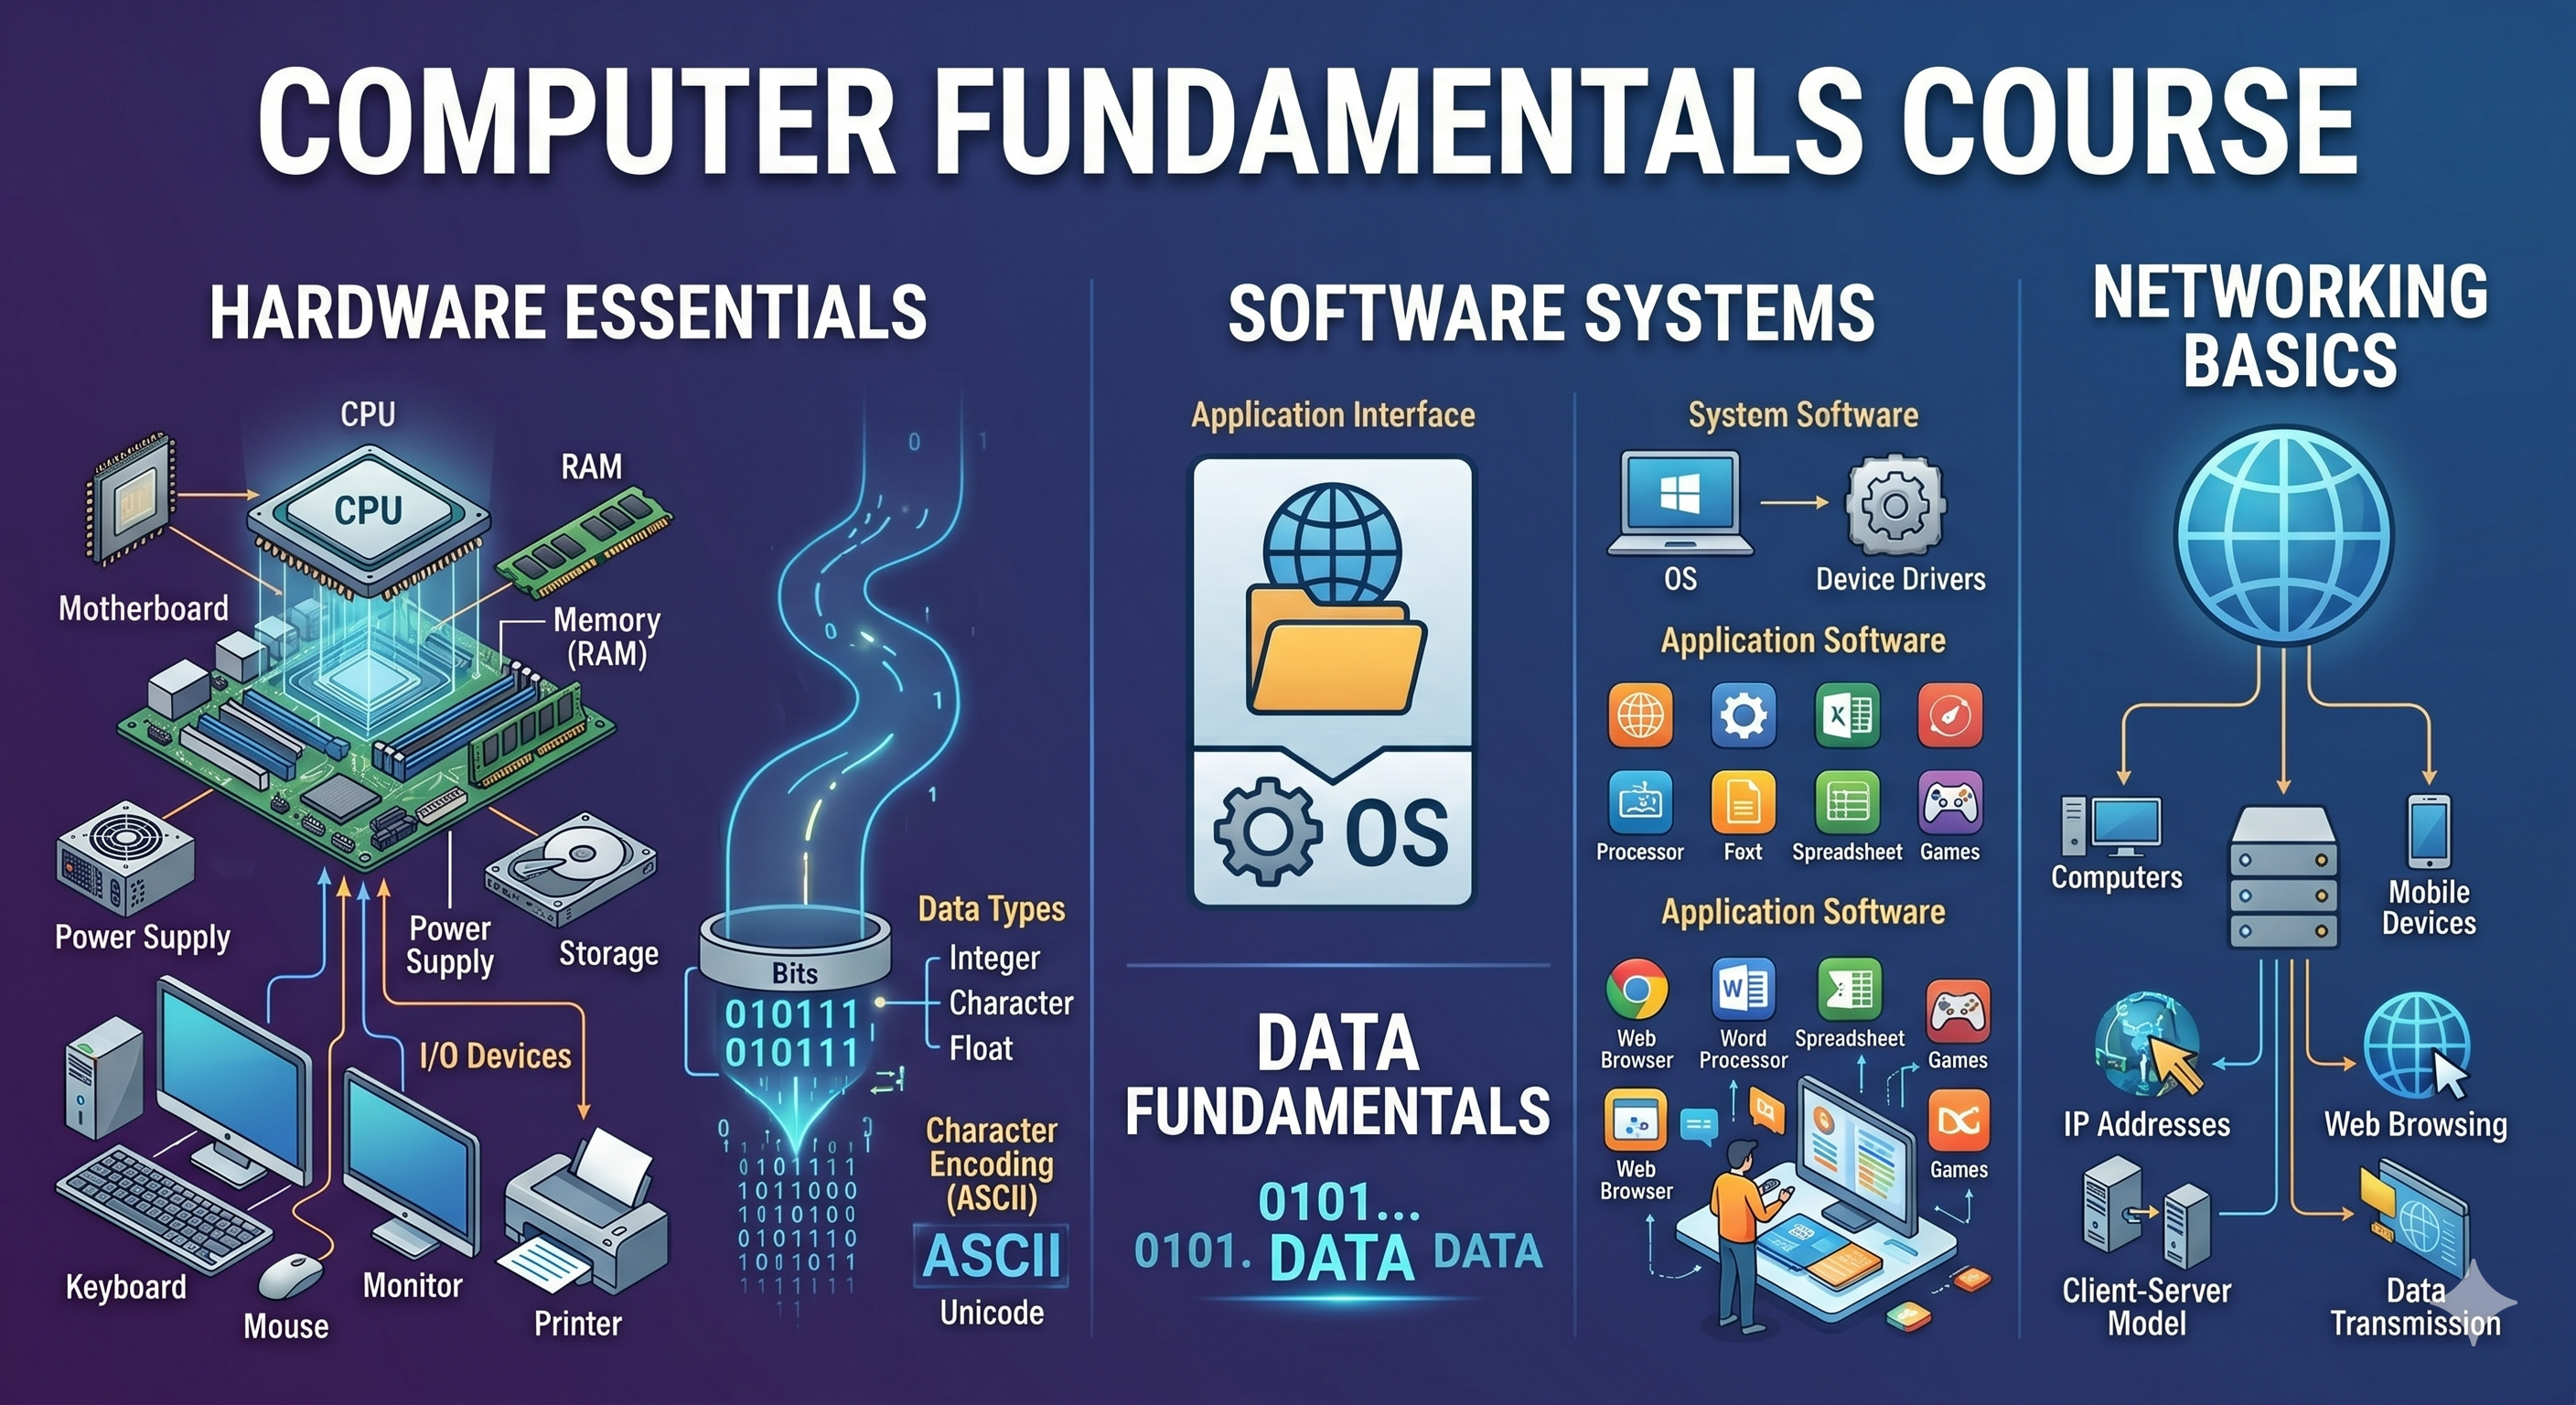
Computer Fundamentals is an introductory course designed to provide students with a strong foundation in computer concepts, operations, and applications. The course introduces the basic components of a computer system, how computers work, common software applications, operating systems, internet technologies, and essential digital skills required in academic, professional, and everyday environments.
Students will gain both theoretical knowledge and practical experience in using computers effectively, understanding hardware and software, managing files and data, and utilizing productivity tools for communication and information processing.
What Students Will Learn
By completing this course, students will learn:
-
The history and evolution of computers.
-
Basic computer architecture and organization.
-
Different types of computer hardware and their functions.
-
Software concepts, including system software and application software.
-
Operating system fundamentals and file management.
-
Input and output devices and their usage.
-
Computer memory and storage devices.
-
Basics of computer networks and internet technologies.
-
Web browsers, search engines, and online communication tools.
-
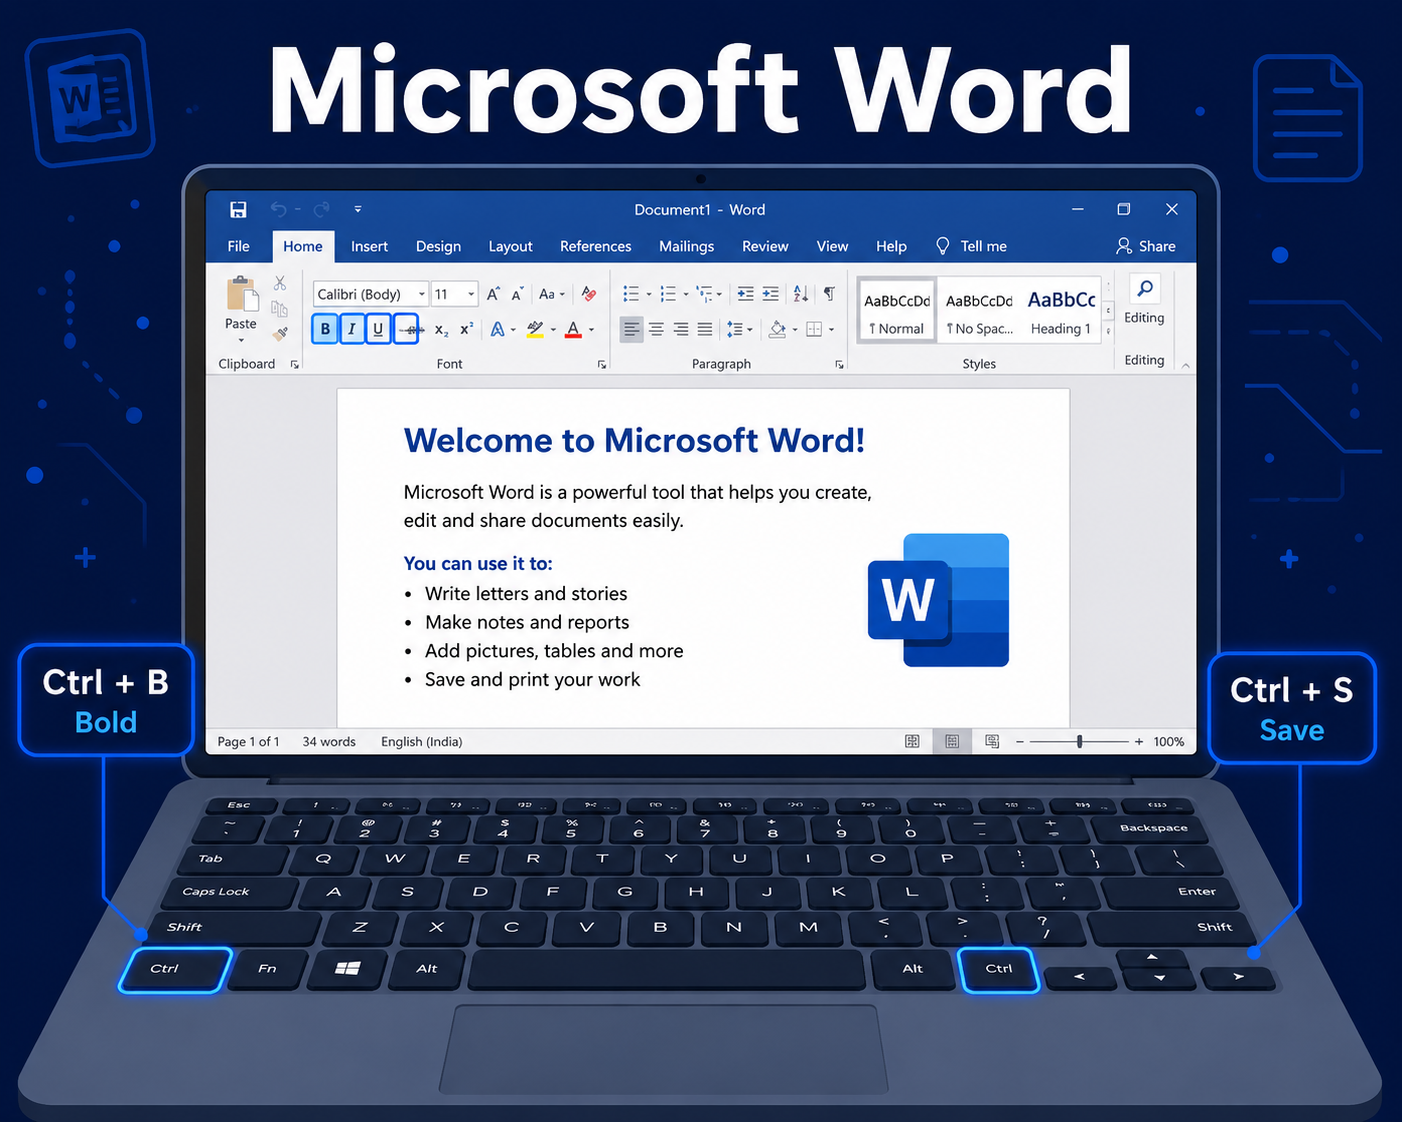
Microsoft Office or similar productivity applications (Word, Excel, PowerPoint).
-
Cybersecurity fundamentals and safe internet practices.
-
Digital communication, email usage, and cloud computing basics.
-
Basic troubleshooting techniques for common computer issues.
Course Outcomes
After successfully completing this course, students will be able to:
-
Understand Computer Systems
-
Explain the basic concepts, components, and functions of computer systems.
-
-
Operate Computers Efficiently
-
Use operating systems, manage files and folders, and perform common computing tasks.
-
-
Utilize Productivity Software
-
Create documents, spreadsheets, and presentations using office productivity tools.
-
-
Access and Evaluate Information
-
Effectively use the internet, web browsers, and search engines to locate and manage information.
-
-
Apply Digital Communication Skills
-
Use email, online collaboration tools, and cloud services for communication and information sharing.
-
-
Practice Safe Computing
-
Identify common cybersecurity threats and apply safe computing practices.
-
-
Troubleshoot Basic Problems
-
Diagnose and resolve simple hardware, software, and connectivity issues.
-
-
Develop Digital Literacy
-
Demonstrate the fundamental digital skills required for higher education, professional work, and lifelong learning.
-
Expected Outcome
Upon completion of the course, students will possess essential computer literacy skills, enabling them to confidently use computers, software applications, and internet technologies for academic, professional, and personal purposes. The course serves as a foundation for advanced studies in computer science, information technology, and related fields.
- Teacher: First Admin